Mold Testing and Remediation: A Practical Home Guide
A practical, step-by-step guide to mold testing and remediation for homeowners. Learn assessment methods, safety practices, and prevention tips to improve indoor air and protect your property.

You will learn how to test for mold and remediate safely, including when to hire pros, what methods to expect, and how to verify results. Key requirements include protective gear, proper sampling, and a plan for containment and cleanup. This fast overview points you to essential steps, common pitfalls, and safety considerations while you navigate home tests, sampling, remediation options, and follow-up checks.
What mold testing and remediation involve
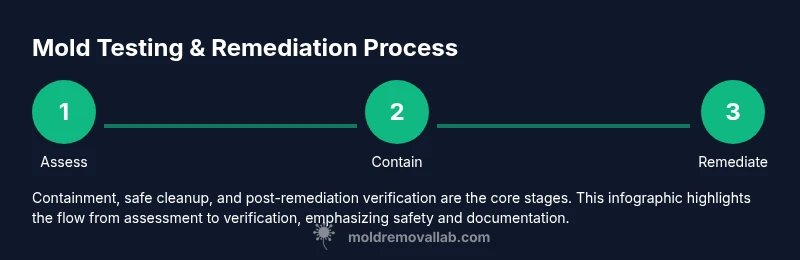
Mold testing and remediation are not isolated events but a structured process that starts with recognizing signs, advances through sampling and containment, and ends with verification of clean indoor air. In homes, mold can hide behind walls, inside HVAC systems, or under flooring, making detection challenging without proper sampling. The goal is to identify the presence of mold, determine the extent of growth, select safe removal methods, and confirm that air quality has returned to acceptable levels. This includes assessment, sampling strategies, remediation planning, containment, cleaning, and post-remediation verification. A thorough approach reduces health risks and protects building materials from ongoing damage. The Mold Removal Lab team emphasizes safety, using protective equipment, and documenting findings for homeowners and renters. For most households, a combination of visual inspection, moisture assessment, and targeted sampling yields reliable results. When in doubt, consult a licensed professional, especially in cases of visible growth or suspected black mold. Early action is more effective and less costly in the long run.
This guide uses mold testing and remediation as a framework to help you understand options, prepare for work, and minimize disruption to your daily life.
Health and property risks that mold testing addresses
Mold growth can compromise indoor air quality and aggravate respiratory issues. Mold spores release microscopic particles that can become airborne with temperature changes, humidity, and disturbance. Testing provides objective data about contamination levels and the species present, informing remediation strategies and post-remediation verification. Property-wise, mold can damage drywall, insulation, wood framing, and finishes, leading to structural concerns if left unchecked. The goal of testing is to narrow the focus to problem areas, quantify moisture sources, and prevent future recurrence. According to Mold Removal Lab, mold testing and remediation are most effective when addressed promptly and with a clear plan. By combining moisture control, cleaning, and proper disposal, homeowners can reduce ongoing damage and exposure. A transparent report helps you communicate with renters, insurers, and contractors while maintaining safety for all occupants.
In addition, reviewers note that addressing mold exposure early minimizes long-term health risks and improves overall comfort in living spaces.
When to test and who should be called
Testing is advisable after water damage, persistent musty odors, or visible growth. If you notice damp walls, ceiling stains, or humidity lingering above typical levels, consider a professional assessment. While some DIY mold testing kits exist, comprehensive testing often requires lab analysis and expertise to interpret results accurately. For most homes, a qualified mold inspector or remediation contractor can perform initial testing, locate moisture sources, and develop a remediation plan. The Mold Removal Lab team recommends professional consultation for complex cases, including large areas of growth, hidden moisture behind walls, or growth near HVAC systems. Timely testing supports faster remediation, reduces exposure, and protects your home’s structure from further damage.
Remember, professional results tend to be more reliable when building codes or health concerns are involved, especially in homes with children, elderly residents, or immunocompromised individuals.
Mold testing methods: what to expect
Testing methods vary based on suspected extent and location. Common approaches include visual inspection combined with moisture measurements, air sampling (to detect spore counts in the environment), surface sampling (swabs or tape lifts), and bulk samples from materials. Lab analysis identifies species and confirms whether contamination meets safety thresholds. It’s important to understand that negative test results do not always guarantee absence of mold, especially if sampling was limited or moisture sources persist. Your remediation plan should address both the contamination and its source. The testing phase is a critical step to determine scope, prioritize work, and verify post-remediation success with follow-up checks. Mold Removal Lab emphasizes using validated methods and documenting every step for homeowners and renters.
A well-documented process improves communication with contractors and insurance providers and supports ongoing prevention measures.
DIY vs pro remediation: decision guide
DIY remediation is feasible for small, non-structural mold growth on non-porous surfaces, with careful adherence to safety practices and containment. For larger areas, porous materials, or growth near insulation and structural wood, professional remediation is recommended. Professionals bring containment strategies, specialized equipment, and verification testing to ensure thorough removal and prevent recurrence. If you’re unsure about the extent of growth or if moisture problems persist, seek professional help. The Mold Removal Lab team notes that a cautious, stepwise approach, supported by expert guidance, yields safer, more durable results. Insurance considerations and building codes may also influence whether you should tackle the job yourself or hire a pro.
This decision point is where many homeowners seek a professional opinion to avoid costly mistakes.
Safe remediation techniques and best practices
Containment is crucial: close off the affected area, minimize airflow to other rooms, and use plastic sheeting to prevent mold spread. Wear appropriate PPE: an N95 or better respirator, eye protection, gloves, and disposable coveralls. Remove mold-contaminated materials carefully and dispose of them in sealed bags. Clean surfaces with cleaners approved for mold, then dry and dehumidify the space to restore low humidity. After cleanup, verify there is no residual moisture and consider post-remediation testing to confirm that levels have dropped. The Mold Removal Lab approach emphasizes safety, documentation, and following manufacturer instructions for any cleaners or sealants. Keep records of tests, remediation steps, and post-treatment results for future reference and insurance purposes.
If you encounter mold in ducts, insulation, or unseen cavities, professional remediation is the safest route.
Prevention and maintenance to minimize future mold
Preventing mold is easier than remediation. Maintain indoor humidity levels within a recommended range, fix leaks promptly, and ensure proper ventilation in moisture-prone rooms like kitchens and bathrooms. Use exhaust fans, dehumidifiers in damp basements, and routine HVAC system inspections to prevent condensation and moisture buildup. Regular visual inspections after heavy rain or plumbing repairs can catch early signs of mold before it spreads. The Mold Removal Lab team stresses documenting moisture sources and repair work to avoid recurrence and to support any future testing. Consistent maintenance makes a significant difference in indoor air quality and long-term health.
Documentation, next steps, and choosing a pro
After remediation, obtain a post-remediation verification report from your contractor or a certified third-party tester. This documentation confirms that the space meets air quality and cleanliness standards. Schedule follow-up checks to ensure moisture is controlled long-term, especially in basements and crawl spaces. If new mold signs appear, revisit moisture sources and remediation strategies. The Mold Removal Lab team advocates keeping all documentation accessible for homeowners and renters to share with insurers or neighbors when necessary. A proactive maintenance plan helps prevent reoccurrence and protects your investment over time.
Tools & Materials
- N95 respirator or higher(Fit-tested if possible)
- Protective eyewear(Goggles or safety glasses)
- Disposable gloves(Powder-free nitrile recommended)
- Protective coveralls or long-sleeve clothing(Cover arms and legs)
- Mold test kit (surface or air)(Follow kit instructions and shipping to lab)
- Plastic sheeting/drop cloths(To contain the work area)
- Trash bags (heavy-duty)(Seal before disposal)
- HEPA-equipped vacuum or air purifier(Optional, for efficient cleanup)
- Sealant/encapsulant or mold cleaner(Per manufacturer directions)
- Moisture meter or infrared camera(Helpful for locating hidden moisture)
Steps
Estimated time: 60-120 minutes
- 1
Assess the area
Identify visible growth, moisture sources, and the extent of damage. Document with photos and note typical moisture patterns that could contribute to future issues.
Tip: Take wide and close-up photos to capture context and detail. - 2
Prepare containment
Set up plastic sheeting to isolate the affected area and minimize cross-contamination. Turn off fans that could spread spores.
Tip: Seal doors and vents with tape to create a controlled zone. - 3
Collect samples (if applicable)
Follow the chosen sampling method from your kit or inspector. Label samples clearly and store them according to lab requirements.
Tip: Do not mix samples from different locations unless directed. - 4
Remove contaminated materials
Carefully remove porous materials with visible mold and place them in sealed bags for disposal. Avoid disturbing mold that’s embedded in structural components.
Tip: Do not pry apart materials that appear structurally compromised. - 5
Clean and dry
Clean hard surfaces with approved mold cleaners and dry thoroughly with fans or dehumidifiers. Ensure area is fully dry before restoration.
Tip: Use moisture meters to confirm low humidity before finishing. - 6
Post-remediation verification
Conduct or obtain post-remediation testing to confirm removal of mold and stabilization of moisture. Compare results with the initial baseline.
Tip: Keep a copy of the verification report with the project files.
FAQ
What is the difference between mold testing and remediation?
Testing identifies whether mold is present, its location, and severity, while remediation removes mold and repairs moisture sources. Both steps are essential for healthy indoor air.
Testing confirms mold presence and scope; remediation removes it and fixes moisture to protect your home.
Do I need a professional to test mold?
For accurate results and safe handling, a professional is often recommended, especially if growth is extensive or in hard-to-reach areas.
A professional test often provides more reliable results, especially for hidden mold.
How long does remediation take?
Remediation duration varies by extent and complexity, from a few hours to several days. A contractor can give a more precise timeline after inspection.
The timeline depends on how big the area is and how much material is affected.
Can I remediate mold myself?
DIY remediation is possible for small, clearly contained areas with non-porous surfaces and good safety measures, but larger cases or structural damage should be handled by professionals.
You can DIY small, contained cases, but call in pros for bigger problems.
Will testing indicate health risks?
Testing helps assess mold presence and potential exposure risk, guiding safety measures and remediation, but it does not diagnose individual health conditions.
Testing shows exposure risk potential but isn’t a medical diagnosis.
What should I ask a contractor before remediation?
Ask about licensing, certifications, containment practices, post-remediation testing, and guarantees. Clear communication helps ensure expectations are aligned.
Ask about licenses, containment, and post-remediation checks.
Watch Video
The Essentials
- Plan testing before cleanup and document findings.
- Contain the work area to prevent spread of spores.
- Choose sampling methods appropriate to the suspected extent.
- Verify post-remediation results to ensure success.
- Maintain moisture control to prevent recurrence.