How to Test Mold: A Practical Step-by-Step Guide for Homeowners
Learn how to test mold in your home with practical steps, safe sampling, and how to interpret lab results to guide remediation. A Mold Removal Lab guide for homeowners seeking safe, effective mold testing.

By reading this guide, you will learn how to test mold safely, select the appropriate test type for your situation, and interpret lab results to decide next steps. You’ll discover practical sampling methods, essential precautions, and when to seek professional remediation. The goal is to confirm contamination before committing to costly or unnecessary actions.
Understanding mold testing: purpose and what the results tell you
Test mold is not a one-size-fits-all task. The goal is to determine whether mold growth is present, locate moisture sources, and guide remediation decisions. According to Mold Removal Lab, mold testing helps homeowners verify contamination, identify problem areas, and avoid unnecessary, costly work. Tests provide a snapshot of conditions at a given time, so results must be interpreted along with humidity, airflow, and visible clues. In this section, you’ll learn why testing matters, what different tests can and cannot tell you, and how to approach the process without panic.
Key idea: The mere presence of mold on a surface or in the air does not automatically trigger a health risk. Health implications depend on exposure duration, concentration, and individual sensitivity. The best approach combines symptoms, visuals, moisture history, and test results to decide on next steps. No test alone can diagnose a health condition. If occupants are vulnerable, discuss results with a healthcare professional and environmental specialist.
This guide emphasizes practical steps you can take today to test mold thoughtfully, while avoiding common missteps that lead to false assurances or unnecessary remediation.
-1
Tools & Materials
- N95 respirator mask(Fit-tested if possible; replace if damaged)
- Disposable gloves(Nitrile preferred; latex alternatives may cause allergies)
- Safety goggles(Eye protection to prevent splashes or contact)
- Alcohol wipes or disinfectant(For sanitizing tools and surfaces between samples)
- Swab kits and/or tape lifts(For surface sampling; choose according to lab needs)
- Sealable sample containers/bags(Label clearly; avoid cross-contamination)
- Permanent labeling supplies(Marker, labels, and tape for sample IDs)
- Notebook or digital log(Record locations, conditions, and times)
- Camera or smartphone(For documenting conditions and suspect areas)
- Moisture meter (optional)(Helpful to identify persistent moisture)
Steps
Estimated time: 1-2 hours
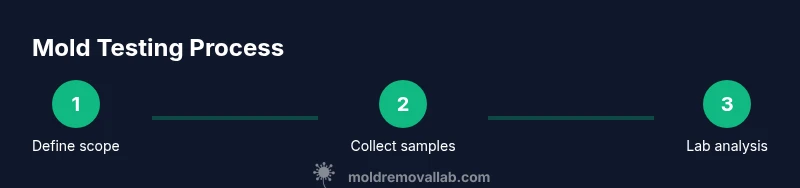
- 1
Define test scope and select test type
Review your concerns and identify suspect moisture sources. Decide whether you need air, surface, or bulk sampling based on where you see mold growth or persistent dampness. This choice will shape how you collect samples and where you focus remediation.
Tip: Clarify the questions you want answered (presence, sources, or both) to select the right test type from the start. - 2
Prepare PPE and testing area
Put on an N95 mask, gloves, and eye protection. Close doors to the testing area to limit airflow changes, and turn off fans or HVAC if safe to do so. Remove clutter to expose surfaces you’ll sample and to prevent accidental contamination of samples.
Tip: Avoid disturbing mold while putting on PPE; steps should be deliberate and clean. - 3
Collect air samples if indicated by scope
Follow the lab’s protocol for indoor vs outdoor air sampling. Typically this involves activated air samplers or passive spore traps placed for a defined period. Ensure timers are set and that sampling devices are kept away from sources of cross-contamination.
Tip: Seal the sampling device immediately after collection and label with date, location, and sampler ID. - 4
Collect surface and bulk samples
Use swabs or tape lifts on visible mold and surrounding materials as directed by the protocol. For bulk samples, carefully cut or remove a small piece of material using clean tools. Minimize disturbance to nearby materials to avoid spreading spores.
Tip: Label each sample with exact location and surface type to prevent mix-ups. - 5
Label, seal, and document samples
Place each sample in its labeled container or bag and seal securely. Create a simple chain-of-custody log noting who collected the sample, when, and where. Include photos of the sampling area.
Tip: Double-check labels before sealing to ensure traceability. - 6
Submit samples to a certified lab
Choose a lab with accreditation and transparent reporting. Use a courier that protects samples from temperature changes and vibration. Include a summary of your observed moisture issues and any remediation steps already taken.
Tip: Ask about turnaround times and what form the final report will take. - 7
Receive and review the lab report
Read the report carefully; compare indoor results to outdoor baselines when available. Look for identified mold types, confidence levels, and recommended actions. Consider moisture sources and structural issues that labs may highlight.
Tip: If results are ambiguous, contact the lab for clarification or request an alternative laboratory method. - 8
Plan remediation based on results
Prioritize moisture control: fix leaks, improve ventilation, and dry damp areas. Align remediation with the lab findings and your occupancy needs. If health concerns exist, involve healthcare or environmental professionals.
Tip: Document moisture repairs and monitor routinely to prevent recurrence.
FAQ
What does mold testing prove?
Mold testing confirms whether mold is present and can help locate sources. It does not diagnose health conditions or replace medical advice. Use results to guide moisture control and remediation planning.
Mold testing shows whether mold is present and where it may be coming from; it doesn’t diagnose health issues.
Is DIY mold testing reliable?
DIY tests can indicate potential mold problems but often lack the accuracy and context of lab analysis. For confirmation and actionable results, rely on professional lab testing or a certified environmental consultant.
DIY tests can help you spot problems, but lab testing is more reliable for solid results.
How long do lab results take?
Lab results typically take several days, depending on the test type and lab workload. Plan for a short wait and use that time to prepare for possible moisture control steps.
Results usually come back in a few days, so plan ahead for next steps.
Will results identify the mold species?
Some tests can identify mold species, especially DNA-based methods, while others only confirm presence. The type of test and lab capabilities determine species information.
Some tests name the mold, others just say it’s present.
What should I do after getting results?
Address moisture sources, improve ventilation, and follow the lab’s remediation recommendations. If health symptoms persist, consult a healthcare professional and consider a mold remediation specialist.
Fix the moisture, follow lab advice, and talk to a professional if symptoms persist.
How do I choose a qualified lab?
Look for accreditation, clear reporting formats, and transparent methods. Prefer labs with experience in building environments and clear documentation of sampling procedures.
Choose an accredited lab with clear methods and good reporting.
Watch Video
The Essentials
- Test mold to confirm contamination before major remediation.
- Use test type that matches suspected sources (air vs surface).
- Label and secure samples to ensure accuracy and traceability.
- Moisture control is central to successful remediation and prevention.