Mold Test for House: A Practical Guide to Safe Remediation
A practical, step-by-step guide to mold testing for house, comparing DIY kits and professional options, interpreting results, and preventing future growth.

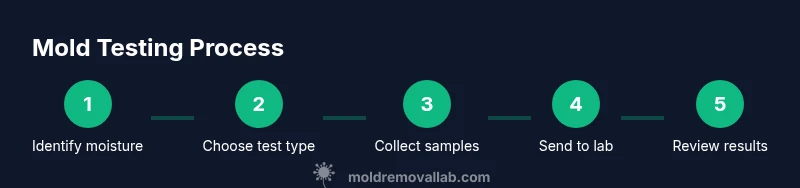
Goal: Confirm mold presence in your home through reliable testing, then decide on remediation. This quick guide outlines your options (DIY kits vs. professional testing), how to collect samples, how to read results, and the next steps to reduce growth and improve indoor air quality. This approach helps homeowners decide whether a test is necessary and what kind of remediation may be required.
What a mold test for house is and why it matters
Mold testing is a targeted way to determine whether mold is present in your home, identify which species are involved, and estimate the extent of contamination. When you begin with mold test for house questions, you are aiming to answer: Is there active mold growth behind walls or under flooring? Are the smells or damp spots signs of hidden moisture problems? The answer informs whether you should pursue DIY testing, hire a professional, or implement moisture-control strategies first. According to Mold Removal Lab, understanding common mold-prone areas (basements, bathrooms, kitchens, and crawl spaces) helps you decide where to sample and what test types to prioritize. By starting with a clear goal, you improve your odds of finding the root cause and avoiding needless remediation costs. In addition to health concerns, mold can also damage building materials over time, so early detection is valuable for long-term maintenance and comfort.
Mold test for house often involves two broad categories: screening tests that tell you if mold is present, and confirmation tests that identify exact species and concentration. Screening tests are useful for a quick check near known damp zones, while confirmation tests—performed by accredited labs—provide definitive results used by professionals to design remediation plans. When you’re deciding to test, consider the home’s moisture sources, recent water events (leaks, floods, high humidity), and your indoor air quality goals. Even if a test comes back negative, continuing moisture management remains essential to prevent future growth and protect occupants.
DIY testing vs professional testing: what to know
DIY mold tests can be convenient and affordable, offering quick insights into whether mold is present. They vary in sensitivity and sampling methods, with some kits providing basic surface swabs and others offering air-prong sampling options. Professional testing, in contrast, involves trained technicians collecting multiple samples from strategically chosen locations and sending them to an accredited lab for analysis. This approach tends to yield higher confidence, especially in complex homes with hidden moisture sources. Mold Removal Lab Analysis, 2026 suggests that DIY kits can be useful for preliminary checks but may misidentify contaminants or miss low-level growth, underscoring the value of lab-grade analysis in ambiguous cases. When deciding, weigh the pace you need, the areas you suspect, and your tolerance for follow-up remediation decisions. If mold exposure is a concern (for pregnant people, infants, or those with compromised immunity), professional testing and a certified remediation plan are typically advisable. In all cases, ensure you follow sample collection instructions precisely to avoid cross-contamination and to preserve test integrity.
Choosing a testing method: air, surface, or bulk tests
There are several testing modalities, each with pros and cons. Air tests sample the ambient air for mold spores, which helps detect airborne contamination that may not be visible. Surface tests involve swabbing or collecting settled dust from suspected areas, providing a direct look at present organisms on walls, ceilings, or insulation. Bulk tests, which collect a piece of material (such as drywall), can reveal mold growth embedded in building substrates. Your choice depends on symptom patterns, location, and accessibility. For example, if you notice a musty odor near a vent or a damp basement, air testing around that zone can reveal airborne spores that aren’t yet visible. If you’ve found visible growth, surface or bulk testing can confirm species and extent. Combining methods can offer a fuller picture, though it may cost more. Regardless of method, proper siting and sampling technique are critical to avoid false positives or negatives. Mold Removal Lab emphasizes sampling in areas with moisture and poor ventilation to maximize relevance and minimize contamination.
Step-by-step guide to performing a basic DIY mold test
Executing a DIY mold test involves a clear sequence of actions designed to minimize contamination and maximize reliability. Before you begin, read the kit’s instructions thoroughly, wear PPE (gloves, N-95 mask, and eye protection), and prepare a clean work area. Start by identifying likely problem zones (bathrooms, basements, kitchens, and any site with past water damage). Collect samples exactly as instructed—whether swabs, tape lifts, or air samples—with clean tools and labeled containers. Seal samples securely and store them away from direct sunlight and extreme temperatures until shipment. If your kit requires shipping, use the provided packaging and keep tracking information. After you receive results, compare them against guidance from the kit or lab, and note any recommended remediation steps. If results indicate elevated mold levels or hazardous species, prioritize professional assessment and a formal remediation plan. Remember, DIY tests have limits; use them as a screening tool, not a final diagnostic.
Interpreting results and next steps
Interpreting mold test results can be intimidating without a lab report. Look for two key data points: the presence/absence of mold and the level of contamination. Many DIY kits provide a visual or simple numerical readout; professional labs deliver species identification and quantitative data. If results show elevated levels or a known moisture source, take immediate action to reduce humidity, fix leaks, and improve ventilation. Document the area of concern, track humidity with a hygrometer, and implement moisture-control strategies (dehumidification, improved drainage, and sealing). For persistent problems, schedule a professional assessment to determine the extent of contamination and to design a remediation plan. Remember that mold can grow invisible to the naked eye, so ongoing monitoring and moisture control are essential even after a test indicates low levels.
Prevention and remediation basics after testing
Testing is a moment in time; prevention is ongoing. Focus on moisture control as the core strategy: fix leaks promptly, keep indoor relative humidity below 50%, ensure proper ventilation in bathrooms and kitchens, and inspect crawlspaces for standing water. Use moisture barriers on susceptible materials and promptly dry any areas that become wet. If mold growth spans more than a small area (greater than 10 square feet) or if there is a history of water damage, professional remediation is usually recommended to ensure thorough removal and proper containment. When planning remediation, address not only visible mold but underlying moisture sources—failure to do so leads to recurrence. Documenting the remediation steps and re-testing after completion can help verify that the problem is resolved and reduce the risk of future growth.
Authority sources and when to call a pro
For homeowners seeking reliable guidance, consult official sources and professional organizations. The EPA provides general guidelines on mold prevention and moisture control, while state health departments offer mold safety information specific to your region. If you have health concerns, allergies, or large areas of growth, hire a licensed mold remediation contractor who can perform containment, removal, and air clearance testing as needed. Always verify credentials and request a written remediation plan before starting. The Mold Removal Lab team emphasizes using credible laboratories and following local regulations to ensure safe and effective outcomes.
Tools & Materials
- Mold test kit (DIY)(Choose a kit that matches your intended sampling type (air, swab, or bulk) and follow included instructions precisely)
- Personal protective equipment (PPE)(Gloves, NIOSH-approved mask (N95 or higher), and protective eyewear)
- Labeling materials(Waterproof marker or labels to clearly identify each sample site)
- Clean, lint-free swabs(If the kit uses swabs; use provided or approved alternatives)
- Sealable evidence bags or containers(For storing collected samples before shipment)
- Digital camera or smartphone(Useful for documenting visible mold and moisture sources)
- Hygrometer or humidity monitor(Track indoor humidity over time to identify moisture trends)
- Notes journal(Record dates, locations, moisture events, and observations)
Steps
Estimated time: 2-4 hours for sampling and documentation; lab results typically take 1-7 days depending on lab workload
- 1
Prepare sampling area and PPE
Put on PPE, clear the sampling area, and ensure good ventilation. Label the sample sites and plan which rooms to test based on moisture clues and odors.
Tip: Work in a well-lit area and avoid cross-contamination by using clean tools for each site. - 2
Choose sampling method
Decide between air, surface, or bulk sampling based on visible moisture and suspected spread. If uncertain, start with a surface swab in the most concerning area.
Tip: Air sampling may require specialized equipment and professional processing. - 3
Collect samples exactly as instructions
Follow the kit’s instructions to collect each sample, avoiding contact with potentially contaminated surfaces. Use fresh swabs or approved collection methods for each site.
Tip: Do not reuse tools between sites; label each sample immediately after collection. - 4
Seal and label samples
Place each sample in its labeled container or bag, seal securely, and store away from heat or direct sunlight until shipment or analysis.
Tip: Include date, location, and any observed moisture source on the label. - 5
Submit samples to a lab or analyze per kit
If using a DIY kit with laboratory analysis, send samples according to the kit’s protocol. If you rely on a consumer readout, interpret the results in the context of visible moisture and symptoms.
Tip: Keep tracking numbers and receipts; this helps with follow-up questions. - 6
Review results and plan remediation
Compare results with the kit’s reference values or lab report. Identify moisture sources and determine whether professional remediation is required.
Tip: Even a negative test doesn’t guarantee absence of mold; maintain moisture controls. - 7
Address moisture and re-test if needed
Mitigate moisture issues (leaks, condensation, ventilation). Re-test after remediation to confirm removal and prevent recurrence.
Tip: Set a reminder to re-test in 4–8 weeks after remediation or significant weather events.
FAQ
What is the most reliable mold test for house?
Professional lab testing with accredited analysis is typically the most reliable for identifying species and concentration. DIY kits can still help screen for potential problems but may miss low-level growth or contaminants.
For the most reliable results, hire a professional lab test. DIY kits can screen for mold but may miss some issues.
How long does mold testing take from sampling to results?
Sampling can be done in a few hours, depending on the size of the area. Lab analyses usually take 1–7 days, depending on the lab’s workload and the number of samples.
Sampling takes a few hours; lab results typically come back within about a week.
Can I test for mold myself if I have allergies?
Yes, but be aware that sensitive individuals might react to mold during sampling. Use PPE, ventilate the space, and consider professional testing if symptoms are severe or persistent.
You can test yourself, but if allergies are severe, a professional test is safer.
What should I do if a test shows mold in multiple rooms?
Identify and fix moisture sources in all affected areas, plan containment if needed, and hire a remediation professional to ensure thorough removal and air clearance.
If mold appears in several rooms, fix moisture and bring in a pro for safe removal.
Is a negative mold test enough to stop testing?
Not always. Mold can recur if moisture sources aren’t addressed. Use moisture control, re-test after remediation, and monitor humidity levels.
A negative test isn’t a guarantee; keep monitoring moisture and re-test if issues return.
How often should I test for mold in a humid basement?
Schedule testing after major weather events or leaks and periodically during high-humidity seasons to catch moisture issues early.
Test after events and during high humidity to catch moisture early.
Watch Video
The Essentials
- Start with a clear testing goal and moisture assessment
- DIY tests are screening tools; lab tests provide stronger identification
- Choose methods based on moisture patterns and accessibility
- Address moisture first; remediation reduces recurrence
- Re-test after remediation to confirm success