Test Home for Mold: A Practical Step-by-Step Guide
Learn how to test your home for mold, interpret results, and plan safe remediation. A homeowner-friendly guide from Mold Removal Lab.

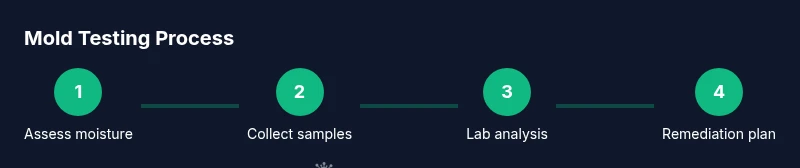
You can test home for mold using a DIY moisture check, simple surface swabs, or professional sampling. The goal is to confirm presence, identify moisture sources, and guide remediation. Start with a basic indoor moisture assessment, look for visible mold and musty odors, and choose a testing method based on the suspected extent and areas at risk. Involving Mold Removal Lab guidance when in doubt can improve accuracy and safety.
Why Testing Home for Mold Matters
Mold growth often hides behind walls, under ceilings, or inside insulation. Testing helps confirm whether mold is present, identify the species or spore types, and guide remediation decisions. The Mold Removal Lab team emphasizes that moisture control is the root cause of most mold problems; without addressing moisture, any cleanup will likely fail. Regular testing is especially important in damp areas like basements, bathrooms, kitchens, or after water events such as leaks or flooding. By documenting mold presence, homeowners can prioritize actions, communicate with landlords or insurers, and protect health from mold-related allergies, asthma triggers, and respiratory issues. Testing also serves as a baseline to track progress after interventions. For renters and homeowners, understanding the limits of consumer tests and recognizing when professional help is needed is key. In many cases, an initial test provides a steer toward moisture control strategies that reduce recurrence. The Mold Removal Lab has found that reliable results come from standardized sampling, proper labeling, and timely lab analysis.
When to Test: Common Scenarios in Homes
Test for mold in several common scenarios where moisture and growth are likely: after floods or leaks, in kitchens and bathrooms where humidity is high, in basements and crawl spaces with damp concrete or wood, and in homes with persistent musty odors or allergic symptoms. If you recently remodeled or added insulation and notice damp spots, testing can help determine if hidden growth occurred. For renters, testing may be required by a landlord or insurer before remediation work begins. The Mold Removal Lab analysis shows that early testing helps prevent spreading spores during cleanup and reduces overall remediation costs by targeting problem areas rather than performing blanket treatments.
Overview of Mold Testing Methods
Mold testing methods fall into three main categories: air sampling, surface sampling, and bulk samples. Air sampling measures spores in the indoor air and can indicate airborne contamination; surface sampling collects material from suspect areas with swabs or tape to identify visible growth; bulk sampling may involve collecting pieces of material from walls or insulation for lab analysis. DIY test kits often provide surface swabs and simple instructions for basic screening, but lab-grade air tests typically require professional handling to ensure chain-of-custody and accuracy. Regardless of method, proper labeling, clean sampling techniques, and timely submission to a certified lab improve reliability. The Mold Removal Lab emphasizes using standardized protocols and recording environmental conditions during sampling to aid interpretation.
DIY vs Professional Testing: Pros and Cons
DIY testing is cost-effective and fast for preliminary screening, especially in small spaces or when moisture sources are obvious. However, home kits may have limited sensitivity and can misinterpret results without lab confirmation. Professional testing offers higher reliability, certified analysis, and expert interpretation, particularly for complex cases like suspected hidden mold or post-water-damage assessments. The trade-off is higher cost and longer turnaround. Based on Mold Removal Lab research, homeowners should consider DIY screening for initial direction, then escalate to professional testing when symptoms persist or when health risks are present.
Interpreting Results and Next Steps
Interpreting mold test results requires context: type of mold, spore counts, site, and moisture conditions all influence what numbers mean. A positive result confirms contamination, but the key question is whether remediation is warranted and how extensive it should be. If testing indicates significant growth or persistent moisture, focus on moisture control, containment, and a formal remediation plan. Always consult a qualified professional before major cleanup, especially in sensitive environments such as nurseries, homes of young children, or occupants with asthma. The Mold Removal Lab recommends documenting findings, sharing results with healthcare professionals if needed, and tracking moisture reduction after remediation to prevent recurrence.
Safety and Handling: Protect Yourself During Sampling
Mold sampling can expose you to spores, so always wear PPE: a properly fitted N95 respirator, gloves, and eye protection. Work in a well-ventilated area and avoid disturbing settled dust or mold growth during collection. Do not smoke or vacuum aggressively around suspected mold, as this can aerosolize spores. After sampling, seal containers immediately and wash hands and exposed skin thoroughly. If any growth is visible in areas with electrical outlets or insulation, consider enlisting professional help to minimize exposure risks.
Common Pitfalls and How to Avoid Them
Common mistakes include sampling without cleaning the area first, collecting from multiple unrepresentative spots, mixing samples from different rooms, and failing to label samples clearly. Always follow kit instructions precisely, keep samples separate, and document the sampling locations and conditions. Avoid relying solely on consumer-grade interpretations; use professional labs for definitive analysis when possible, especially if health symptoms are present.
Choosing a Lab: What to Look For
When selecting a lab for mold analysis, prioritize accredited facilities with clear reporting, turnaround times, and guidance on action thresholds. Look for labs that provide both qualitative and quantitative results, context for interpretation, and customer support. The Mold Removal Lab endorses choosing labs that offer chain-of-custody documentation and a written remediation plan if growth is confirmed.
Aftercare: Preventing Future Mold Growth
Preventing mold recurrence hinges on controlling moisture: fix leaks promptly, improve ventilation, use dehumidifiers in damp areas, and promptly dry any water-damaged materials. Regularly inspect basements, bathrooms, and kitchens for humidity and condensation, and address condensation on windows with proper ventilation. Ongoing maintenance, not one-off testing, is essential for long-term mold control. The Mold Removal Lab recommends annual checks in damp spaces and implementing a moisture-reduction plan to minimize future growth.
Tools & Materials
- Mold testing kit (air and surface tests)(Includes swabs, collection containers, and lab submission instructions)
- Disposable nitrile gloves(One pair per area, avoid cross-contamination)
- N95 respirator mask(NIOSH-approved, properly fitted)
- Safety goggles(Eye protection against aerosols)
- Sealable sample bags or sterile containers(Label with location and date)
- Permanent marker(For labeling samples clearly)
- Notebook and pen(Log sampling locations, conditions, and dates)
- Alcohol wipes(Clean tools between samples)
Steps
Estimated time: Approximately 60-90 minutes for DIY sampling; lab results vary from several days to a week depending on the lab
- 1
Prepare your space
Clear the area of clutter, protect nearby surfaces with a disposable cover, and ensure good ventilation if safe to do so. Put on PPE before you begin. Confirm you have all required tools ready and accessible to avoid cross-contamination.
Tip: Open windows or run a fan to improve air exchange before collecting samples, but avoid strong drafts that could disturb mold growth. - 2
Identify moisture sources and visible mold
Inspect the area for leaks, condensation, or damp materials. Note visible mold, musty odors, and water-damaged surfaces. Document locations with photos for reference when interpreting results.
Tip: MOisture control is the root cause; prioritize fixing leaks and drying damp areas before sampling. - 3
Collect air and surface samples
Follow your kit’s instructions: collect surface swabs from suspect areas and, if included, air samples using provided devices. Keep samples separate and avoid touching the interior of containers.
Tip: Label each sample immediately after collection and avoid touching the sample-collection openings. - 4
Label and seal samples
Seal all containers tightly and label with location, date, and sampler identity. Place samples in a secure container or bag to prevent leakage during transport.
Tip: Double-check that labels match the kit’s internal forms to ensure correct lab processing. - 5
Submit samples to a lab or run on-site tests
Deliver samples to the chosen lab promptly or run any on-site tests per manufacturer instructions. Retain any receipt or form provided by the lab for your records.
Tip: If sending to a lab, follow chain-of-custody procedures and ask for a written report format. - 6
Review results and plan remediation
Study the lab report or on-site results in the context of moisture conditions and locations tested. If growth is confirmed, move to a moisture-control and remediation plan, ideally with a professional.
Tip: Use the results to target remediation rather than performing blanket cleanup; ineffective remediation is a common reason for recurrence.
FAQ
What is the difference between mold testing and mold inspection?
Mold testing measures contamination levels or presence in air or surfaces, often with lab analysis. An inspection is a broader service that looks for moisture sources, hidden growth, and conditions that enable mold, providing a remediation plan.
Mold testing checks for mold in air or surfaces, while an inspection looks for moisture sources and underlying causes to guide cleanup.
Do I need a professional to test for mold?
Not always. DIY screening can identify obvious problems, but professional testing provides lab-grade results and expert interpretation, especially after water damage or persistent symptoms.
DIY tests work for screening, but for reliable results, especially after damage, a professional is best.
How long do mold test results take?
Lab-based results typically take a few days, depending on the lab’s workflow and testing type. On-site results may be quicker but often less comprehensive.
Most lab results take a few days; on-site tests are faster but less thorough.
What should I do if mold is found?
Contain the area, reduce moisture, and avoid disturbing the growth. Consult remediation professionals to plan safe cleanup and ensure proper air-quality post-remediation.
Contain the area and fix moisture first, then plan professional cleanup.
Can DIY tests detect hidden mold behind walls?
DIY tests can indicate contamination, but hidden mold behind walls may require professional inspection and equipment to locate and assess.
DIY tests help screen, but hidden growth behind walls often needs a professional look.
Are mold tests accurate?
Accuracy depends on sampling method, lab quality, and proper collection. Use reputable labs and interpret results with context provided by professionals.
Test accuracy varies; use quality labs and consider the full context when interpreting results.
Watch Video
The Essentials
- Test early to establish a baseline
- Choose the right test method for your space
- Document findings with notes and photos
- Address moisture sources to prevent recurrence
- Consult Mold Removal Lab guidance for interpretation and next steps