How to Check Mold in Walls: A Homeowner's Practical Guide
Learn practical, non-destructive methods to check for mold in walls, identify moisture sources, and decide when to involve professionals. Clear steps, tools, and safety tips from Mold Removal Lab.

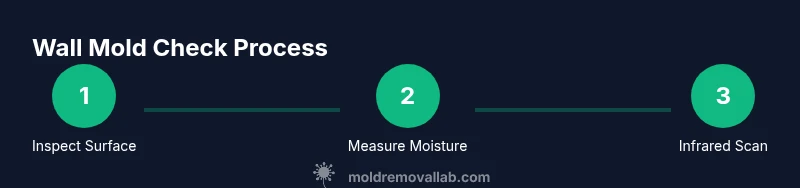
To check mold in walls, start with a visual survey for stains, discoloration, or peeling wallpaper, and sniff for a musty odor. Inspect behind outlets or light switches when safe. Use a moisture meter to identify elevated moisture and consider a non-destructive boroscope or infrared scan to peek inside walls. If you detect mold or ongoing moisture, document findings and seek professional guidance.
Introduction and Authority
According to Mold Removal Lab, checking walls for mold begins with understanding moisture dynamics and signs you can spot without specialized equipment. This guide walks homeowners through safe, non-destructive checks, how to interpret findings, and when to escalate to professional testing and remediation. By recognizing the most common hiding places and using the right tools, you can catch mold early and prevent hidden growth from spreading. The Mold Removal Lab team emphasizes a cautious, evidence-driven approach that prioritizes safety and proper moisture management.
How mold grows in walls and where it hides
Mold requires three things to thrive: moisture, a suitable food source (like drywall or wood), and a surface long enough for colonies to establish. In walls, mold often hides behind wallpaper, beneath painted surfaces, at drywall seams, around window and door frames, and in areas with hidden leaks or condensation. Poor ventilation in bathrooms, kitchens, and basements can create microclimates that sustain mold growth even without obvious water damage. Understanding these dynamics helps you target inspections where growth is most likely to occur and reduces unnecessary wall removal. The Mold Removal Lab analysis shows that moisture intrusion and limited airflow are common drivers of hidden mold; recognizing these factors informs both inspection and remediation decisions.
Visual indicators to look for on interior walls
Visible signs are often the first cue. Look for:
- Dark, fuzzy, or powdery patches on painted, wallpapered, or drywall surfaces
- Discoloration or staining near seams, corners, or around plumbing runs
- Peeling paint or wallpaper, bubbling, or warped surfaces
- Musty or earthy odors that linger after cleaning or ventilation changes
- Condensation on walls after showers or cooking, especially with poor ventilation
If you notice any of these indicators, document their location and duration, and plan a closer inspection of the suspected area. Remember that mold can hide behind baseboards, electrical boxes, or behind patched drywall, so a thorough approach matters.
Moisture and humidity: the silent drivers of wall mold
Moisture is the #1 factor behind mold growth in walls. Water intrusion from leaks, roof spills, or seepage can saturate studs and insulation, creating a feeding ground for mold spores. Condensation also contributes, particularly in climates with rapid temperature swings or in rooms with inadequate insulation. Mold can establish colonies on organic materials like wood framing and paper-backed drywall within 24-48 hours of moisture exposure, making proactive moisture control essential. The Mold Removal Lab team recommends monitoring indoor humidity, fixing leaks promptly, and ensuring proper ventilation in moisture-prone areas to reduce the risk of hidden mold behind walls.
Safe, non-destructive inspection methods you can start today
Before you start, protect yourself with gloves, a disposable coverall, eye protection, and an N95 mask. Begin with a non-destructive interior check by removing switch plates or outlet covers in safe locations to inspect framing around those areas. Use a handheld moisture meter to assess surface and near-surface moisture on drywall, studs, and insulation. If your meter shows elevated moisture but there is no visible mold, you may need to explore deeper with non-destructive probes such as a boroscope or an infrared camera to peek inside cavities without removing walls. Infrared can highlight temperature differences that suggest moisture pockets behind surfaces. Document findings and plan targeted investigations rather than wholesale wall removal. The goal is to identify moisture sources and mold growth while minimizing disruption.
Tools and methods: how to use moisture meters, infrared cameras, and boroscopes
- Moisture meters: use surface measurements on paint or wallpaper and reach into small test bores when possible. Calibrate according to the device manual and take multiple readings at the suspected site.
- Infrared cameras: scan walls for thermal anomalies that indicate moisture pockets; interpret results alongside moisture meter data, not in isolation.
- Boroscope/inspection camera: insert into small gaps or wall cavities to observe hidden areas with minimal damage.
- Documentation: photograph readings, odor observations, and any water intrusion history; correlate with home maintenance records to identify recurring problems.
Limitations exist: non-destructive tools indicate moisture but cannot confirm mold species or contamination levels. For confirmation, professional testing may be required. The emphasis remains on handling suspected mold cautiously and addressing moisture first.
Sampling vs. non-sampling: when to test and how to interpret results
DIY mold test kits can provide a general sense of whether mold spores are present, but they can be unreliable and may not distinguish benign indoor molds from harmful varieties. Professional testing by a certified mold inspector or environmental lab typically includes surface sampling, air sampling, and a moisture assessment, with lab analysis to identify species and concentrations. If you have symptoms, chemical sensitivities, or complex exposure scenarios (e.g., in a damp basement with extensive water intrusion), prioritize professional testing to guide remediation decisions. Always ensure a moisture source is addressed before interpreting test results, because remediation without moisture control often returns mold growth.
From findings to action: remediation readiness and next steps
When moisture sources are addressed and mold growth is confirmed, plan remediation focused on containment, removal of mold-contaminated materials where necessary, and thorough cleaning of surrounding surfaces. Do not attempt to “just wipe it away” with household cleaners on porous materials, as spores can become airborne and re-settle. Ensure the area is dry and ventilated during and after remediation, and consider installing or upgrading ventilation in high-humidity spaces. Keep documentation of all findings, tests, and remediation actions to support future maintenance and potential insurance or landlord communications. The Mold Removal Lab guidance emphasizes moisture control, proper containment, and professional guidelines for significant contamination or structural involvement.
Authority sources and ongoing prevention: what to read and how to stay safe
To deepen your understanding and verify best practices, consult authoritative sources on mold, moisture, and indoor air quality:
- https://www.cdc.gov/mold/default.html
- https://www.epa.gov/mold
- https://www.niehs.nih.gov/health/topics/agents/mold/index.cfm Also, prioritize proactive maintenance: fix leaks promptly, improve ventilation, and monitor humidity in damp areas like bathrooms, basements, and kitchens. Regular checks help prevent a small moisture issue from becoming a full-blown mold problem, preserving home health and value.
Tools & Materials
- Nitrile gloves(Chemically resistant; use for handling damp areas and samples)
- Safety goggles(Eye protection during inspections and sampling)
- N95 respirator(Protects against spores and dust when removing or disturbing mold)
- Disposable coveralls(Optional but helpful for contamination control)
- Flashlight(Bright, adjustable light to inspect dark wall cavities)
- Moisture meter(Non-destructive tool to measure surface/near-surface moisture)
- Infrared camera (optional)(Helps identify temperature anomalies indicating moisture behind walls)
- Borescope/inspection camera(Non-destructive way to peek inside wall cavities)
- Plastic sheeting and tape(Containment and dust control during inspection)
- Sealable bags(Dispose of contaminated materials securely)
- Notebook or digital recorder(Document locations, readings, and moisture history)
Steps
Estimated time: 2-4 hours
- 1
Plan and safety prep
Assess the area, turn off power to the inspected wall section if needed, and don appropriate PPE. Identify potential hazards (electrical outlets, plumbing, asbestos risk in older homes) and establish containment to avoid cross-contamination.
Tip: Keep pets and kids away from the inspection area before you start. - 2
Do a surface visual check
Look for visible stains, discoloration, peeling paint, or condensation on the wall surface. Note locations around plumbing, windows, and in basements or bathrooms where moisture is common.
Tip: Take clear photos of every suspicious area for records. - 3
Breathable containment setup
Place plastic sheeting to seal off the room from the rest of the home. Use tape to create a clean boundary and minimize dust dispersion during inspection.
Tip: Avoid creating airtight seals that could trap moisture in the inspection area. - 4
Test surface moisture
Use the moisture meter on the wall surface and at adjacent areas to establish a moisture baseline. Record readings at multiple heights and angles to capture variability.
Tip: Take readings in at least three spots across the suspected area. - 5
Peek behind wall coverings safely
If safe to access, remove small sections of drywall or wallpaper at concealed edges (e.g., near outlets or baseboards) to look for early signs of mold growth and moisture pockets.
Tip: Do not remove large sections; keep disruption minimal. - 6
Use a boroscope or infrared peek
Insert a boroscope into small gaps to observe behind the surface, or use an infrared camera to identify cool spots that may indicate moisture intrusion.
Tip: Cross-check infrared hotspots with moisture meter readings. - 7
Decide on sampling (if needed)
If mold is visible and clearly contaminated, sampling may help identify species. For suspected widespread contamination or sensitive occupants, consider professional sampling.
Tip: Avoid DIY sampling for large or unknown contamination—professional labs offer validated protocols. - 8
Plan remediation or escalation
If mold is confirmed or moisture sources persist, plan remediation with containment, cleaning, and moisture source repair. Decide whether to call a licensed mold inspector or remediation contractor based on area affected and safety concerns.
Tip: Document every step and communicate findings clearly to occupants or landlords.
FAQ
Can you check for mold in walls without removing drywall?
Yes, you can start with non-destructive visual checks, moisture meters, infrared scanning, and limited boroscope inspections. If these indicate elevated moisture or visible mold, plan further action or professional testing.
You can start with non-destructive checks and then seek professional testing if needed.
Is a DIY mold test kit reliable for walls?
DIY kits can indicate the presence of mold spores but often cannot identify species or assess concentration accurately. For reliable results, especially in occupied homes, hire a qualified mold inspector or lab.
DIY kits can show spores, but for accurate results you should use a professional test and lab analysis.
What should I do immediately if I find mold behind a wall?
Contain the area to prevent spread, fix any moisture source, and avoid disturbing the mold more than necessary. Then contact a professional for testing and remediation guidance.
Contain the area, fix moisture, and call a pro for testing and remediation guidance.
How long does mold remediation typically take?
Remediation duration varies with the extent of contamination, materials involved, and moisture control needs. A small area may take less time than a larger, structural issue.
The time depends on how big the mold problem is and how much moisture you need to fix.
When should I call a professional mold inspector?
If you detect visible mold growth or persistent moisture, or if occupants have health symptoms, contact a licensed inspector to assess and guide remediation.
Call a professional if you see mold or have ongoing moisture and symptoms.
Are black mold concerns different from other molds?
Black mold can be more concerning depending on species; however, all mold should be evaluated and remediated safely. A professional can determine risk and appropriate remediation steps.
Black mold can be riskier, so get a professional to verify and guide cleanup.
Watch Video
The Essentials
- Identify moisture sources before removing walls
- Use non-destructive tools first to map mold risk
- Document findings and seek professional testing when in doubt
- Address leaks and ventilation to prevent recurrence