How to Check for Mold in House: A Practical Guide
Learn a practical, science-backed approach to check for mold in house, including visual checks, moisture monitoring, and testing options. Safe, actionable steps for homeowners and renters.

To check for mold in a house, start with a thorough visual inspection for stains, musty odors, and hidden moisture sources, then measure humidity and surface moisture in likely problem areas. Gather basic tools (gloves, flashlight, moisture meter, mask) and document findings before testing or calling a pro if growth is suspected.
How to check for mold in house: a practical approach
If you suspect mold in your home, the goal is to identify moisture sources, visible growth, and the potential for hidden colonies. This guide follows a practical, homeowner-friendly approach that aligns with Mold Removal Lab guidance. By learning how to check for mold in house, you’ll build a clear picture of moisture risks, growth signs, and when to escalate to testing or professional remediation. Start with simple visual checks, document any odors or staining, and then use basic moisture measurements to decide whether further actions are needed. The process emphasizes safety, thorough documentation, and timely action to protect indoor air quality for you and your family. In this section and throughout, Mold Removal Lab’s expertise informs practical steps you can take today, without overreacting or skipping essential safety precautions.
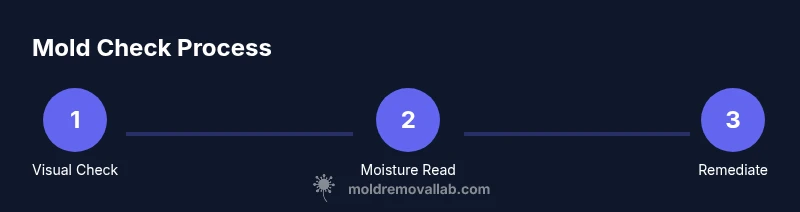
Step 1: Visual inspection
Begin with a systematic visual inspection of the most common problem areas: kitchens, bathrooms, basements, laundry rooms, and spaces around windows. Look for visible mold growth (colored patches on walls, ceilings, or insulation), staining, peeling paint, and dark spots that refuse to clean off. Note musty odors, which often indicate hidden moisture. Use a bright flashlight to illuminate corners, behind furniture, and inside cabinets. Take clear photos before cleaning to document progression or changes over time. Be mindful that mold can hide behind wallpaper, under sink decks, and inside ductwork. This step lays the groundwork for a targeted moisture check and potential testing strategy.
Step 2: Check humidity and moisture levels
Mold needs moisture to thrive, so monitoring indoor humidity is critical. Use a hygrometer to measure relative humidity (RH) in different rooms, especially in kitchens, bathrooms, basements, and crawl spaces. Aim to keep indoor RH below 60% to reduce mold risk, and lower is better if you live in a humid climate. Check for persistent dampness after showers, rainfall, or appliance use, and note any condensation on windows or cold surfaces. Record RH readings in a notebook or app to track changes over time and correlate them with weather patterns or activities.
Step 3: Inspect HVAC, plumbing, and known moisture sources
Mold frequently grows near sources of moisture such as leaky roofs, poorly vented bathrooms, and humid HVAC components. Inspect around ceiling corners, HVAC ducts, supply vents, and return air grilles for condensation, staining, or peeling paint. Examine under sinks, around traps, and behind washers and dishwashers for leaks or dampness. Look at basement walls and foundation for cracks or efflorescence that indicate moisture intrusion. If you find any ongoing leaks, address them promptly, as ongoing moisture undermines any cleaning effort.
Step 4: Look for hidden mold signs
Some mold hides behind walls or under flooring. Use signs like musty odors in rooms with no obvious mold, persistent dampness after drying or cleaning attempts, or staining that reappears after cleaning. If you suspect hidden growth behind drywall, under baseboards, or within insulation, plan for safer access or professional assessment rather than aggressive DIY removal. Document any areas of concern with photos and note the location and type of surface (wood, drywall, concrete) to guide next steps.
Step 5: Sampling and testing options
Testing can help confirm mold presence and identify species, but it isn’t a substitute for moisture control and remediation. You can choose consumer-grade testing kits for surface sampling or air sampling, though results may require lab analysis for clarity. Consider professional testing if you detect large growth, persistent odors, or if occupants have health concerns. When testing, ensure you follow a strict sampling plan, collect multiple samples from suspected zones, and arrange for lab analysis to obtain actionable results. Mold Removal Lab Analysis, 2026 emphasizes that tests should complement, not replace, source control and cleanup decisions.
Step 6: What to do if you find mold
If mold is present, start with containment to prevent spread: avoid disturbing the growth, seal off the area if possible, and wear appropriate PPE. Clean small, non-porous surfaces with detergent and water, and dry thoroughly. For porous materials (drywall, insulation, carpet) or large areas, plan professional remediation; DIY removal of porous materials can release spores and damage the structure. Document the scope of the issue and obtain quotes if remediation seems required. If you have health concerns or the mold covers a large area, prioritize professional assistance.
Step 7: Safety, cleanup, and prevention considerations
Always prioritize safety: wear gloves, an N-95 mask, and eye protection during inspection and cleanup.Ventilate the space when possible, and avoid mixing ammonia with bleach due to toxic fumes. After cleanup, reduce moisture with dehumidifiers, fix leaks, improve ventilation in high-humidity rooms, and consider air purifiers with HEPA filters. Regular maintenance, such as cleaning gutters, sealing basements, and monitoring RH, reduces the chance of recurrence. Keep an ongoing log of moisture events, remediation steps, and health symptoms to guide future actions.
Step 8: When to call a professional
If mold covers more than a small area, is widespread in your home, or if occupants experience persistent allergy-like symptoms, it’s wise to consult a licensed mold remediation professional. A pro can perform advanced testing, contain the area properly, and remove mold safely, following local regulations. The Mold Removal Lab team recommends erring on the side of caution when moisture sources are ongoing or structural damage is suspected, to protect your health and the home’s value.
Tools & Materials
- Bright flashlight(For dark corners and behind appliances)
- N-95 mask or respirator(Protects against mold spores during inspection)
- Disposable gloves(Keep hands clean and reduce contamination risk)
- Gloves + eye protection(Extra safety for sticky or aerosolized spores)
- Moisture meter or hygrometer(Measures moisture in walls, floors, and air humidity)
- Tape measure(Document space dimensions and locations of interest)
- Camera or smartphone(Photograph signs of mold and moisture for records)
- Spray bottle with water and mild detergent(Light cleaning in non-porous areas to observe changes)
- Cleaning rags and disposable bags(Safe cleanup and disposal of moldy materials)
- Mold testing kit (surface swab or air sample)(Optional; use if you plan to send samples to a lab)
- Protective coveralls(Optional for larger cleanup areas)
Steps
Estimated time: 60-120 minutes
- 1
Inspect exterior moisture sources
Start with the outside of the home: roof edges, gutters, downspouts, and drainage. Look for standing water, ice dams, or clogged gutters that could direct moisture toward the structure. Addressing exterior moisture reduces indoor mold risk.
Tip: Tackle exterior issues first to prevent indoor mold growth from recurring. - 2
Perform a room-by-room visual check
Move through living spaces, kitchens, bathrooms, basements, and crawl spaces. Look for stains, discoloration, peeling paint, musty smells, and condensation on surfaces. Use the flashlight to inspect hidden corners and behind fixtures.
Tip: Keep notes with photos and exact locations for future reference. - 3
Measure humidity and surface moisture
Take readings in several rooms with a hygrometer. Check surfaces for dampness near sinks, pipes, windows, and vents. Aim for RH below 60% and dry any damp surfaces promptly.
Tip: Recheck after activities like showering or laundry to identify seasonal moisture spikes. - 4
Inspect HVAC, plumbing, and known moisture areas
Check around air handlers, ducts, registers, under sinks, and around washers/dryers for leaks or condensation. Leaky spots should be repaired before cleaning moldy areas.
Tip: Leaks indirectly feed mold; fix them before remediation.” - 5
Identify hidden signs of mold
Mold may hide behind walls or under flooring. Look for persistent musty odors or staining that returns after cleaning. Consider professional access if you suspect hidden growth.
Tip: Quiet growth can be as problematic as visible patches. - 6
Decide on testing options
Choose between surface tests, air tests, or professional lab analysis. Understand that tests confirm exposure but do not replace moisture control and cleaning.
Tip: If you’re unsure, start with a basic surface test and plan for lab analysis if results are inconclusive. - 7
Plan remediation and prevention
Outline containment steps, cleanup scope, and post-remediation moisture control. Implement ongoing moisture management (dehumidifiers, improved ventilation, prompt leak repair).
Tip: Prevention is key; regular maintenance saves time and costs later.
FAQ
What are common signs of mold in a house?
Look for visible patches, musty odors, water stains, peeling paint, and dampness. Mold can appear in hidden places like behind wallpaper, under sinks, or inside closets. Persistent signs after cleaning often indicate an ongoing moisture problem.
Common mold signs include visible patches, musty smells, and damp spots. If you notice these, investigate moisture sources and consider testing or professional help.
Is visible mold always dangerous?
Visible mold indicates moisture and growth, but danger depends on size, location, and occupant health. Small patches in well-ventilated areas may be manageable with proper cleanup; large areas or growth near air intakes warrant professional remediation.
Visible mold means moisture is present, but the level of risk depends on size and where it is. If in doubt, get a professional assessment.
Can I check for mold myself without hiring a pro?
Yes, you can perform initial checks using visuals, humidity readings, and non-invasive surface tests. For larger areas, hidden growth, or health concerns, you should consult a professional to avoid exposure and ensure proper remediation.
You can start with DIY checks, but for suspected extensive mold or health risks, hire a pro for safety and thorough remediation.
How long does remediation take after mold detection?
Timeline varies by extent: small, contained spots may be cleaned in a day or two; larger jobs or structural damage require scheduling with licensed professionals and may take several days to weeks.
Remediation time depends on how widespread the growth is. Start cleanup and contact a pro to get a precise schedule.
Should I use a home mold kit or send samples to a lab?
Home kits can indicate presence but may produce ambiguous results. For clarity, send samples to an accredited lab or hire a professional who can interpret results and guide remediation decisions.
Kits can help, but labs give clearer results and guidance for next steps.
What safety steps should I take during inspection?
Wear gloves, a mask, and eye protection. Avoid disturbing mold patches, ventilate the area, and wash hands after handling materials. If you have health issues, pause and seek professional help.
Protect yourself with PPE and avoid spreading spores. If you’re sensitive, get professional help.
Watch Video
The Essentials
- Inspect and document moisture sources first
- Keep indoor humidity under 60% to deter mold
- Tackle leaks and poor ventilation before cleaning
- Use testing to confirm, not replace, moisture control
- Call a professional for large or persistent growth