Where to Look for Mold: A Practical Home Inspection Guide
Learn where to look for mold in your home, how to inspect safely, and when to seek professional remediation. Practical steps for homeowners and renters to identify damp zones, hidden growth, and prevent recurrence.

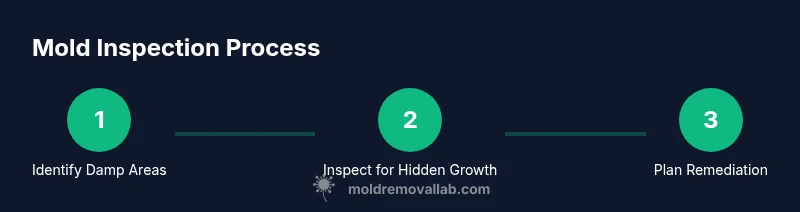
Where to look for mold isn't always obvious. Start with damp, high-humidity zones like bathrooms, basements, laundry rooms, and kitchens, then inspect behind appliances and under sinks. Look for fuzzy patches, powdery residues, or musty odors. Check crawl spaces and areas with prior water damage; even small discolored spots can signal hidden growth behind walls or panels.
What mold is and why it matters
Mold is a group of fungi that thrives on moisture and can grow on many indoor surfaces, including wood, drywall, fabric, and insulation. Most people notice visible patches or a musty smell, but hidden colonies behind walls, under floors, and inside HVAC ducts pose the biggest health and structural risks. According to Mold Removal Lab, understanding where mold tends to appear helps homeowners prioritize where to look for mold and when to seek professional help.
Health impacts vary by species and exposure. Some people experience allergic reactions, nasal congestion, coughing, and eye irritation after exposure to mold spores, while others have no symptoms at all. People with asthma, compromised immune systems, or chronic lung conditions may be more sensitive. Moisture is the common driver: without persistent dampness, mold growth slows or stops. This section outlines typical growth zones and the factors that encourage growth, so you can target inspections safely and efficiently.
Where to look for mold in the home: high-risk zones
Mold loves damp, poorly ventilated spaces. Start with bathrooms, basements, laundry rooms, kitchens, and garages where humidity is regularly high and water use is constant. Check corners, behind toilets, under sinks, around pipes, and along baseboards where condensation collects. Do not overlook closets, laundry hampers, and crawl spaces, especially if they have vents or damp insulation. In areas with recent leaks or floods, inspect for staining, bulking, or warped materials. Keep an eye on ceilings near windows, sunrooms, and skylights, where condensation can accumulate on cold surfaces. Remember, visible mold is only the tip of the iceberg; moisture behind walls often drives hidden growth.
Hidden growth: behind walls and in HVAC systems
Hidden mold often hides where you can’t see it: behind drywall, under flooring, around plumbing penetrations, and inside HVAC ducts. Ductwork can spread spores if it’s connected to a damp space, making professional testing and cleaning essential in some cases. Look for suspicious staining on studs, warped panels, or musty odors that linger in rooms with no obvious water source. Use a mirror or a small camera to peek behind panels and around corners that aren’t readily visible. If you notice elevated moisture readings or persistent smell, plan a deeper assessment.
In many homes, the most challenging mold is the one you don’t immediately sense. This is where moisture meters and infrared cameras help identify warm, humid pockets that indicate hidden growth waiting to be discovered.
How moisture drives mold growth: key concepts
Mold growth requires moisture, warmth, and an organic surface. The key idea is to reduce moisture sources and improve ventilation to suppress growth. Common motivators include leaks, spills that weren’t fully cleaned, condensation on cold surfaces, and poor air exchange in enclosed spaces. Addressing one factor often reduces the others: fixing a leak lowers humidity, and increasing air flow helps dry surfaces faster. Understanding these relationships helps homeowners target prevention efforts rather than reacting only after a patch appears.
Keep climate controls balanced: run exhaust fans during showers, use dehumidifiers in damp basements, and ensure that bathrooms and kitchens have vents that vent to the outdoors. Regularly inspecting potential problem areas builds a proactive maintenance habit rather than a reactive fix when mold becomes visible.
Practical field inspection techniques you can perform safely
Before you begin, wear appropriate PPE: a properly fitted N95 respirator, disposable gloves, and eye protection. Work in well-ventilated areas and avoid disturbing mold growth, which can release spores into the air. Start with visually obvious areas: bathrooms, basements, and kitchens. Use a bright flashlight to reveal faint discolorations and test moisture with a hygrometer. Document every patch with photos, noting location, surface type, and any prior water events. Keep notes of humidity levels and any odors; these clues guide further investigation and remediation planning.
If you find mold behind walls or within concealed cavities, avoid aggressive probing. Small, contained samples may be taken only if you have training and authorization, and always follow local safety guidelines. For many homeowners, initial inspections focus on moisture sources and air flow rather than full-scale cleanup. A recorded map of problem zones helps a remediation team target their work efficiently.
Testing considerations: when and how to test
Testing mold can help confirm the presence of growth and guide remediation strategies, especially when mold isn’t visible or is suspected to be widespread. There are several testing approaches, including surface sampling, air sampling, and bulk analysis. Tests should be conducted by qualified professionals who can interpret results in the context of indoor air quality and moisture sources. Results commonly indicate the presence of mold, its relative concentration, and potential species; however, a remediation plan should rely on moisture control, containment, and proper cleanup rather than test results alone.
Use testing selectively: after leaks are fixed and moisture is controlled, testing can verify that conditions are safe for reoccupancy. Avoid DIY testing kits for decisions about remediation, and be cautious about misinterpreting results without expert guidance.
Prevention and maintenance: long-term strategies
Prevention focuses on moisture control and airflow improvements. Repair plumbing leaks promptly and seal around windows and doors to prevent condensation. Improve ventilation in bathrooms, kitchens, laundry rooms, and basements. Compact, humid spaces benefit from dehumidifiers and continuous monitoring with a hygrometer. Regular cleaning routines that remove dust and organic debris reduce surface nutrients available to mold. Consider moisture barriers for basements and crawl spaces, and ensure crawl space vents are open or closed appropriately based on climate and moisture conditions.
Long-term maintenance includes keeping a clean, dry home, addressing water events quickly, and rechecking previously affected areas after storms or floods. By implementing a structured inspection schedule, homeowners can catch growing problems early and prevent costly remediation later.
DIY remediation vs professional help: making the call
Small, isolated patches on non-porous surfaces in well-ventilated areas may be cleaned with consumer products, following proper PPE and containment practices. For larger areas, porous materials, or growth on structural materials, it is wiser to hire a licensed professional. Significant mold growth or growth in HVAC systems, attics, or behind walls typically requires professional containment, removal, and decontamination to prevent cross-contamination and ensure thorough cleanup. The Mold Removal Lab team emphasizes safety and thoroughness: when in doubt, call in experts to assess, contain, and remediate.
Always ensure remediation includes moisture source remediation, proper disposal of contaminated materials, and post-remediation verification. A professional team can guide you through permits, containment strategies, and re-occupancy criteria, which are often overlooked in DIY efforts.
Documentation, next steps, and when to re-inspect
After remediation, document the work with before/after photos, a written summary of the work performed, and any moisture-control measures implemented. Keep records of receipts, contractor notes, and any recommendations for ongoing maintenance. Re-inspect problem areas periodically—at least seasonally—and after heavy rain events. Maintain humidity levels below your home's comfort threshold and monitor for any return of odors or staining. Early re-inspection helps catch failures early and prevent recurring problems. The Mold Removal Lab team recommends establishing a moisture-management plan and setting calendar reminders for follow-up checks.
Tools & Materials
- N95 respirator(Fit-tested if possible; replace after exposure)
- disposable gloves(Nitrile preferred; use fresh pair for each inspection)
- protective eyewear(Goggles or safety glasses to protect eyes)
- flashlight/headlamp(Bright, adjustable lighting for dark corners)
- moisture meter / hygrometer(Identify elevated humidity in suspect zones)
- notepad or digital note app(Record locations, observations, and readings)
- camera or smartphone(Document patches and stains with photos)
- screwdriver or access tools(For accessing behind panels or appliances)
- plastic bags and cleaning cloths(Contain and tidy small areas during inspection)
Steps
Estimated time: 1-2 hours
- 1
Prepare and protect yourself
Put on PPE, ensure the area is well-ventilated, and gather your inspection tools. Review a quick plan: which zones to start in and how you will document findings. This reduces scramble and helps you stay organized as you move through the home.
Tip: Wear a properly fitted N95 and gloves; avoid disturbing potential colonies. - 2
Map and prioritize damp zones
Create a mental or written map of moisture-prone areas (bathrooms, basements, kitchens) and note any recent leaks. Prioritize areas with ongoing moisture—these are the highest-risk spots where mold is likely to appear.
Tip: Start with the most humid rooms first to maximize visibility of problem zones. - 3
Inspect obvious damp zones
Carefully inspect walls, ceilings, baseboards, behind toilets, and under sinks. Look for stains, discoloration, bubbling paint, or musty odors. Use your flashlight to reveal subtle growth that isn’t obvious from a distance.
Tip: Look for subtle color changes and texture differences that signal mold. - 4
Check hidden spaces and HVAC access
Inspect behind appliances, inside cabinets, crawl spaces, and access panels. If you suspect hidden growth, use a small mirror or camera to peek behind paneling or ductwork without disturbing material.
Tip: Avoid prying or cutting into walls; call a pro if growth is suspected behind walls. - 5
Document and record moisture readings
Take notes and capture photos of each area inspected, including relative humidity readings if you have a meter. Catalog the findings by room and surface type for remediation planning.
Tip: Keep a consistent naming convention for photos to simplify review later. - 6
Decide on sampling only if needed
If you’re unsure about the extent, consider professional testing to confirm the presence and extent of mold. Do not rely solely on visual checks for large areas or porous materials.
Tip: Testing should inform remediation scope, not replace moisture control. - 7
Plan remediation with moisture control
If you find active growth, plan for moisture source repair first (leaks, condensation, ventilation). Remediation should target both mold removal and moisture reduction to prevent recurrence.
Tip: Contain the area to prevent cross-contamination during cleanup. - 8
Engage a professional if needed
For significant growth, hidden mold, or growth in ductwork, contact a licensed remediation specialist. They willContain, remove, and clean HVAC components and affected materials safely.
Tip: Verify credentials, experience, and references before hiring. - 9
Recheck and monitor after remediation
After cleanup, re-inspect the areas and monitor humidity for several weeks. Schedule follow-up checks and maintain a proactive moisture-management plan.
Tip: Set reminders for seasonal re-inspections to catch issues early.
FAQ
Is mold always dangerous to inhale?
Not all mold is equally harmful, but some species can trigger allergic reactions or asthma symptoms in sensitive people. Exposure should be minimized, especially for vulnerable individuals. If you notice persistent symptoms or large growth, seek professional assessment.
Not all mold is dangerous, but exposure can affect some people—especially those with allergies or asthma. Minimize exposure and consider expert help for large or hidden growth.
Can I remove mold myself safely?
Small patches on non-porous surfaces can sometimes be cleaned with proper PPE and containment. Large areas, porous materials, or growth inside walls require professional remediation to ensure complete removal and prevent cross-contamination.
You can handle small, surface mold with PPE, but large or hidden mold should be handled by a pro.
How long does remediation usually take?
The timeline varies with the extent of growth and moisture issues. Simple cases may resolve in days, while larger or more complex jobs can take longer. A professional assessment provides a clearer schedule.
Remediation duration depends on how big the area is and what moisture needs fixing; a pro can give you a precise timeline.
Should I test again after remediation?
Post-remediation testing can confirm that mold has been effectively removed and indoor air quality is safe. It’s typically recommended when growth was extensive or in occupied spaces with sensitive occupants.
Testing after cleanup helps confirm safety and prevent a relapse.
What should I do immediately after finding mold?
Contain the area to prevent spore spread, turn off affected water sources if safe, and document the location. Contact a professional if growth is large or in hard-to-reach areas.
Contain the area and note what you find, then call a pro for large or hidden growth.
Do I need to replace materials after mold removal?
Some porous materials (drywall, insulation, carpet) may need removal if heavily contaminated. Non-porous surfaces can often be cleaned and restored if properly treated.
Sometimes materials must be removed if mold has penetrated them; otherwise cleaning and treatment can restore surfaces.
Watch Video
The Essentials
- Inspect damp zones regularly
- Document findings with photos
- Address moisture sources first
- Consider professional help for large or hidden growth
- Re-inspect after remediation