Home Mold Testing: A Practical Step-by-Step Guide for Homes
Learn how to test for mold at home, interpret results, and plan safe next steps. This Mold Removal Lab guide covers DIY kits and professional options for healthier indoor air.

You will learn how to test for mold at home, choose between DIY kits and professional services, and interpret results to decide on remediation. This guide covers safe sampling, documentation, and practical next steps to protect indoor air quality. You’ll need basic PPE, clear goals, and a dry, clean space to begin.
What is home mold testing?
According to Mold Removal Lab, home mold testing is the process of collecting samples from walls, surfaces, or air to determine whether mold is present, where it is located, and what types of mold may be growing. Mold can indicate moisture problems that, if left unchecked, may affect indoor air quality and occupant health. The Mold Removal Lab team emphasizes that testing should be part of a larger moisture control plan, not a one off check. When we test, we look for clues such as visible growth, musty odors, and high humidity levels. Understanding what you are testing for helps you choose the right method and interpret results with context. Remember, testing answers specific questions about presence and location, but remediation decisions depend on moisture sources and building materials involved.
From the Mold Removal Lab analysis, many homes with moisture problems exhibit mold growth in areas prone to humidity. This is why the goal of home mold testing is to identify moisture drivers and guide next steps rather than simply declaring a mold presence.
When to test your home
Testing is most valuable when you notice signs of moisture or mold, such as staining, musty odors, or water intrusion from leaks or flooding. If you have ongoing dampness, frequent condensation, or a recent water event, testing can help determine the extent of contamination and prioritize remediation. Mold can spread quickly through HVAC systems and porous materials, so early testing can save time and money. At times, testing is warranted as part of a rental agreement or home sale to ensure occupant safety. The Mold Removal Lab team recommends testing in any area with persistent moisture and after significant water events to establish a baseline and track improvements.
Sampling methods: DIY kits vs professional services
There are several approaches to sampling, including DIY test kits that collect surface swabs or air samples and professional services that may use more sophisticated equipment. Surface sampling is common for areas with visible growth, while air sampling can reveal mold spores that move through the air. Each method has limitations; DIY kits may not capture all species or sources, while professional labs can provide a broader species profile and interpretation. When using any kit, follow the manufacturer instructions to avoid contamination and ensure samples are properly stored and labeled. The Mold Removal Lab team notes that choosing a method depends on goals, budget, and risk tolerance.
How to choose a testing plan
Start by defining your goals: confirm presence, identify species, or locate moisture sources. Decide whether a DIY kit is sufficient or if you need professional sampling and lab analysis. Consider the scope of testing, the number of rooms, and whether you need a formal report for a rental or sale. Look for certified labs and transparent pricing, and read reviews to gauge reliability. Remember that results should be interpreted in the context of moisture and building materials, not in isolation. The Mold Removal Lab recommends pairing testing with a moisture assessment to get a complete picture.
Interpreting mold test results
Interpreting results requires context. A positive result confirms the presence of mold but does not by itself indicate a health hazard. Look for notes on the species detected, spore counts, and sampling locations. More important is understanding where moisture is coming from and whether the building envelope needs repair. A professional mold inspection can provide an integrated interpretation and help translate lab reports into actionable steps. The goal is to translate results into moisture control and remediation plans.
Tools & Materials
- PPE (N95 mask or better)(Protects against exposure to mold spores)
- Disposable gloves(Use nitrile; keep hands clean)
- Safety goggles or face shield(Eye protection when disturbing mold)
- Sample collection kit or swabs(For surface sampling or air sampling devices)
- Seal-able specimen bags or sterile containers(Preserve collected samples)
- Flashlight or headlamp(Inspect dark areas)
- Notebook or digital device(Record locations, dates, and observations)
- Alcohol wipes or disinfectant(Sanitize tools before and after use)
- Moisture meter (optional)(Helpful to identify moisture sources)
- Camera or smartphone(Document visible growth for records)
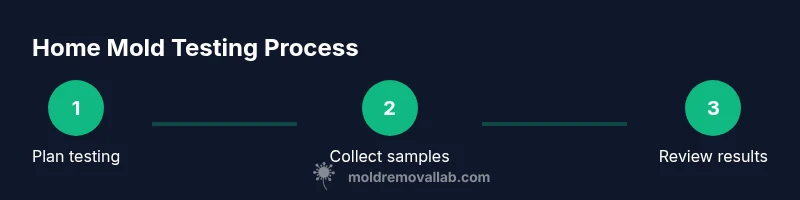
Steps
Estimated time: 2-4 hours for sampling in one or more rooms; results may take days from lab.
- 1
Define testing goals
Clarify whether you want to confirm mold presence, identify species, or locate moisture sources. Clear goals help you select the right sampling method and determine how many samples you need.
Tip: Write down the exact questions you want answered before you start. - 2
Choose your testing method
Decide between a DIY kit and professional testing. Consider the scope, your comfort with sampling, and whether you need a formal lab report for a landlord or buyer.
Tip: If you want species information, a professional lab is typically more thorough. - 3
Prepare the space
Clear clutter, seal off the area if needed, and turn off fans to avoid moving spores during sampling. Ensure a dry, calm environment to prevent sample contamination.
Tip: Avoid disturbing mold until sampling is ready, to preserve sample integrity. - 4
Collect surface samples
Use provided swabs or tape to sample the suspected growth or damp surfaces. Label each sample with location and date. Follow kit instructions to reduce contamination risk.
Tip: Avoid touching the sampling area with bare hands. - 5
Collect air samples (if applicable)
If your kit or lab offers air sampling, follow the device instructions and collect samples in a calm environment away from open doors and windows.
Tip: Keep a steady posture and avoid airflow that could skew results. - 6
Label and store samples
Place each sample in its labeled container or bag and store according to kit guidelines. Record the sampling location in your log.
Tip: Double-check that labels match the sample IDs. - 7
Submit or send samples to the lab
If using a professional service, coordinate pickup or drop-off as instructed. For DIY kits, mail or upload results as directed.
Tip: Keep tracking numbers and receipts for records. - 8
Review lab results
Once results arrive, review notes on detected species, spore counts, and sampling locations. Compare against moisture observations and building materials.
Tip: Highlight findings that point to moisture sources. - 9
Plan remediation and moisture control
Use results to guide remediation decisions, prioritize moisture control, and schedule follow-up testing after work is complete to verify improvements.
Tip: Address the moisture source first to prevent recurrence.
FAQ
Is DIY home mold testing reliable?
DIY kits can indicate mold presence, but they may not capture all species or sources. For precise identification and remediation planning, professional testing is often preferable.
DIY tests can show mold presence, but for precise identification, consider professional testing.
How long does mold testing take?
Sampling can be done in a few hours, and lab analysis may take several days depending on workload and scope.
Expect a few hours to collect samples, with results in a few days.
Do I need to test every room?
Not necessarily. Focus on rooms with moisture problems, visible growth, or musty odors. Sampling a representative subset is often sufficient.
Test areas with moisture or visible signs, not every room unless needed.
What should I do if a test is positive?
Follow the labs guidance and consult a licensed mold remediation professional. Address moisture sources first to prevent re-growth.
If mold is found, address moisture and hire professionals for cleanup.
Can bleach fix mold found by testing?
Bleach may kill some molds on non-porous surfaces but is not a universal solution. For porous materials, professional remediation is often necessary.
Bleach isn't a cure-all; depends on material and mold type.
Are there safety concerns testing in damp areas?
Yes. Damp spaces may harbor hazardous dust and mold spores. Wear PPE, ventilate, and consider professional help if unsure.
Yes, protect yourself with PPE and seek help if necessary.
Watch Video
The Essentials
- Define testing goals before you start
- Choose DIY or professional method based on scenario
- Document locations and results carefully
- Address moisture sources to prevent recurrence
- Consult professionals for remediation after confirmed mold presence