How to test for mold in your house
Learn practical, safe methods to test for mold in your house. This Mold Removal Lab guide covers DIY tests, professional sampling, interpreting results, and moisture-control strategies to keep your home healthy.

You can determine whether mold is present by a quick visual check, simple DIY tests, and professional sampling if needed. This guide helps you test for mold in your house safely, interpret results, and decide when to call an expert. You'll learn how to collect samples, avoid contamination, and understand common indicators of hidden mold.
Why testing for mold matters
Mold growth is more than a surface issue; it often signals a moisture problem that can affect indoor air quality and health. If you have allergies, asthma, or persistent sinus issues, mold exposure could be a contributor. According to Mold Removal Lab, testing is a critical first step when you notice staining, musty odors, or persistent humidity. If you’re curious about practical steps, you might ask yourself: how can you test for mold in your house? The short answer is: use a combination of visual checks, moisture assessments, and appropriately selected testing methods. Visual indicators—visible colonies, staining on walls, warped materials—often accompany hidden growth behind walls, under flooring, or in HVAC ducts. Moisture indicators such as condensation on windows, damp basements, or chronic leaks should heighten your suspicions. By pairing a careful inspection with basic moisture control (reducing humidity, fixing leaks, improving ventilation), you can reduce mold growth and improve your home’s safety. This section sets the stage for actionable testing approaches, so you can proceed with confidence.
How mold testing works: an overview
Mold testing encompasses several approaches, from simple at-home kits to professional sampling conducted by accredited labs. Most tests aim to answer two questions: Is mold present, and how much is there? DIY surface swabs and tape lifts can indicate presence, while indoor air samples and bulk samples can help quantify exposure risk. Importantly, results must be interpreted in the context of moisture conditions and building materials. Mold Removal Lab’s analysis emphasizes that testing is most effective when paired with remediation planning and moisture control, not as a stand-alone fix. Distinguish between removing visible growth and addressing the underlying moisture source—both are essential for lasting improvement. When you see musty smells, staining, or recurring leaks, testing becomes a proactive step toward safeguarding health and property.
DIY testing options you can use at home
At-home testing offers a practical first look at potential mold issues. Surface sampling kits use swabs or adhesive tapes to collect material from suspected areas, while indoor air kits measure mold spores in the air over a defined period. For many households, these tools provide helpful clues, especially when moisture sources are obvious. Always follow the kit instructions precisely and avoid cross-contamination by using clean gloves and separate tools for each area. In addition to kits, basic observations—humidity readings, visible mold growth, and odor patterns—are valuable data points. If you find elevated moisture or persistent problems after remediation attempts, DIY testing can help confirm improvements or reveal ongoing issues. Remember, DIY results are most reliable when paired with proper sampling techniques and subsequent analysis by a certified lab, if needed.
Professional testing and sampling methods
Professional mold testing offers more comprehensive insight, particularly for hidden mold or complex indoor environments. Experts can conduct targeted indoor air sampling, surface sampling from multiple locations, and, in some cases, moisture mapping and thermal imaging to locate concealed moisture sources. Lab analysis may differentiate between viable and non-viable spores and provide species-level identification, which can influence remediation strategies. Costs vary by service and scope, but the goal is to obtain a defensible assessment that informs remediation plans and moisture control improvements. When in doubt, a professional evaluation ensures you’re not overlooking hidden mold and helps prevent recurrence by addressing root causes.
Interpreting results and next steps
Interpreting mold results requires context. A positive finding doesn’t automatically imply immediate health risk; it indicates exposure potential and moisture conditions that favor growth. Compare results with moisture sources, air exchange, and occupancy patterns to gauge risk accurately. If mold is detected, remediation should focus on removing growth, repairing moisture intrusion, and improving ventilation. After remediation, consider follow-up testing to verify effectiveness and to ensure moisture levels have stabilized. Mold is a symptom of moisture; addressing the water problem is essential for long-term success.
Safety considerations when testing for mold
Mold testing can expose you to irritating spores, especially in poorly ventilated spaces. Wear appropriate PPE: a high-quality respirator (N95 or better), gloves, and eye protection. Avoid disturbing mold spores unnecessarily, which can aerosolize them and increase exposure. If you have severe allergies, asthma, or a compromised immune system, avoid DIY testing in favor of professional assessment. Never mix cleaning chemicals in testing areas, and ventilate the space during sampling. After collecting samples, seal and label them properly to prevent cross-contamination and store them according to lab instructions.
How often to test and preventive practices
There’s no one-size-fits-all testing schedule, but proactive checks after leaks, floods, or ongoing humidity issues are wise. Regular moisture control—fixing leaks promptly, using dehumidifiers in damp spaces, ensuring adequate ventilation, and maintaining clean, dry surfaces—reduces mold risk long-term. If you’ve completed a remediation effort, consider a follow-up test to confirm effectiveness and to verify that moisture has been controlled. Ongoing vigilance, not a one-time test, is the best defense against mold recurrence.
Tools & Materials
- Mold test kit (DIY surface and air tests)(Follow manufacturer instructions; choose kits with lab analysis options when possible)
- Disposable gloves(Nitrile are preferred for chemical resistance)
- N95 respirator or higher(Protects against inhalation of mold spores during sampling)
- Plastic bags and sealable containers(For collecting and transporting samples without contamination)
- Tape, swabs, and clean collection tools(Use dedicated tools for each sampling area to avoid cross-contamination)
- Labeling materials (markers, labels)(Clearly label each sample with location and date)
- Notebook or digital device(Record locations, observations, and dates)
- Camera or smartphone(Document visible mold and moisture sources)
- Cleaning supplies (soap, water, disinfectant)(Clean surfaces after sampling while avoiding cross-contamination)
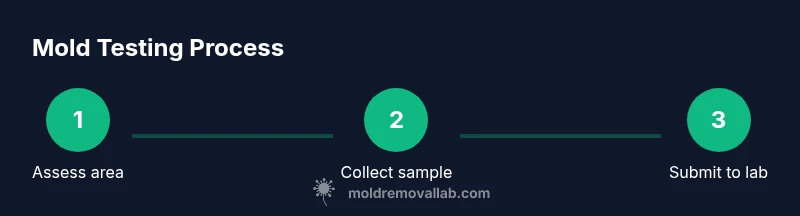
Steps
Estimated time: 60-90 minutes
- 1
Prepare and protect yourself
Put on PPE (N95 mask, gloves, eye protection) and ensure the space is ventilated. This protects you from irritants and reduces contamination of samples. Gather all planned testing materials before starting to minimize switching rooms.
Tip: Keep spare PPE in a sealed bag for quick access. - 2
Decide on testing method
Choose between DIY surface/air tests and professional sampling based on the scope and your goals. Consider whether you need rapid results or species-level identification for remediation planning.
Tip: If you suspect hidden mold, plan for at least one surface sample from suspected areas and an indoor air sample. - 3
Select sampling locations
Mark potential problem areas: obvious mold growth, damp basements, kitchens, bathrooms, and behind walls where leaks occurred. Use a consistent pattern to cover both problem zones and control areas.
Tip: Avoid disturbing mold colonies to prevent spore disruption unless you’re collecting samples. - 4
Collect surface samples
Use a sterile swab or tape lift as instructed by your kit. Sample multiple spots and label each with the exact location. Avoid cross-contact by using fresh tools for each area.
Tip: Take photos of each sampling site for reference during interpretation. - 5
Collect air samples
If using an air sampling kit, follow the device’s protocol and run the test for the specified duration. Keep doors and windows in their usual state to reflect normal conditions.
Tip: Seal the sampler if required after sampling to prevent contamination. - 6
Package and label samples
Place samples in their labeled containers and seal them securely. Include date, location, and any environmental notes. Follow kit or lab submission guidelines for packaging.
Tip: Double-check that containers are intact to avoid leaks during transport. - 7
Submit samples and wait for results
Submit to the lab or use the kit’s mail-in option. Record the submission date and expected turnaround time. Prepare to act on results with a moisture-control plan.
Tip: If results take long, consider interim moisture remediation to reduce ongoing growth.
FAQ
What is the best way to test for mold at home?
The best approach combines a visual inspection with a reputable DIY testing kit or professional sampling when needed. Use kits that specify lab analysis and follow procedures strictly to minimize false results.
Use a proven DIY kit and professional sampling when necessary; follow the instructions closely for reliable results.
Are DIY mold test kits reliable?
DIY kits can indicate mold presence but may miss hidden growth or exaggerate contamination due to improper sampling. For actionable results, consider lab confirmation and moisture assessment.
DIY kits are helpful as a first check, but lab confirmation is often needed for clear conclusions.
How long do mold test results take?
Lab-based results typically take a few days to a week, depending on the lab workload and the test type. DIY kits may provide results within minutes to days after analysis if mailed to a lab.
Most labs return results in a few days to a week; DIY kits vary by lab processing times.
Do I need to evacuate the house during testing?
Evacuation is usually unnecessary for standard surface or indoor-air tests, but you should minimize exposure by wearing PPE and avoiding disturbance of mold colonies, especially if you have health sensitivities.
You typically don’t need to leave, but protect yourself with PPE and limit disturbance.
When should I hire a professional for mold testing?
Hire a professional when mold covers large areas, is behind walls or in HVAC, or when you have persistent moisture issues despite cleaning. Professionals provide comprehensive sampling and expert interpretation.
Call a pro for big or hidden mold problems or ongoing moisture issues.
Can mold testing detect hidden mold behind walls?
Standard surface tests may miss hidden mold. Professionals can use specialized techniques and equipment to locate concealed growth, but it often requires moisture assessment and sometimes destructive testing.
Hidden mold can be tricky; professionals use special methods to locate it.
The Essentials
- Test mold presence alongside moisture controls in your home.
- DIY tests are helpful but may require lab verification for accuracy.
- Professional testing is advised for hidden mold or complex environments.
- Remediation should target both mold removal and moisture source repair.