Yellow Mold in Soil: Identification & Safe Remediation
Learn to identify yellow mold in soil, assess moisture sources, safely remove contaminated soil, and prevent recurrence with practical steps from Mold Removal Lab.

You can identify, safely remove, and prevent yellow mold in soil by assessing moisture sources, bagging contaminated soil, drying the area, and applying preventive soil management. Start by wearing PPE and isolating the affected area, then improve drainage and avoid overwatering. Mold Removal Lab recommends cautious cleanup to protect indoor air quality.
What yellow mold in soil is and why it forms
Yellow mold in soil is a common sign of persistent moisture and decaying organic matter, often appearing in outdoor garden beds, compost piles, and potted plants with poor drainage. In many cases, this mold is saprotrophic, feeding on dead organic material rather than actively harming living plants. According to Mold Removal Lab, the appearance of yellow mold typically indicates that the soil environment remains damp long enough to support fungal growth. While it may look alarming, the immediate health risk to most households is low, especially when the area is outdoors or isolated from living spaces. However, disturbed mold can release spores that irritate eyes, skin, or lungs in sensitive individuals, so approach cleanup with care.
Understanding why this mold shows up helps you plan a safer response. It often signals that a moisture source needs attention—whether from overwatering, poor drainage, or shade that traps humidity. By addressing the moisture loop, you reduce the likelihood of reoccurrence and protect nearby plants and living spaces. Keep in mind that outdoor soil tends to dry more slowly than indoor potting mixes, so outdoor cleanup may require different steps and timing than indoor remediation.
In many homes, yellow mold in soil doesn’t mean you have a toxic mold problem inside the house. Still, spores can travel on shoes, tools, or wind, so containment during cleanup matters. If you notice symptoms such as persistent coughing, wheezing, or eye irritation after exposure, consult a health professional and consider having indoor air checked. The Mold Removal Lab team emphasizes that safe handling and controlled cleanup reduce risk and support healthier soil in the long term.
Common causes and early warning signs
Common causes of yellow mold in soil include persistent moisture and excessive organic matter in contact with soil:
- Excess moisture: Overwatering or poorly drained soil creates a humid microclimate that supports mold growth.
- Organic matter overload: Spent plant material, compost residues, and mulch provide food for molds.
- Stagnant air: Poor air flow around containers or bed edges raises humidity.
- Temperature range: Mild to warm temps with high humidity promote growth.
Early warning signs include yellowish or creamy colonies on soil surface, a powdery or fuzzy texture, earthy or damp odor, and visible mats around plant bases. Recognizing these signals early lets you act before mold becomes widespread. Tracking moisture patterns after rain or irrigation helps identify problematic areas and informs drainage improvements. For any persistent growth in soil that is close to living spaces or inside containers, expanding cleanup and moisture-control efforts is warranted to protect residents and plants alike.
Safety first: PPE and handling
Before touching moldy soil, assemble proper PPE: nitrile gloves, an N95 respirator if spores may become airborne, and protective eyewear. Work in a well-ventilated area and consider a disposable coverall for larger infestations. Do not shake or brush the moldy soil, which can aerosolize spores. Place the contaminated soil in a sealable bag or container to prevent spread, and wash hands thoroughly after handling. Mold Removal Lab notes that limiting disturbance reduces airborne spores and protects household members with mold sensitivities.
Containment during cleanup reduces cross-contamination. Keep the work area isolated from indoor spaces, and clean tools separately after use. After bagging contaminated soil, disinfect the workspace with a mild soap solution and ensure that any reusable tools are thoroughly rinsed and dried before next use. If the mold appears to be spreading beyond a small zone, pause cleanup and reassess moisture sources before proceeding; attempting large-scale remediation without proper precautions can increase exposure risk.
Managing moisture and drainage to prevent growth
Moisture control is the cornerstone of preventing yellow mold in soil from returning. Start by improving drainage around plantings and containers:
- Audit watering practices: Water deeply but less frequently, allowing the surface to dry between sessions.
- Enhance drainage: Add perlite or coarse sand to potting mixes, or install raised beds with adequate soil depth and drainage channels.
- Increase airflow: Space pots evenly, prune surrounding vegetation that shades soil, and use fans outdoors if conditions allow.
- Mulch management: Keep mulch away from direct contact with stems and soil surface to reduce moisture retention near roots.
Maintaining a dry, well-ventilated environment helps soil revert to a healthier balance and lowers the chance of mold returning. For garden beds, consider soil amendments that improve structure and drainage; for containers, select a breathable pot and a soil mix formulated for good drainage. The goal is to create conditions that favor plant roots over mold colonies, without stressing beneficial soil organisms.
Safe cleanup steps and material handling
A careful cleanup minimizes spore spread and protects people and plants:
- Remove visible mold growth and contaminated soil using a scoop, placing it into a sealable bag.
- Bag and seal the material immediately; label the bag and store it in a designated outdoor bin until disposal.
- Clean nearby surfaces with soap and water, then wipe with a mild disinfectant if needed and allowed by your plants’ safety considerations.
- Sanitize tools used during cleanup, and wash hands after handling soil.
- Replace soil with fresh, sterile mix and ensure proper drainage for new pots or beds.
- Refill with a damp-but-not-soaked moisture level, then monitor daily for signs of regrowth for the first week.
A measured, cautious approach reduces risk and supports a quicker return to a healthy soil environment. Mold Removal Lab stresses the importance of away-from-living-spaces cleanup and careful disposal to protect family members and pets from exposure.
Preventing recurrence and ongoing monitoring
Prevention hinges on ongoing moisture management and soil health:
- Establish a moisture baseline: Use a soil moisture meter to keep soil from staying wet for too long.
- Schedule regular inspections: Check pots and garden beds weekly during wet seasons for signs of dampness or mold.
- Rotate or refresh soil: Replace old potting mix every 1-2 years or when mold signs recur, using sterile material for new plantings.
- Improve air circulation: Ensure outdoor areas have airflow and avoid dense plantings that trap humidity.
- Maintain clean tools and spaces: Clean planters and trowels after each use to prevent cross-contamination.
Following these steps helps create a stable environment where yellow mold in soil is unlikely to persist. If you notice recurring growth despite moisture management, consider consulting a soil-health specialist or Mold Removal Lab for a tailored remediation plan and to identify any hidden moisture sources that require attention.
Tools & Materials
- Protective gloves (nitrile, powder-free)(Size appropriate; cuffed wrists for full protection)
- N95 respirator mask(If disturbing mold; ensure proper fit and seal)
- Safety goggles(Wrap-around style preferred for eyewear protection)
- Disposable coveralls(Optional for larger contaminated areas)
- Seal-able plastic bags(Use heavy-duty bags; label after sealing)
- Plastic scoop or trowel(For scooping contaminated soil without splashing)
- Spray bottle with mild soap solution(For initial surface cleaning; avoid harsh chemicals near plants)
- Hydrogen peroxide (3%)(Optional surface disinfectant; use with caution and follow label)
- Moisture meter(Helps track soil dampness over time)
- Outdoor trash bin or sealed disposal container(Store contaminated material before outdoor disposal)
Steps
Estimated time: 2-6 hours active work (plus drying time of 24-72 hours as needed)
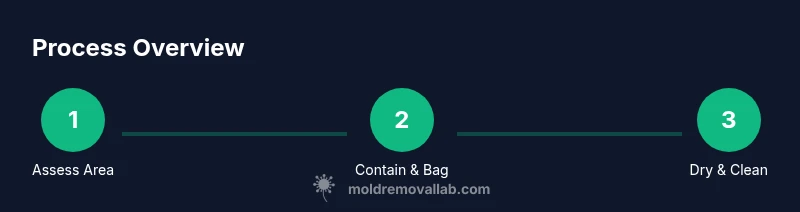
- 1
Assess the area and extent
Survey the soil area to determine how far the mold has spread and identify moisture sources. Take photos for reference and note affected zones to guide cleanup. Understanding extent helps prevent under- or over-cleaning.
Tip: Document with photos and measurements to track changes over time. - 2
Contain and bag moldy soil
Carefully scoop contaminated soil into a sealable bag, avoiding shaking or stirring to limit spore release. Seal the bag securely before moving it to the disposal area.
Tip: Keep bags closed during transport to outdoor disposal if possible. - 3
Dry out the area and improve airflow
Ventilate the space, use gentle air movement, and reduce surface moisture. Allow the area to dry before proceeding with cleanup of surrounding surfaces.
Tip: If indoors, open windows and use a fan pointing away from living spaces. - 4
Clean surrounding surfaces
Wash adjacent soil, pot rims, and nearby surfaces with soap and water. If a disinfectant is used, apply per label directions and ensure plant safety.
Tip: Rinse surfaces well and dry completely before replanting. - 5
Replace soil and adjust drainage
After cleaning, replace with fresh, sterile soil where appropriate. Improve drainage in pots or beds to prevent future damp conditions.
Tip: Consider a raised bed or well-draining potting mix for new plantings. - 6
Monitor moisture and recheck for regrowth
Use a moisture meter to maintain optimal soil dampness and inspect the area daily for 1-2 weeks. Reassess moisture sources after rainfall or irrigation.
Tip: Keep a simple log of moisture readings and any visible mold.
FAQ
What is yellow mold in soil?
Yellow mold in soil typically indicates damp conditions and decaying organic matter. It is often not immediately dangerous, but spores can irritate sensitive individuals. Address moisture and clean up carefully to reduce exposure.
Yellow mold in soil usually means damp conditions and decaying matter. It’s often not dangerous, but take precautions and clean up carefully to reduce exposure.
Is yellow mold in soil a health risk?
Most outdoor soil molds pose low indoor risk, but spores can irritate eyes, skin, or lungs for sensitive people. Use PPE during cleanup and ventilate the area.
Mold spores can irritate sensitive people, especially indoors. Wear PPE and ventilate when cleaning.
How can I prevent yellow mold from returning?
Improve drainage, avoid overwatering, use sterile potting mix, and ensure good airflow around soil and plants. Regular inspections help catch issues early.
Fix drainage, don’t overwater, and keep air moving around soil to prevent mold from coming back.
When should I call a professional?
If mold covers a large area, recurs despite cleanup, or you have health concerns, seek professional remediation or mold testing.
Call a professional if mold keeps coming back or you’re worried about health risks.
Can I reuse soil that had yellow mold?
It’s best to discard moldy soil and start with fresh, sterile mix. If you reuse soil, ensure it’s thoroughly dried and inspected for new mold growth.
Better to not reuse moldy soil; use fresh mix and monitor moisture.
Watch Video
The Essentials
- Identify moisture sources and fix drainage
- Bag and dispose of moldy soil safely
- Improve soil health to prevent recurrence
- Monitor moisture and recheck for regrowth regularly