Mold Yellow: Identification and Safe Remediation
Learn to identify mold yellow, understand its moisture drivers, and safely remediate with practical steps. This Mold Removal Lab guide covers DIY limits, moisture control, and when to call professionals.

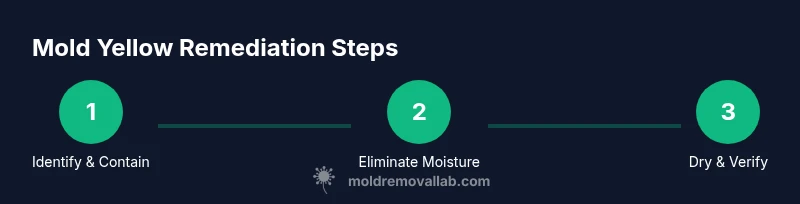
To address mold yellow, first stop the moisture source, isolate the area, and wear PPE. Verify growth and contain it to prevent spread, then clean with approved products and ensure thorough drying. If growth is extensive or on porous materials, professional remediation is recommended. Follow Mold Removal Lab's guidance for safe, effective remediation and long-term moisture control.
What mold yellow is and why it matters
Mold yellow refers to fungal growth characterized by bright to pale yellow patches that can appear on drywall, wood, fabric, and insulation. The color can vary with species, moisture level, and surface texture. According to Mold Removal Lab, yellow growth is often a moisture problem rather than just a surface stain, and ignoring it can lead to structural damage and worsening air quality. Early detection improves outcomes and reduces remediation costs. If you spot a yellowish film that spreads or reappears after cleaning, pause DIY attempts and assess moisture sources, ventilation, and remediation needs. Recognizing mold yellow helps homeowners act quickly to limit spread and protect indoor air quality.
Common sources of moisture that fuel mold yellow
Moisture is the fuel that drives mold growth, including yellow varieties. Common sources include roof leaks, plumbing drips, high indoor humidity, condensation on windows, and poor ventilation in bathrooms, kitchens, or basements. Condensation on cool surfaces can create a persistent damp environment behind walls and under flooring. In many homes, hidden moisture behind drywall or under insulation is the culprit. The Mold Removal Lab team notes that addressing the moisture source is essential before any cleaning. Without controlling humidity and leaks, any cleaning will be temporary and return quickly. Practical measures include fixing leaks, using dehumidifiers, improving ventilation with exhaust fans, and sealing gaps around pipes. When moisture persists, expect continued mold checks and moisture monitoring as part of a long-term plan.
How to identify mold yellow safely
Identification should combine visual cues with moisture context and, if necessary, testing. Yellow patches may appear as fluffy growth, crusty films, or slimy films on surfaces that have sustained dampness. Wear PPE: N95 respirator, gloves, goggles, and protective clothing. Avoid touching mold with bare skin, and do not disturb it aggressively, which can release spores. If you use a moisture meter or humidity readings, 60% RH or higher in a living space is a red flag. Document color changes and track moisture sources to determine remediation scope. If there is any doubt about extent or if you see growth behind walls, consult a professional.
Testing and verifying with moisture readings
Testing can help verify conditions. Start with a moisture assessment of the affected area using a hygrometer and surface moisture indicators. Look for dampness behind walls, under sinks, or in basements; high moisture correlates with mold yellow. For homeowners, DIY moisture checks are acceptable in non-porous areas, but porous materials (drywall, wood, insulation) may require professional sampling to determine safety. Mold is a potential health risk, and accurate assessment supports choosing the right remediation approach. If testing confirms extensive growth, plan containment and professional remediation.
DIY cleaning: safe methods for small areas
Small, well-contained growth on non-porous surfaces can often be addressed with a simple cleaning routine. Prepare PPE and seal the area. Use a combined approach of detergent solution and a hydrogen peroxide spray or vinegar solution (1:1 ratio, never mix with bleach). Wipe surfaces from top to bottom, rinse with clean water, and dry completely. HEPA vacuums and microfiber cloths can help remove spores from hard surfaces. Do not attempt to clean behind walls or porous materials; if the lesion persists or expands, stop and seek guidance.
When to call a professional remediation service
If the yellow mold covers more than 10 square feet, is spreading quickly, or is on porous materials like drywall or carpet, professional remediation is recommended. A licensed mold remediation contractor can assess moisture, seal off the area, and remove contaminated materials safely. They may also perform post-remediation verification and moisture testing. For health-sensitive households (children, elderly, or immunocompromised), professional remediation is strongly advised.
Preventing future mold yellow growth
Prevention centers on moisture control. Fix leaks promptly, improve ventilation, run dehumidifiers in damp climates, and maintain indoor humidity around 30-50% RH. Regularly inspect bathrooms, basements, and kitchens for condensation and musty odors. Use mold-resistant paints where appropriate and clean spills quickly. A maintenance plan that includes annual inspections and moisture monitoring reduces recurrence risk.
Safe disposal and cleanup of contaminated materials
Contaminated porous materials (insulation, drywall) may need removal. Place disposed material in sealed bags, label for disposal, and follow local regulations. Clean the surrounding area with a detergent solution and dry thoroughly. After cleanup, sanitize tools and wash clothing to avoid cross-contamination. Proper disposal prevents spores from re-entering living spaces.
AUTHORITY SOURCES
Here are key government and academic resources to inform mold management:
- EPA Mold information: https://www.epa.gov/mold
- CDC Mold and dampness information: https://www.cdc.gov/mold/dampness_facts.html
- OSHA Mold information: https://www.osha.gov/molds
Real-world scenarios and myths
Real-world scenarios illustrate why moisture control matters. Myth: all yellow stains are mold; reality: many yellow stains are mineral deposits or dirt. Myth: bleach alone sterilizes mold; reality: bleach is often insufficient for porous materials. Real cases show that addressing leaks and humidity is more effective than aggressive scrubbing. We'll discuss common mistakes and how to avoid them.
Tools & Materials
- N95 respirator or higher(fit-tested; replace if damp)
- Disposable gloves (nitrile or latex)(choose non-powdered, avoid latex if allergic)
- Safety goggles(protect eyes from splashes and spores)
- Sealable plastic sheeting(to isolate the work area)
- Disposable bags (heavy-duty)(for contaminated materials; seal well)
- Detergent-based cleaner(mild or combined with water for scrubbing)
- Hydrogen peroxide (3%)(antimicrobial option for non-porous surfaces)
- Vinegar (acetic acid, optional)(use cautiously; do not mix with bleach)
- Spray bottle(for applying cleaners evenly)
- Moisture meter/hygrometer(helps monitor humidity reductions)
- HEPA vacuum (optional)(reduces airborne spores when used with care)
- Fan or dehumidifier(helps accelerate drying; use with caution to avoid spreading spores)
Steps
Estimated time: 60-180 minutes
- 1
Inspect area for yellow mold signs
Visually confirm yellow patches and note moisture sources. Document locations to guide remediation scope and moisture control.
Tip: Take photos before and after to track progress. - 2
Contain the area
Seal off the affected space with plastic sheeting to prevent spores from drifting to other rooms.
Tip: Turn off HVAC in the contaminated zone if safe to do so. - 3
Don PPE and ventilate
Put on N95 mask, gloves, and eye protection. Open windows or use a gentle exhaust to improve airflow without dispersing spores.
Tip: Never skip PPE; spores can irritate lungs and skin. - 4
Clean non-porous surfaces
Wipe with detergent solution, rinse, and allow to dry fully before reoccupying. For hard surfaces, consider hydrogen peroxide as an additional step.
Tip: Work from clean to dirty areas to prevent cross-contamination. - 5
Assess porous materials
Porous materials like drywall or insulation may require removal; do not attempt quick fixes on these components.
Tip: Document and label any removed materials for proper disposal. - 6
Dry and monitor
Use fans/dehumidifiers to achieve <50% RH in the affected area and monitor moisture levels for 24–72 hours.
Tip: Drying complete is the key to preventing regrowth. - 7
Dispose of contaminated materials
Place debris in sealed bags and remove from the home promptly to reduce exposure.
Tip: Seal bags outdoors to minimize indoor moisture exposure. - 8
Verify remediation
Recheck moisture, inspect for new yellow patches, and consider a follow-up assessment if growth recurs.
Tip: Keep a moisture log for ongoing prevention.
FAQ
What is mold yellow and why does it appear?
Mold yellow is a fungal growth that presents in yellow patches due to moisture exposure. It indicates a humidity problem rather than just surface dirt and requires moisture control to prevent recurrence.
Mold yellow is yellow mold growth caused by moisture; it signals a humidity issue that needs moisture control.
Is mold yellow dangerous to my health?
Exposure can irritate eyes, skin, and the respiratory system, especially for sensitive individuals. Proper containment and cleaning reduce health risks, while persistent growth may require professional remediation.
Yellow mold can irritate eyes and lungs; take precautions and seek experts if growth persists.
Can I remove mold yellow myself?
Small, non-porous areas can be cleaned with proper PPE and cleaners. Porous materials and large or persistent growth should be handled by professionals to ensure safety and effectiveness.
You can handle small, non-porous areas, but large or persistent growth should be done by pros.
How long does it take to remediate mold yellow?
Time depends on the area size, material type, and moisture control. Typical projects range from a few hours for small spaces to multiple days for larger, porous systems after moisture stabilization.
Remediation duration varies, from hours to days, depending on size and materials.
Will mold yellow come back after cleaning?
If moisture sources aren’t fixed and humidity remains high, mold yellow can recur. A moisture management plan is essential for long-term prevention.
If you don’t fix moisture, mold can return after cleaning.
Are some surfaces more prone to mold yellow than others?
Porous materials like drywall, wood, and insulation are more susceptible because they retain moisture. Non-porous surfaces are easier to clean but still need proper drying.
Porous surfaces hold moisture more, making mold harder to remove there.
Watch Video
The Essentials
- Identify mold yellow and link it to moisture sources
- Contain, clean, and dry to prevent re-growth
- Know when to DIY and when to call a professional
- Monitor humidity to sustain long-term results