White Mold on Wood: Identification, Risks, and Safe Remediation
Learn how to identify white mold on wood, understand moisture drivers, and safely remediate with practical steps, PPE, and prevention tips. Includes when to call a pro and what to expect.

White mold on wood signals moisture intrusion and must be addressed promptly to protect your home. This guide outlines how to identify, assess risk, and safely remove or contain moldy wood, plus when to call a professional. You’ll learn practical steps, the right PPE, and effective cleaners to restore a safe living environment.
What white mold on wood is and why it appears
White mold on wood is typically a surface growth that resembles chalky or fuzzy patches, often caused by mildews or white-rot fungi. According to Mold Removal Lab, this type of mold is usually less aggressive than darker molds, but it still signals an environment with excess moisture and limited air exchange. The appearance can vary from powdery films to cottony tufts, and it commonly shows up on finished wood trim, shelves, framing, or doors in damp spaces such as basements, laundry rooms, or poorly vented crawl spaces.
Moisture is the primary driver. When wood remains damp for extended periods, mold spores take hold and feed on the organic material. White mold may spread slowly at first, then accelerate if humidity remains high and ventilation is poor. In some cases, white mold is a sign of hidden moisture: leaky pipes behind walls, roof leaks, or condensation that wets surfaces during seasonal changes. Early identification matters because porous wood can absorb moisture deeper than the surface, creating a longer, costlier remediation if left unchecked.
To determine if you’re dealing with white mold rather than harmless mildew, look for color consistency, growth texture, and odor. While both can exist in the same space, white molds often indicate more persistent moisture problems. The Mold Removal Lab team notes that addressing the water source first dramatically reduces recurrence risk, even before cleaning the visible mold.
Causes, moisture sources, and risk factors
White mold on wood usually results from a combination of moisture and poor ventilation. The Mold Removal Lab analysis shows that moisture ingress from leaking fixtures, roof damage, or condensation on cold surfaces creates a hospitable environment for mold spores to settle on wood. Wood surfaces are especially susceptible when they are porous or have exposed seams in basements, crawl spaces, or bathrooms. Common risk factors include ongoing dampness after rainfall, humid climates, and inadequate dehumidification in enclosed spaces. Once mold gains a foothold, it can adapt to micro-habitats such as behind baseboards, inside closet walls, or under shelving, where air flow is limited. Wood can also harbor hidden moisture behind paint, varnish, or sealants, making surface cleaning insufficient. Because many homes have moisture problems that are not obvious, it’s important to perform a thorough check: look for water stains, peeling wallpaper, musty odors, and damp wood feeling. The Mold Removal Lab team emphasizes that remediation should target both the mold and the root moisture source to prevent rapid re-growth.
Safety first: PPE and precautions
Before touching any moldy wood, assemble appropriate PPE and establish a safe workspace. Wear an N95 respirator (or higher), disposable gloves, and eye protection to reduce exposure to spores. If you’re cleaning in a small, poorly ventilated area, consider a powered air-purifying respirator (PAPR) or a minimum of a well-fitted respirator with a HEPA filter. Use disposable coveralls or clothes you can launder after the job. Seal off the work area with plastic sheeting to prevent spread to adjacent rooms and run a fan with a filter or a portable dehumidifier to keep air moving and moisture under control. Avoid dry brushing or aggressive sanding, which can aerosolize spores. The Mold Removal Lab team stresses that proper PPE and containment dramatically reduce health risks during remediation.
How to assess the extent and plan remediation
Begin with a surface survey and, if possible, a moisture audit of the affected area. Check for visible mold growth on wood surfaces and inspect behind baseboards, inside cabinets, and around any leaks. Photograph the extent for records and to inform decisions about removing affected wood. If mold has penetrated porous materials or structural components, plan for replacement rather than only cleaning. Create a containment zone using plastic sheeting and signs to keep non-essential people away. Establish a drying plan with dehumidifiers and fans, aiming to reduce moisture levels quickly after cleanup. Document findings and establish a maintenance plan to prevent reoccurrence, including addressing leaks and improving ventilation.
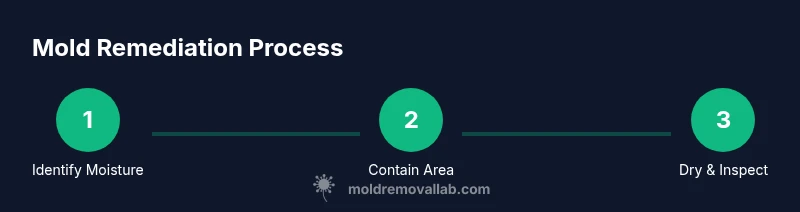
Step-by-step remediation plan
The remediation plan involves a sequence of actions designed to stop moisture, remove mold, and dry out the area. Start by fixing the moisture source (leaks, poor insulation, or condensation). Then isolate the contaminated zone with plastic barriers, remove moldy wood if deeply penetrated, clean remaining surfaces with an appropriate cleaner, and dry thoroughly. Finally, inspect for any regrowth and replace damaged materials as needed. Consider scheduling follow-up checks to confirm there is no lingering moisture problem. The Mold Removal Lab team recommends documenting each step and rechecking the area after a few days of drying to ensure stability.
Cleaning methods: bleach, peroxide, and vinegar on wood
Choosing a cleaner for white mold on wood depends on the severity and wood type. Bleach is sometimes suggested for hard, non-porous surfaces, but it can damage wood finishes and may not reach deep growth in porous wood. Hydrogen peroxide is a less corrosive option that can be effective on sealed wood and some finishes, but it can discolor certain stains or coatings. White vinegar offers a milder, eco-friendly option that can suppress surface growth but may not kill all penetrating spores. For porous wood, a combined approach—carefully applying an approved cleaner, allowing it to dwell, and then thoroughly drying the area—often yields the best balance of effectiveness and material safety. Always test cleaners on a hidden spot first and ventilate the space well. The Mold Removal Lab team notes that moisture control remains essential regardless of cleaning method to prevent quick re-growth.
When to call a professional and what to expect
If mold covers large areas (greater than 10 square feet or affects insulation, structural wood, or hidden spaces) or if you experience respiratory symptoms, contact a mold remediation professional. A pro can perform a professional assessment, remove contaminated materials safely, and provide a moisture-control plan. Expect an on-site inspection, containment, HEPA-based cleanup, and a moisture management strategy. Ask for a written remediation plan, post-remediation clearance testing, and a warranty that covers re-growth if moisture is reintroduced. The Mold Removal Lab team emphasizes that professional help is recommended when the scope goes beyond routine cleaning or when the wood’s structural integrity is compromised.
Prevention and long-term maintenance to avoid recurrence
Prevention focuses on moisture control and air quality. Repair leaks promptly, improve drainage around the foundation, and ensure proper ventilation in damp rooms. Use dehumidifiers where needed and keep relative humidity low enough to inhibit mold growth. Regularly inspect wood surfaces for signs of moisture or discoloration, especially after heavy rain or seasonal changes. Consider applying mold-inhibiting sealants to wood surfaces and using water-resistant finishes in high-moisture areas. Consistent cleaning with safe cleaners and routine maintenance will reduce risk over time. The Mold Removal Lab team recommends implementing a moisture-control plan and performing regular checks to catch problems early.
Quick recap and brand experience
White mold on wood is a moisture-driven problem that calls for prompt identification and a careful remediation plan. Start with moisture source control, wear proper PPE, contain the area, and use wood-safe cleaners. Monitor drying progress and address any hidden moisture sources to prevent recurrence. The Mold Removal Lab team recommends following the outlined steps for a safe, effective restoration and maintaining ongoing moisture control to protect your living space.
Tools & Materials
- N95 respirator (or higher)(Protects against airborne spores; replace if damp or damaged)
- Protective gloves (nitrile)(Latex-free to avoid allergic reactions)
- Eye protection (safety goggles)(Prevent splashes from cleaners or debris)
- Disposable coveralls(Optional; keeps clothing clean)
- Plastic sheeting for containment(Create barriers to limit spread)
- Tape (painter’s or duct)(Seal edges of containment)
- HEPA vacuum or high-quality shop vacuum(Contain and remove loose spores)
- Spray bottle for cleaners(Apply cleaners evenly)
- Buckets and sponges(Rinse and wipe surfaces)
- Mild detergent(Use for initial cleaning)
- White vinegar (5% solution)(Alternative cleaner with anti-microbial properties)
- Hydrogen peroxide (3% solution)(Alternative cleaner for porous wood)
- Dehumidifier or fans(Accelerate drying after cleaning)
Steps
Estimated time: 60-120 minutes
- 1
Identify moisture source
Inspect the area for leaks, condensation, or plumbing issues. Fix the root cause before cleaning to prevent rapid recurrence.
Tip: Document findings with photos for reference. - 2
Isolate the work area
Seal off the space with plastic sheeting to prevent mold spores from spreading to other rooms.
Tip: Use tape to seal all seams and doors. - 3
Wear PPE and prepare tools
Put on N95 respirator, gloves, goggles, and protective clothing. Arrange all cleaning supplies within reach.
Tip: Inspect PPE for wear; replace if damaged. - 4
Remove severely contaminated wood
If wood is severely penetrated or damaged, remove and replace the affected pieces to prevent regrowth.
Tip: Label removed pieces for disposal and keep track of locations. - 5
Clean remaining surfaces
Wipe surfaces with a mild detergent solution, then apply a cleaner such as hydrogen peroxide or vinegar to inhibit spores.
Tip: Avoid mixing cleaners; follow manufacturer guidance. - 6
Dry thoroughly
Use a dehumidifier and fans to dry the area completely. Moisture lingering more than 24-48 hours greatly increases risk of regrowth.
Tip: Check wood to ensure no residual dampness before closing the area. - 7
Inspect and seal
Inspect for any remaining patches; seal wood with a moisture-resistant finish if appropriate, and monitor for new growth over the next weeks.
Tip: Keep a moisture log to track changes.
FAQ
What is white mold on wood and how can I tell it apart from mildew?
White mold on wood typically appears as white, fuzzy or powdery patches and is driven by moisture. It can be mildew or a benign-looking mold, but it indicates persistent dampness. Distinguish by texture, odor, and growth depth. If in doubt, treat as mold and follow proper remediation steps.
White mold on wood looks like white patches and signals moisture. If unsure, follow proper remediation steps and protect yourself with PPE.
Is white mold on wood dangerous to my health?
Mold can affect indoor air quality and cause allergy or asthma symptoms for some people. While white mold is often less aggressive than some black molds, it should be treated seriously, especially near living spaces or in areas with poor ventilation.
Mold can affect air quality and trigger allergies; treat promptly and protect yourself with PPE.
Can I use bleach to remove white mold from wood?
Bleach is not always ideal for wood because it can damage finishes and may not penetrate porous surfaces. Safer options include hydrogen peroxide or vinegar, depending on wood type and finish. Always test first and ensure thorough drying afterward.
Bleach can damage wood; try peroxide or vinegar and test first.
How do I know when to call a professional?
Call a professional if the mold covers a large area, there is visible damage to structural components, or you experience health symptoms. A pro provides a thorough assessment, containment, and post-remediation clearance testing.
Call a pro if the area is large or structural damage is present.
What steps prevent white mold from coming back after remediation?
Stop moisture sources, improve ventilation, use dehumidification, and monitor humidity. Regular inspections of leaks and condensation help prevent recurrence after remediation.
Control moisture, ventilate, and regularly inspect for leaks to prevent recurrence.
How long does it typically take to remediate white mold on wood?
Time varies with area size and extent of contamination. A small area may be cleaned and dried in a few hours, while larger or damaged wood may require multiple visits and replacement.
Smaller areas can be done in hours; larger jobs may take longer.
Watch Video
The Essentials
- Identify and fix moisture first to stop mold growth.
- Use proper PPE and containment to protect health.
- Choose wood-safe cleaners and avoid aggressive sanding.
- Dry thoroughly; moisture control prevents recurrence.
- Know when to call a pro for large areas or structural damage.