White Mold on Wall: A Practical Remediation Guide
Learn to identify white mold on walls, control moisture, and safely remediate spaces. This practical guide from Mold Removal Lab covers DIY steps and when to call pros.

A white mold on wall signals ongoing moisture and fungal growth. This guide helps you identify, contain, and safely remediate the issue, prioritizing moisture control and proper cleanup. If the growth is extensive or suspicious of hidden damage, professional help is advised. Mold Removal Lab emphasizes moisture management as the foundation of any remediation.
What white mold on wall is and why it forms
White mold on wall is a common sign of moisture problems that allow fungi to grow on interior surfaces. It often appears as powdery patches or fuzzy cultivations and can spread quickly if moisture isn’t controlled. The term “white mold” covers several fungal organisms that thrive in damp environments, including condensation-prone bathrooms, kitchens, basements, and rooms with leaky plumbing. According to Mold Removal Lab, moisture and humidity are the primary drivers of white mold on wall growth, making moisture control essential. This type of growth isn’t just a cosmetic issue; it signals underlying conditions that can affect indoor air quality and occupant health. In homes, even a small ongoing leak or poor ventilation can sustain mold colonies over weeks or months. The key is to act promptly, identify the moisture source, and begin a safe remediation plan that addresses both the visible mold and the hidden moisture.
Causes and where water comes from
Moisture can reach walls through multiple pathways. Leaky roofs, burst pipes, and plumbing leaks are obvious culprits, but condensation from poor insulation, gaps around windows, and high indoor humidity also feed mold growth. In kitchens and bathrooms, steam and splashes create micro-environments where mold can flourish on studs, drywall, or paint films. When moisture remains, mold spores settle, germinate, and form visible colonies such as white patches, specks, or films. The Mold Removal Lab team emphasizes that the root cause must be addressed first; without fixing leaks, dehumidifying, and improving ventilation, any cleanup will be temporary at best. Regular moisture control measures—like fixing leaks, sealing gaps, and using exhaust fans—help prevent recurrence.
Visual cues and simple at-home tests to identify mold
Visible signs of white mold on wall include powdery or fluffy patches that may appear dull or bright depending on lighting. Smells can be musty, especially in damp spaces. At-home tests such as tape lifts or simple surface swabs can help confirm fungal presence, but they do not replace professional testing for hidden growth. If you see mold after cleaning and drying, or if the area is porous and has extensive staining, it’s a sign to pause and reassess moisture sources. Document affected areas with photos and note any leaks, condensation, or humidity spikes. For many homeowners, a combination of visual inspection and moisture readings (relative humidity and surface moisture) provides enough data to start a remediation plan without complex lab work.
Safety first: protective gear and area containment
Before touching anything, equip yourself with an N95 respirator, protective gloves, and eye protection. Avoid disturbing mold spores, which can become airborne with agitation. Set up containment by closing doors to the affected room and laying plastic sheeting to prevent cross-contamination to adjacent spaces. If you’re cleaning in a multi-story home, consider restricting access to children and pets during the process. Remember that mold growth is often a sign of ongoing moisture; balancing safety with speed helps reduce exposure and keeps other areas dry.
Cleaning methods: what works on walls and what's risky
Cleaning white mold on wall should start with non-porous surfaces using detergent and water or a mild cleaner. On painted drywall, you can scrub gently with a sponge and allow the area to dry completely. For more stubborn patches, hydrogen peroxide (3%) or white vinegar can be effective on non-porous surfaces, but avoid mixing cleaners that create harmful fumes. Bleach is generally not recommended for porous materials like drywall or plaster because it can damage the surface and release spores during application. Always test a small area first, and never apply cleaners to damp, mold-laden plaster that is crumbling. After cleaning, dry the surface thoroughly to inhibit regrowth.
Handling different wall materials: drywall, plaster, and painted surfaces
Walls aren’t all created equal when mold remediation begins. Drywall and plaster are porous; mold can penetrate these materials, making complete removal more involved. Painted walls may hide deeper issues beneath the paint layer. If the affected area is small and the material isn’t structurally compromised, cleaning and repainting might suffice. However, when plaster or drywall shows soft spots, crumbling edges, or persistent staining after cleaning, you’ll need to cut out and replace sections. In some cases, encapsulating small, affected areas with mold-resistant sealants before repainting can help seal minor growth, but that’s only a partial solution if moisture isn’t controlled.
Moisture control: dehumidification, ventilation, and repairs
Effective remediation hinges on moisture control. Use dehumidifiers to lower indoor humidity to comfortable levels (generally below 50-60%), run exhaust fans in moisture-prone rooms, and repair leaks promptly. Improve ventilation by using operable windows or air exchangers to remove humid air. If a leak is present, repair it and insulate pipes to reduce condensation. Regularly check for dampness on walls, especially after rain or heavy use of moisture-generating activities. Sustained moisture control reduces the chance of mold returning after cleanup.
When to decide DIY vs professional remediation
DIY can address small, clearly visible white mold on wall after moisture is controlled and the materials are non-porous or minimally affected. If you see extensive growth, damage to structural components, or mold behind walls, it’s wise to call a professional remediation service. Mold professionals have specialized equipment to assess hidden moisture issues and can implement containment and thorough cleanup to reduce recontamination risk. In cases where you’re unsure about the extent of growth or the structural integrity of the wall, professional guidance is recommended.
Post-remediation testing and monitoring
After cleanup and drying, retest or re-inspect to confirm mold has been removed and humidity is under control. A simple moisture meter and surface check can help verify that the space dries thoroughly. Maintain ongoing humidity control, repair leaks promptly, and monitor for new signs of moisture or odor. Document all steps taken and keep a log of humidity readings to track changes over time. Regular checks help ensure the remediation sticks and that white mold on wall doesn’t return.
A practical remediation checklist you can print
- Identify moisture sources and affected areas
- Wear PPE and contain the space
- Clean non-porous surfaces with detergent; treat stubborn patches carefully
- Dry thoroughly with dehumidifiers and airflow
- Assess wall materials; replace damaged drywall if needed
- Repaint with mold-resistant primer and paint
- Re-test humidity and surface condition
- Maintain moisture controls to prevent recurrence
Tools & Materials
- N95 respirator(Fit securely; replace if damp)
- Protective gloves (nitrile or latex)(Chemical-resistant if using cleaners)
- Safety goggles(Protect eyes from splashes)
- Plastic sheeting or painter's drop cloths(Used for containment)
- Tape (painter’s/packing)(Seal edges of containment)
- Buckets and sponges(For cleaning and rinsing)
- Mild detergent or dish soap(First cleaning step)
- White vinegar (5-20% acetic acid)(Alternative for gentle mold treatment)
- Hydrogen peroxide (3%)(Effective on non-porous surfaces)
- Plain water spray bottle(For rinsing and dampening)
- Dehumidifier or large fans(Drying and humidity control)
- Moisture meter or humidity gauge(Useful for monitoring humidity)
- Replaceable wall material (if needed)(Drywall/plaster replacement)
- Mold-resistant primer and paint(Prevents future mold growth)
Steps
Estimated time: 2-8 hours
- 1
Identify mold presence and moisture sources
Inspect affected areas and document the extent of visible white mold on wall. Check for leaks, condensation, or high humidity sources. Take photos and mark boundaries before starting cleanup to guide future repairs.
Tip: Capture wide and close-up images to track changes. - 2
Shut off moisture sources and ventilate
Stop the moisture source where possible (fix leaks, drain condensation). Open windows or use fans to promote air movement. If the space is occupied, restrict access to reduce exposure.
Tip: Address leaks within 24-48 hours to prevent spread. - 3
Protect yourself and prepare containment
Put on PPE before handling mold. Set up containment with plastic sheeting to prevent spores from reaching other areas. Seal doorways and vents as needed.
Tip: Keep children and pets away from the area during cleanup. - 4
Contain the area to prevent cross-contamination
Keep the affected room isolated; cover surfaces that could spread spores. Remove textiles or furniture if safe, and centralize cleaning to minimize movement.
Tip: Do not reuse rags on clean areas after touching moldy surfaces. - 5
Clean non-porous surfaces with detergent
Wash walls and hard surfaces with a mild detergent and water. Rinse with clean water and dry promptly to reduce residual moisture.
Tip: Rinse thoroughly to prevent soap residue from attracting dust. - 6
Treat porous materials with caution
If mold has penetrated porous materials like drywall, assess whether removal or encapsulation is appropriate. In many cases, affected sections must be removed and replaced.
Tip: Porous materials with crumbling edges should be removed rather than cleaned. - 7
Dry the space thoroughly
Run dehumidifiers and fans to drive down humidity and dry surfaces completely. Use a moisture meter to verify drying goals.
Tip: Keep airflow consistent for 24-72 hours depending on space. - 8
Repair and seal surfaces
Replace damaged drywall if needed, seal with mold-resistant primer, and repaint with a mold-resistant paint to reduce future growth.
Tip: Ensure the area remains dry for at least 24 hours before painting. - 9
Test for residual mold and monitor humidity
After cleanup, re-check the area for any remaining visible mold and verify humidity levels stay low. Set up ongoing checks to catch moisture spikes early.
Tip: Keep a simple moisture log for the first month after remediation.
FAQ
Is white mold on wall dangerous to my health?
Exposure to mold can irritate eyes, skin, and lungs, especially for people with allergies or asthma. Take precautions during cleanup and address moisture promptly. If you have ongoing respiratory symptoms, seek medical advice.
Mold can irritate lungs and trigger allergies; limit exposure during cleanup and consider professional help if symptoms persist.
Can I remove white mold on wall by myself?
For small, clearly accessible areas with a known moisture source, DIY cleanup is possible using safe cleaners and proper PPE. If mold covers a large area, is behind walls, or reappears after cleaning, consult a professional.
You can start DIY cleanup for small spots if moisture is fixed, but call a pro for larger problems or persistent growth.
What cleaning products work best for white mold on wall?
Detergent and water are effective on non-porous surfaces. Hydrogen peroxide or white vinegar can supplement cleaning on non-porous areas. Avoid mixing cleaners and never rely on bleach for porous materials.
Use detergent or hydrogen peroxide on non-porous surfaces, and be careful not to mix cleaners or use bleach on porous walls.
Should I seal or repaint after removing mold?
Once the area is completely dry, apply a mold-resistant primer and paint. Sealing helps prevent moisture ingress, but the root cause (moisture) must remain controlled.
After drying, repaint with mold-resistant products to reduce future growth, but keep moisture in check.
How long does remediation take?
Time depends on the extent of growth and the materials involved. Plan for several hours to a couple of days if replacement is needed. Always prioritize drying and moisture control to prevent reoccurrence.
It can take from several hours to a couple of days, depending on area and materials, with moisture control as the focus.
When should I call a professional?
Call a professional if mold covers a large area, is hidden behind walls, or moisture problems continue after initial cleanup. Professionals can assess hidden damage and implement proper containment and remediation.
If the growth is extensive or hidden, or moisture keeps returning, seek professional help.
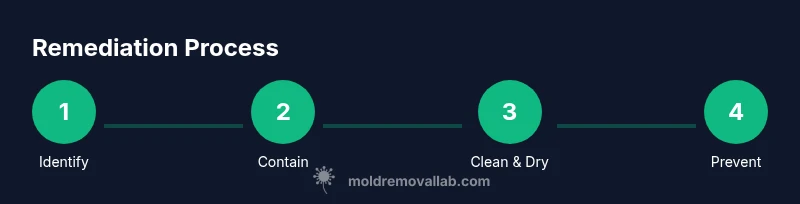
The Essentials
- Identify moisture sources and affected areas.
- Contain the space to prevent mold spread.
- Clean and dry promptly to prevent recurrence.
- Address structural moisture and ventilation long-term.
- Test after remediation and monitor humidity regularly.