Mold on Wood: A Practical Guide for Homeowners
Learn how to safely identify, clean, and prevent mold on wood in your home. This comprehensive how-to covers moisture control, PPE, cleaning methods, drying, and ongoing prevention for homeowners and renters.

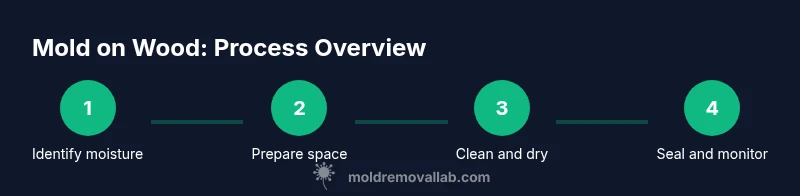
You can identify, clean, and prevent mold on wood with a safe, step-by-step approach. The steps cover moisture source control, PPE use, choosing suitable cleaners, thorough drying, light sanding or sealing, and ongoing humidity management to prevent regrowth. Key requirements include good ventilation, a moisture-free environment, and a plan to monitor progress. For extensive growth or hidden mold, seek professional remediation.
What mold on wood is and why it matters
According to Mold Removal Lab, mold on wood is a common sign of chronic moisture exposure. When moisture remains in wood fibers, mold spores settle and colonize, leading to visible patches, a musty odor, and potential health concerns. Wood is porous and can retain moisture even after apparent water events, creating favorable conditions for mold growth behind finishes such as paint or stain. Recognizing mold on wood early helps prevent structural damage and reduces indoor air quality risks for occupants. This guide, grounded in Mold Removal Lab Analysis, 2026, walks homeowners through safe identification, assessment, and remediation steps. It emphasizes moisture source control, proper PPE, ventilation, and gradual drying to avoid spreading spores to adjacent areas. By the end, you’ll have a clear plan to protect wooden surfaces without unnecessary disruption to your home.
Brand guidance: The Mold Removal Lab team emphasizes prudence and safety. Early action is essential to minimize damage and protect family health.
Wood types and mold susceptibility: what homeowners should know
Wood species and finishes influence how mold behaves. Softwoods like pine tend to absorb moisture more quickly, while hardwoods such as oak resist absorption better when properly sealed. Plywood, OSB, and MDF are more vulnerable because their inner layers can wick moisture behind coatings, creating hidden pockets where mold thrives. Surface mold on sealed or painted wood may be easier to remediate than mold that has penetrated the wood grain. Understanding the wood type helps tailor cleaning approaches and determines whether sanding or partial replacement is required. When assessing, note the wood species, whether finishes are intact, and if growth occurs in damp zones like basements, kitchens, or bathrooms. A careful inventory sets the stage for effective remediation and prevention.
Safety first: PPE, ventilation, and indoor air quality
Mold can pose respiratory irritants and allergen exposure risks, so safety takes priority. Always wear an N95 respirator (or higher), chemical-resistant gloves, and eye protection. Work in a well-ventilated area; if home occupants have allergies or asthma, temporarily relocate as needed. Avoid mixing cleaners, and never use chlorine bleach on porous wood with active moisture, as fumes and reactions can aggravate symptoms. Keep pets and children away during cleanup. After finishing, seal contaminated waste in sealed bags and dispose of them safely. Proper PPE and ventilation reduce exposure and make the remediation flow smoother.
Assessing moisture sources and extent of mold growth
Before cleaning, locate and repair moisture sources such as leaks in roofs, pipes, or HVAC systems. Use a moisture meter to gauge humidity levels and check for condensation patterns, which indicate ongoing moisture intrusion. Document affected areas with photos to support decisions on whether you can treat in place or need to replace sections. Mold growth on wood is often a sign of hidden moisture behind panels or within framing; if growth appears across multiple surfaces or recurs after cleaning, professional guidance is prudent to prevent recontamination and structural damage.
Cleaning options: DIY methods vs professional remediation
For light, surface mold on non-porous or sealed wood, soap and water or gentle cleaners may suffice. White vinegar can be used for a mild antimicrobial effect on non-porous surfaces; hydrogen peroxide is another common option for some porous surfaces when used cautiously. When wood is deeply porous or partially decayed, or when mold returns after cleaning, DIY methods may be inadequate and professional remediation is recommended. Always test cleaners on a inconspicuous spot to check for staining or finish damage. If odor persists after cleaning and drying, consider further action or professional evaluation.
Drying and humidity control after treatment
Drying the wood thoroughly is critical to preventing regrowth. Use towels to remove surface moisture, then employ a dehumidifier and increased air circulation to lower relative humidity in the space (target under 60%). Avoid blowing contaminated air toward clean areas; direct airflow out of the space while ensuring the wood surface reaches complete dryness. Re-check moisture levels with a meter after 24–48 hours and continue until readings stabilize. A dry space discourages mold return and protects finishes and framing.
Sealing, finishing, and long-term prevention
Once wood is dry and mold-free, sealing or refinishing can help reduce future moisture uptake, but it does not cure underlying moisture issues. Repaint or refinish only after the wood has fully dried and there is no visible mold. Improve ongoing humidity management by running bathroom exhausts, repairing leaks promptly, and maintaining indoor humidity between roughly 30–50%. Regular inspections of damp areas—such as kitchens, bathrooms, and basements—help catch early signs of moisture intrusion and allow timely intervention to prevent mold on wood from returning.
Real-world scenarios and decision points for homeowners
In scenarios like a damp closet shelf or a bathroom vanity panel, assess the extent of mold and whether the wood is structurally sound. Isolate the affected area, dry thoroughly, and monitor progress. If mold is active behind wall panels or within framing, or if structural integrity is compromised, professional remediation becomes a more prudent choice. For visible, stain-like patches on non-structural wood, a methodical DIY approach can be effective when done with the right PPE and proper drying afterward. Each situation requires careful assessment of moisture, wood condition, and long-term prevention needs.
How Mold Removal Lab guides homeowners through this process
Mold Removal Lab emphasizes safety, documentation, and prudent decision-making. We advise starting with moisture source control and using appropriate PPE, then selecting cleaning methods suited to the wood type and mold extent. For small, isolated patches on non-structural wood, DIY cleaning with careful drying can work. If there’s any sign of deep penetration, hidden growth, or recurring mold, contact a certified mold remediation professional. Our approach centers on protecting occupants and preserving wood when possible, while recognizing when replacement is the best long-term solution.
Tools & Materials
- N95 respirator or higher(Fit-tested if possible; keep spare masks)
- Protective gloves (nitrile or rubber)(Water-resistant is best)
- Eye protection(Splash goggles or safety glasses)
- Plastic sheeting or drop cloths(Contain the work area)
- Mild detergent or soap(Gentle cleaning base)
- White vinegar (5%–6% acidity)(Mild antimicrobial option for non-porous surfaces)
- Hydrogen peroxide (3%)(Alternative mild disinfectant for some surfaces)
- Non-abrasive scrub brush(Soft-bristle helps avoid surface damage)
- Spray bottle(For cleaners and cleaners mixtures)
- Microfiber cloths(Non-linting, reusable)
- Bucket(For rinsing and dirty water)
- HEPA vacuum or vacuum with HEPA filter(Reduces airborne spores)
- Dehumidifier or fans(Helps reduce humidity after cleaning)
- Moisture meter or RH meter(Optional but helpful for tracking progress)
Steps
Estimated time: 1-2 hours
- 1
Identify moisture source and affected areas
Locate leaks, condensation, and high humidity zones. Document extent with photos and map out affected surfaces. Fix the moisture source before continuing to clean to prevent recurrence.
Tip: Prioritize areas with active leaks; addressing moisture reduces mold regrowth risk. - 2
Prepare workspace and PPE
Seal off the area with plastic sheeting, set up ventilation away from living spaces, and don appropriate PPE before handling moldy wood.
Tip: Keep children and pets out of the work zone to minimize exposure. - 3
Remove loose surface mold carefully
Gently brush or wipe without aggressive scrubbing to avoid dispersing spores. Use a vacuum with HEPA if available to capture debris.
Tip: Do not dry-sand or chip heavily; surface removal is enough to reduce colonies. - 4
Clean the wood surface
Apply mild soap solution or a mild cleaner; scrub with a soft brush, then wipe clean. For non-porous wood, lightly spray with vinegar or 3% hydrogen peroxide and let dwell briefly before wiping.
Tip: Always test a small hidden spot first to avoid discoloration. - 5
Dry thoroughly and control humidity
Use towels to remove moisture, then run a dehumidifier and fans to bring RH below 60%. Re-check moisture after 24–48 hours and repeat if needed.
Tip: Good airflow helps prevent re-wetting and encourages complete drying of wood fibers. - 6
Seal, finish, and monitor
Seal or finish wood after it is completely dry to reduce moisture uptake. Maintain indoor humidity and inspect periodically for new signs of mold.
Tip: Document any new mold signs; early action saves more extensive remediation later.
FAQ
Can mold on wood be completely removed with DIY methods?
Surface mold on non-porous or sealed wood often responds to careful cleaning. Deeper mold penetration or wood that is porous and damp may require professional remediation or replacement of affected sections.
DIY cleaning can work for surface mold, but deep mold or damaged wood may need a professional remediation.
Is bleach effective for wood mold?
Bleach is less effective for porous wood and can fail to penetrate; it may discolor wood fibers and release fumes. Use milder cleaners appropriate for wood and follow with thorough drying.
Bleach isn't ideal for wood mold; stick to gentler cleaners and ensure the wood dries completely.
What humidity level should I maintain after cleaning?
Keep indoor relative humidity below 60% (ideally 30–50%) to reduce mold regrowth risk. Use a dehumidifier and adequate ventilation to maintain this range.
Aim for under 60% humidity after cleaning to prevent mold from returning.
When should I call a professional remediator?
If mold covers a large area, is embedded within structural wood, recurs after treatment, or if you have health concerns, contact a certified mold remediation professional.
Call a professional if the mold is extensive or keeps coming back.
Can mold on wood threaten indoor air quality long-term?
Yes. Mold releases spores and volatile compounds that can affect air quality, especially in poorly ventilated spaces. Address moisture sources promptly and monitor after remediation.
Mold can affect indoor air quality; address moisture and monitor after cleanup.
Is it safe to reuse moldy wooden items after cleaning?
Only if the wood is structurally sound, fully dry, and shows no new signs of mold. If the mold returns or the wood is damaged, replace instead of reuse.
Reuse only if completely dry and mold-free; otherwise replace.
Watch Video
The Essentials
- Identify moisture sources before cleaning.
- Wear proper PPE and ventilate the space.
- Dry thoroughly and monitor humidity to prevent recurrence.
- Choose cleaning methods appropriate for wood type and mold extent.
- Call a professional if mold is extensive or recurs.