What to Do If Exposed to Mold: A Practical Home Guide
Learn immediate steps, safe cleanup methods, and prevention tips for mold exposure. A practical home guide from Mold Removal Lab to protect your living space.

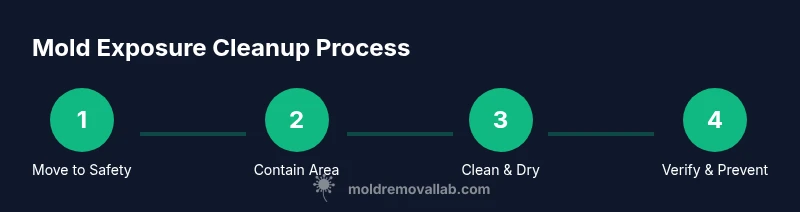
Exposure to mold can affect health, especially for allergy or asthma sufferers. The quick goal is to reduce exposure and start remediation safely: leave the affected area, ventilate with fresh air, avoid disturbing mold, wash hands and clothing, and seek medical advice if you notice symptoms. Follow a step-by-step guide for thorough cleanup.
What to know about mold exposure and health
Exposure to mold indoors is common, but health risks increase when moisture supports growth. What to do if exposed to mold isn't just about cleaning—it's about reducing inhalation and skin contact while you locate the moisture source. According to Mold Removal Lab, exposure to mold can trigger allergic reactions and respiratory symptoms, especially for individuals with asthma or allergies. The Mold Removal Lab team found that rapid actions to limit exposure help minimize symptoms and prevent further spread. In this guide, we cover practical steps you can take right away, safe cleanup methods, and how to prevent recurrence. The focus is practical, not fear—so you can restore a safe home quickly.
Immediate safety actions when exposure is suspected
First, leave the affected area to reduce inhalation exposure. If you can do so safely, open a window to bring in fresh air and reduce concentration of spores. Do not disturb mold growth, as agitation can release more spores. Remove contaminated clothing and place it in a sealed bag for washing or disposal. Wash exposed skin with soap and water, and wash your hands before touching your face or eating. If you have pets or children nearby, move them away from the area. If moisture problems are visible or widespread, stop the cleanup and call a professional to assess the scope.
Safe cleanup practices after exposure
Wear PPE: N95 respirator, gloves, goggles, and protective clothing. Seal off the area with plastic sheeting to prevent spread of spores to other rooms. Ventilate by opening windows or using fans directed at open air, not into wall cavities. For non-porous surfaces, use detergent and warm water; for porous materials, consider disposal rather than cleaning where cleaning could leave hidden mold behind. Do not mix cleaners with ammonia or bleach; follow label directions. Vacuum with a HEPA-equipped vacuum only after surfaces are dry; damp surfaces can release spores. Dry the area thoroughly within 24–48 hours to prevent re-growth. Document moisture sources and repairs needed, as lingering moisture invites mold return.
The Mold Removal Lab team emphasizes sticking to proven methods and avoiding shortcuts that spread spores.
When to seek medical advice and professional remediation
If you experience persistent coughing, wheezing, eye irritation, or skin rashes after exposure, seek medical help promptly. People with asthma, COPD, or immune suppression may need faster evaluation. For extensive mold growth or persistent leaks, hire a licensed remediation professional or indoor air quality expert to assess hidden mold behind walls. Keep records and photos of mold-affected areas for your insurance or landlord. If dampness lingers more than a few days after a leak, involve a professional to prevent structural damage and recurring growth.
Prevention and long-term monitoring to minimize future mold risk
Regular moisture control is the best defense against mold recurrence. Fix leaks promptly, run exhaust fans in kitchens and bathrooms, and aim to keep relative humidity at comfortable levels. Use a hygrometer to monitor moisture in basements or crawl spaces and address condensation issues early. Improve drainage around the foundation and ensure water is directed away from the house. Create a simple home maintenance calendar to review moisture sources seasonally and schedule professional checks if you live in humid climates. The Mold Removal Lab team recommends making moisture control a routine habit to protect your home long-term.
Tools & Materials
- Nitrile gloves(Disposable, powder-free preferred)
- N95 respirator(Fit-test if possible)
- Goggles or face shield(Splash protection for eyes)
- Protective coveralls or long-sleeved clothing(Loose-fitting, washable)
- Disposable plastic sheeting(2-4 mil thickness; seal edges)
- Detergent or mild soap(Unscented, large-batch for surfaces)
- Household cleaner (bleach or approved alternative)(Follow label directions; never mix with ammonia)
- Buckets and scrub brushes(For scrubbing non-porous surfaces)
- Rags and disposable towels(For wiping up and containment)
- Heavy-duty trash bags(Seal contaminated materials securely)
- Moisture meter (optional)(Helps monitor moisture levels)
- HEPA vacuum (optional)(Use only when surfaces are dry)
Steps
Estimated time: 60-120 minutes
- 1
Move to safety and assess area
From a safe distance, identify the mold-affected zone and turn off HVAC equipment to prevent spreading spores. If moisture is still active, stop and address the source before proceeding.
Tip: Document the area with photos before moving items if you need to report to a pro. - 2
Don protective gear
Put on gloves, an N95 respirator, goggles, and protective clothing to minimize exposure during cleanup. Ensure a proper fit and coverage before touching contaminated materials.
Tip: Do a quick PPE check in good lighting; a poor fit reduces protection. - 3
Contain the workspace
Seal the contaminated area with plastic sheeting and tape to prevent spores from migrating to other rooms. Close doors and, if possible, create a dedicated entry/exit route.
Tip: Clearly label the area as mold-affected to avoid accidental entry. - 4
Remove and bag porous materials
Dispose of porous items (drywall, carpet, insulation) that cannot be cleaned effectively. Place them in sealed bags before removal to minimize spore release.
Tip: Double-bag especially thick or porous waste for extra containment. - 5
Clean non-porous surfaces
Wash hard, non-porous surfaces with detergent and water, then wipe dry. For stubborn spots, use an approved cleaner following label directions and avoid mixing cleaners.
Tip: Never apply cleaners to live electrical components or outlets. - 6
Dry and ventilate the area
Use fans or dehumidifiers to dry the space completely within 24–48 hours. Direct airflow across surfaces to prevent ongoing moisture, not into wall cavities.
Tip: If moisture persists, pause cleanup and consult a pro. - 7
Evaluate moisture sources and plan remediation
Identify the moisture source (leaks, condensation) and plan for repair before reoccupying. For extensive growth or hidden mold, hire a licensed professional.
Tip: Keep receipts and photos for records and potential insurance claims.
FAQ
What counts as exposure to mold?
Exposure means inhaling mold spores or contacting mold-affected surfaces. Symptoms vary by individual, with some experiencing irritation or allergic reactions.
Exposure means inhaling or touching mold; symptoms vary by person, from irritation to allergic reactions.
Are all mold exposures dangerous?
Risk depends on the amount of exposure, the mold species, and individual sensitivity. Sensitive groups may experience more pronounced symptoms.
Risk depends on exposure level and personal sensitivity; some people are more affected than others.
Can I clean mold myself?
Small, contained areas can often be cleaned safely with PPE and proper cleaners. Large areas or porous materials typically require professional remediation.
For small, contained spots you can clean with PPE and proper cleaners; larger areas should be handled by a pro.
How long does remediation take?
Time varies with the extent of growth and moisture issues. Minor cases may resolve in a few days, while extensive growth can take longer with professional help.
It depends on how extensive the mold is; minor cases are quicker, larger ones take longer with pro help.
Is bleach effective for cleanup?
Bleach can disinfect non-porous surfaces, but porous materials often need disposal. Follow label directions and avoid mixing with other cleaners.
Bleach can disinfect hard surfaces, but porous materials may need disposal; follow the label and avoid mixing cleaners.
Watch Video
The Essentials
- Identify moisture sources and fix them promptly.
- Wear proper PPE before handling mold-affected materials.
- Contain the area to prevent mold spread.
- Dry and monitor to prevent recurrence.
- Consult a professional for extensive growth or structural issues.