How Mold Exposure Is Treated: Practical Home Guide
Learn evidence-based methods to treat mold exposure at home, from medical evaluation and environmental cleanup to moisture control and prevention strategies to protect family health.

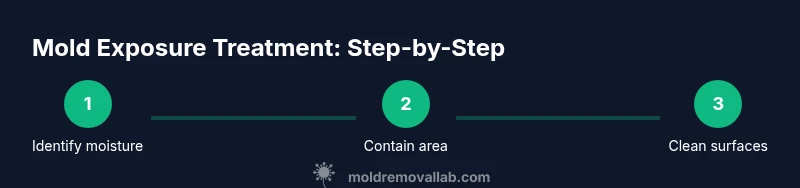
How mold exposure is treated involves medical care for symptoms and a structured cleanup plan that addresses moisture and mold sources. Immediate steps include minimizing exposure, consulting a clinician if symptoms persist, and starting safe cleaning while reducing indoor humidity. This guide also covers prevention to reduce recurrence. It integrates medical perspective, environmental hygiene, and home maintenance to lower exposure risk.
What mold exposure means for your health
Health effects from mold exposure vary widely depending on mold species, concentration, duration, and an individual's sensitivities. For most healthy people, exposure can cause nasal congestion, coughing, eye irritation, or skin itching when mold is present at high levels. In sensitive individuals—infants, elderly, people with asthma or compromised immune systems—exposure can trigger more significant reactions like wheezing, shortness of breath, or allergic responses. Some molds produce mycotoxins that, in certain circumstances, may contribute to more serious symptoms; however, routine household exposure is unlikely to cause severe illness in healthy adults. The Mold Removal Lab team emphasizes that long-term exposure at high levels is uncommon in well-maintained homes but remains a health concern if moisture problems persist. Understanding these risks helps homeowners recognize when medical evaluation is warranted, especially if symptoms improve after cleaning or worsen in damp areas. If you notice persistent symptoms, seek medical advice to tailor treatment to your health needs.
Immediate actions if you suspect exposure
If you notice musty odors, visible mold growth, or dampness that lasts more than 24-48 hours, take prompt steps to reduce exposure. Limit time spent in the affected area, ventilate by opening windows, and run a fan to push air out of the building. Wear protective gear before entering the space: a properly fitted mask, eye protection, and disposable coveralls help minimize inhalation of spores. Document signs of moisture with photos and measurements when possible. If anyone in the home has existing health conditions like asthma or allergies, consider temporarily relocating to reduce exposure while you assess cleanup options and moisture control needs. The Mold Removal Lab team notes that early action lowers the chance of rapid regrowth and makes subsequent remediation easier.
Medical evaluation: when to see a clinician
Seek medical evaluation if exposure coincides with persistent or worsening symptoms, chest tightness, coughing that won’t improve, or eye and skin irritation that lasts beyond a few days after cleaning. A clinician can assess for allergies, asthma exacerbations, or infections that could be triggered or worsened by mold. Diagnostic steps may include a physical exam, airway function tests, and, when appropriate, allergy testing. Medication may be prescribed to ease symptoms, and a clinician can advise on whether antifungal or anti-inflammatory treatments are necessary. Remember, symptoms often improve once moisture problems are controlled, but professional guidance helps tailor treatment to your health needs.
Environmental cleanup basics: reducing indoor mold
Mold thrives where moisture is present. The first priority is stopping leaks and fixing water problems—this reduces the source of mold growth. After moisture control, focus on removing existing mold and preventing spores from spreading. Clean non-porous surfaces with a detergent solution, rinse, and dry thoroughly. Porous materials like drywall or insulation that are saturated or heavily infested often need to be removed and replaced. Keeping indoor humidity below 50-60% helps prevent regrowth. Use dehumidifiers or air conditioning, and ensure good ventilation in bathrooms, kitchens, and basements. The goal is to create a dry, clean environment where mold cannot reestablish itself.
When to hire professionals: DIY vs pro remediation
Small, well-contained outbreaks (roughly a patch the size of a credit card on a single non-porous surface) can sometimes be cleaned by homeowners with proper PPE and techniques. Large areas, porous materials, or widespread growth require professional remediation to ensure complete removal and containment. A professional team can assess hidden moisture sources, manage structural risks, and use specialized equipment like HEPA filtration and negative air pressure. If there is heavy growth in kitchens, bathrooms, or basements, or if occupants have chronic symptoms, engaging a licensed mold remediation service is wise. Pros can also help with post-remediation verification to confirm the problem is resolved.
Assessing moisture sources and ventilation
Effective mold control starts with moisture assessment. Inspect for roof leaks, plumbing issues, condensation on windows, and poor ventilation. Ensure bathrooms and kitchens vent exhaust fans to the outdoors, not into attics or crawlspaces. Use moisture meters or humidity sensors to monitor humidity in problem areas. Improving ventilation reduces stagnant air and helps dry surfaces faster after cleaning. Regularly inspect under sinks, around window frames, and in basements for dampness and signs of moisture intrusion. A proactive approach prevents new mold from forming and minimizes the risk to occupants.
Safe cleaning methods for different materials
Non-porous surfaces like metal, glass, and enamel can usually be cleaned safely with detergent and water, followed by a drying step. Porous materials such as drywall, ceiling tiles, and carpet may need removal if mold growth is extensive or embedded. Use a scrubbing approach for hard surfaces and avoid saturating porous materials during cleaning. For disinfection, household cleaners with detergent are generally sufficient; some professionals also recommend approved mold cleaners. Always air out the space and dry surfaces completely after cleaning. Avoid mixing cleaners and never use bleach on porous materials as it can release harmful fumes and damage materials.
Personal protection during cleanup
Wear a properly fitted respirator (N95 or higher), eye protection, disposable coveralls, and gloves. Contain the work area with plastic sheeting to prevent spores from spreading to other parts of the home. Avoid dry sweeping or brushing, which can disperse mold spores; use damp wiping or HEPA vacuuming instead. If you feel dizzy, have trouble breathing, or symptoms worsen during cleanup, stop work and seek medical attention. Safety gear protects you and others in the home while you remediate the mold.
Long-term prevention and maintenance
After cleanup, prevent recurrence by fixing moisture problems and improving ventilation. Regularly inspect areas prone to moisture, such as bathrooms, basements, and laundry rooms. Clean surfaces with a mild detergent and promptly address any new water intrusion. Keep humidity low with dehumidifiers in damp climates and ensure that HVAC systems are cleaned and inspected. Maintain gutters and downspouts to prevent roof leaks, and repair any structural issues that allow water intrusion. A maintenance plan keeps mold from returning and protects indoor air quality.
How mold exposure is treated in sensitive populations
Children, older adults, and people with asthma or immune system issues may experience stronger reactions to mold exposure. In these populations, medical care should be prompt and proactive. Healthcare providers may recommend stricter environmental controls, more frequent monitoring, and tailored medications to manage symptoms. Families with sensitive members should consider professional remediation sooner and implement rigorous moisture control strategies. By combining medical care with environmental improvements, exposure risk can be significantly reduced for vulnerable individuals.
Common myths vs evidence-based practices
Myth: Bleach cleans mold completely. Fact: Bleach can help on non-porous surfaces but does not reach porous materials and can release harsh fumes in enclosed spaces. Myth: Any amount of mold is dangerous. Fact: Health effects depend on the extent of exposure and individual sensitivity; small, properly contained growth can be addressed with care, but persistent growth requires action. Myth: If you can’t see mold, you’re safe. Fact: Hidden moisture can hide mold behind walls and in ductwork. My goal is to provide evidence-based guidance to help you make informed decisions.
Monitoring progress and evaluating improvement
Track improvements by noting symptom changes and rechecking moisture levels. Revisit affected areas after cleanup to ensure dryness is sustained and there is no regrowth. If symptoms persist or recur after remediation, re-evaluate the home environment and consult a healthcare professional. Documenting conditions with photos and moisture readings helps guide ongoing maintenance and ensures your mold remediation efforts are effective.
Tools & Materials
- Nitrile gloves(Latex-free; choose snug-fitting)
- N95 respirator or P100(Fit-tested if possible)
- Safety goggles(Eye protection against spores)
- Disposable coveralls(Protect skin and clothing)
- Plastic sheeting and tape(Create containment area)
- Mild detergent or mold cleaner(Detergent-based cleaning solution)
- Bleach solution (optional)(Diluted, non-porous surfaces only)
- White vinegar (optional)(Non-porous surface aid)
- HEPA vacuum (certified filter)(Use after cleaning to capture spores)
- Dehumidifier(Keep RH below 50-60%)
- Heavy-duty garbage bags(Seal and dispose of contaminated materials)
- Moisture meter(Monitor humidity progression)
Steps
Estimated time: 3-6 hours (plus drying time)
- 1
Identify moisture source and containment
Walk the area to locate leaks or water damage, assess extent, and establish containment with plastic sheeting to prevent spores from spreading during cleanup.
Tip: Stop the water source if possible and isolate the area to limit exposure. - 2
Put on PPE and prepare workspace
Put on N95/P100 respirator, goggles, disposable coveralls, and gloves. Set up plastic barriers and ensure good ventilation to protect your health.
Tip: Check PPE fit before touching any suspected mold area. - 3
Remove porous damaged materials
Carefully cut out and bag porous materials like drywall or insulation that show mold growth. Avoid disturbing intact, uninfected areas when possible.
Tip: Seal waste in bags before moving to prevent spore spread. - 4
Clean non-porous surfaces
Wipe hard, non-porous surfaces with detergent solution, rinse, and dry completely. Avoid saturating materials to prevent moisture intrusion.
Tip: Work from clean to dirty areas to prevent cross-contamination. - 5
Disinfect and deodorize
If appropriate, apply a non-bleach disinfectant to non-porous surfaces and allow to air dry. Do not mix cleaners; follow label directions.
Tip: Ventilate during disinfection to reduce chemical exposure. - 6
Vacuum with HEPA
Gently vacuum cleaned areas with a HEPA-equipped unit to capture residual spores; avoid dry brushing.
Tip: Use attachment tools to reach corners and crevices. - 7
Dry the area thoroughly
Run dehumidifiers and fans to reach low humidity; monitor moisture with a meter if available. Ensure surfaces stay dry for 24-72 hours.
Tip: Aim for humidity under 50-60% to deter regrowth. - 8
Dispose of waste safely
Place contaminated materials in sealed bags and dispose of according to local regulations. Clean tools before reuse.
Tip: Label bags clearly to prevent accidental exposure. - 9
Restore and repair to prevent recurrence
Repair leaks, improve ventilation, and rebuild only after moisture is controlled. Select mold-resistant materials where possible.
Tip: Prioritize moisture-proof barriers in the most prone areas. - 10
Reassess humidity and area after cleanup
Recheck problem areas for moisture and re-clean if signs of mold remain. Document progress with photos and notes.
Tip: Schedule follow-up checks to confirm sustained dryness.
FAQ
What are common symptoms of mold exposure?
Symptoms can include nasal congestion, coughing, eye irritation, and skin itching. In sensitive individuals, asthma-like symptoms may occur.
Mold exposure can cause coughing and sneezing; seek medical advice if symptoms persist.
Should I test for mold or assume it’s present?
Testing can help identify hidden mold, but remediation should not wait for test results if visible growth exists. Use professional guidance for decisions.
Tests can help locate hidden mold, but don’t delay cleanup if you see visible growth.
Is it safe to clean mold myself?
Small, contained areas can be cleaned by a homeowner with proper PPE and methods. Large or porous-area growth should be handled by professionals.
Small areas can be cleaned safely if you follow protective steps; larger problems need pros.
How long does remediation take?
Process duration depends on area size and material; minor spots can be done in hours, larger projects may take days. A professional assessment provides a clearer timeline.
It varies; small jobs are quick, bigger jobs take longer—get a professional timeline.
What about sensitive populations?
Children, the elderly, and people with asthma may be more affected. Medical care and stricter environmental controls are advised for these groups.
Kids and seniors may be more affected—take extra precautions and consult a clinician.
Are there safe cleaners to use regularly?
Mild detergents are standard for routine cleaning. Avoid mixing cleaners and consult product labels for approved uses; some surfaces tolerate vinegar, others require professional products.
Use mild detergents; avoid mixing cleaners and follow labels.
Watch Video
The Essentials
- Start with moisture control and source removal
- Wear PPE during cleanup
- Address contaminated materials safely
- Use professional remediation for large areas
- Maintain ongoing moisture management