What to do for mold on walls: practical remediation guide
A practical, expert-backed guide from Mold Removal Lab on how to respond to mold on walls, including moisture control, safe cleanup, and prevention to keep homes safe.

To address mold on walls, you must stop moisture, safely clean the affected area, and prevent recurrence. This quick guide outlines practical steps homeowners can take, when to call pros, and how to document the remediation. Start with a moisture source audit, wear PPE, isolate the area, choose appropriate cleaners, dry thoroughly, and monitor for future growth. Follow these steps to reduce health risks and protect your home.
What to do for mold on walls: understand the problem
Mold growth on walls is often a sign of hidden moisture, not just a cosmetic issue. If you're asking what to do for mold on walls, you’re already taking the first crucial step toward safety. According to Mold Removal Lab, growth on interior walls is usually driven by condensation, leaks, or high humidity, and quick action can limit health risks and structural damage. The Mold Removal Lab team found that addressing the moisture source first dramatically improves remediation outcomes. This section explains the dynamics of mold and sets the stage for practical steps you can take today to reduce exposure and prevent a return of visible colonies.
Quick moisture audit you can do
A simple moisture audit helps you locate hidden water problems behind walls. Start by testing for leaks around roofs, windows, and plumbing patches. Use a hygrometer to track relative humidity; aim for below 50-60% in living spaces and below 50% in bathrooms or basements when possible. Look for damp patches on paint, wallpaper, or drywall and pay attention to musty odors. Document any water events (spills, floods, leaks) and note whether condensation occurs after showers or in colder months. Even small moisture problems can fuel mold growth if left unchecked, so this audit is a critical early step in the what to do for mold on walls process.
Safety, PPE, and containment
Before you touch affected areas, prepare proper PPE: an N95 respirator (or higher), eye protection, and wear gloves. Use plastic sheeting to isolate the area and prevent spores from spreading to clean spaces. If the mold covers a large area or if water intrusion is ongoing, extra containment and ventilation are essential to protect occupants and cleanup crews. This step reduces cross-contamination and keeps your home livable during remediation.
Cleaning methods: when to DIY and when to call a pro
Surface mold on non-porous surfaces (like tile) can often be addressed with soap, water, and a non-abrasive brush. For porous materials (drywall, insulation behind paint), cleaning is not always sufficient; growth can be embedded and return after moisture reappears. Mild cleaners or hydrogen peroxide solutions can work, but avoid aggressive solvents on damaged materials. If mold growth exceeds a small patch, or if you encounter black mold or health concerns, consider hiring a licensed mold remediation professional to ensure complete removal and proper containment.
Drying and preventing recurrence
Drying is as important as cleaning. Use fans and a dehumidifier to bring relative humidity below 50-60% quickly. Keep airflow moving for at least 24-48 hours after cleaning, and verify that the area is completely dry before repainting or re-occupying. Persistent moisture problems—leaks, condensation, or poor ventilation—will fuel new mold growth, so address the root cause (roof leaks, plumbing, HVAC drainage, insulation gaps) to prevent recurrence.
Documentation and dealing with landlords/insurers
Document mold events with dates, photos, and notes on sources of moisture. If you rent, notify your landlord in writing and keep copies of all communications. Insurance considerations depend on policy specifics and the cause of mold growth; having a clear timeline and remediation steps can help you communicate needs effectively. This documentation also supports future preventive maintenance requests and potential health-related disclosures.
Long-term prevention and home maintenance habits
Prevention is ongoing. Regularly inspect bathrooms, kitchens, basements, and crawl spaces for signs of moisture or condensation. Improve ventilation with exhaust fans, keep humidity in check with dehumidifiers, and seal leaks promptly. Schedule seasonal checks of roofing, gutters, and plumbing to catch issues before mold has a chance to take hold. By maintaining a dry, well-ventilated home, you reduce mold risk and protect indoor air quality.
Tools & Materials
- N95 respirator or higher(fit-tested if possible)
- eye protection(protect eyes from splashes and spores)
- gloves (nitrile or rubber)(at least 6 mil thick)
- plastic sheeting or painter's drop cloth(to isolate area and contain spores)
- mild detergent(for initial cleaning)
- HEPA vacuum(for cleanup after drying)
- brushes/sponges(non-metal, gentle abrasives)
- bucket(for mixing solution)
- mold-killing solution (hydrogen peroxide or commercial remover)(follow label; avoid bleach on porous materials)
- dehumidifier or fans(to speed drying)
- moisture meter or humidity gauge(optional but helpful)
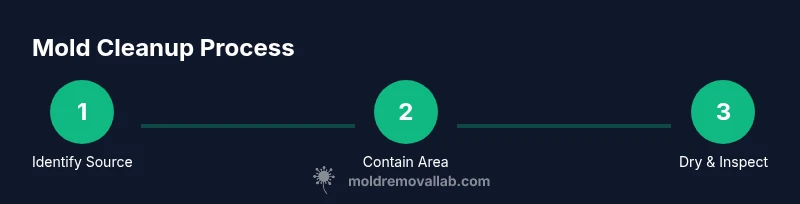
Steps
Estimated time: 2-6 hours of active work, plus 24-72 hours drying time
- 1
Identify and secure moisture source
Locate leaks or water intrusion and determine how moisture is reaching the walls. This step is essential because removing mold without stopping moisture will lead to re-growth.
Tip: Document the exact source (drain leak, roof, or condensation) to guide repairs. - 2
Prepare the workspace and PPE
Put on your PPE, cover nearby surfaces with plastic, and set up containment to prevent spores from spreading.
Tip: Double-check mask fit and eye protection before touching surfaces. - 3
Contain the area
Seal off the affected room and restrict access to maintain a clean area and minimize cross-contamination.
Tip: Use plastic sheeting to create a barrier and tape seams well. - 4
Clean visible mold
Wipe surfaces with a mild detergent solution and a soft brush. For non-porous surfaces, rinse with clean water.
Tip: Avoid aggressive scrubbing on fragile materials to prevent damage. - 5
Apply mold-killing solution
Apply hydrogen peroxide or another approved mold remover per label directions, focusing on the moldy zones.
Tip: Do not mix cleaning agents; follow product directions precisely. - 6
Rinse, dry, and re-inspect
Rinse treated areas if required, dry thoroughly with fans/dehumidifiers, and re-inspect for any remaining growth.
Tip: Ensure moisture is below threshold before moving on. - 7
Plan for prevention
Address the moisture source and implement ventilation improvements to prevent recurrence.
Tip: Install or verify exhaust fans and fix insulation where condensation forms.
FAQ
Is mold on walls dangerous to my health?
Mold exposure can irritate the eyes, skin, and lungs, especially for people with allergies or asthma. If you notice persistent symptoms, consult a healthcare professional. In many cases, addressing moisture and cleaning safely reduces risk.
Mold exposure can irritate your airways, but reducing moisture and cleaning promptly helps keep you healthy.
Should I DIY mold cleanup or hire a pro?
Small, surface mold on non-porous surfaces can often be cleaned safely at home. Large areas, porous materials, or ongoing moisture problems warrant professional remediation to ensure complete removal and proper containment.
For large areas or persistent moisture, it’s best to hire a professional.
Can I just repaint after cleaning mold?
Repainting without drying and treating the underlying moisture will usually cause mold to return. Ensure the area is completely dry, fix the moisture source, and use mold-resistant primers.
Don’t repaint until the area is dry and the moisture issue is addressed.
What humidity level is safe after cleanup?
Keep indoor humidity below 50-60% in most spaces; in bathrooms and basements, aim for the lower end to minimize condensation and mold risk.
Try to keep humidity under 60 percent to reduce mold chances.
What documentation helps if I rent or file insurance?
Take clear photos, note dates of moisture events, list cleanup steps, and keep receipts. This helps with landlord requests or insurance claims.
Take pictures, dates, and keep receipts to support any claims.
How can I prevent mold long-term?
Improve ventilation, fix leaks promptly, use dehumidifiers in damp areas, and inspect regularly for signs of moisture or hidden growth.
Keep humidity low and inspect for leaks to prevent mold.
Watch Video
The Essentials
- Act quickly to remove moisture and avoid re-growth
- Wear PPE and contain the area to protect health
- Choose appropriate cleaners and ensure complete drying
- Address moisture sources to prevent recurrence
- Document remediation for landlords/insurance as needed