How to Remove Mold from the Wall: A Practical Guide
Learn practical, step-by-step methods to safely remove mold from walls, identify moisture sources, and prevent regrowth with moisture control and proper remediation.

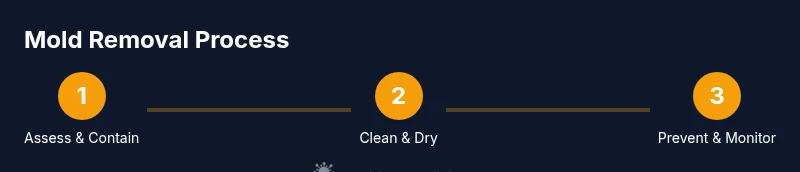
This guide shows you how to remove mold from the wall safely and effectively. You’ll identify moisture sources, protect yourself with proper PPE, choose appropriate cleaning methods, and implement prevention strategies to reduce future growth.
What causes mold on walls
Mold on walls is typically a sign of persistent moisture. According to Mold Removal Lab, hidden leaks, condensation, and indoor humidity create an environment where mold spores can settle on wall surfaces. When you see mold, you’re looking at a symptom of a broader moisture problem, not just the mold itself. Addressing the moisture source is essential for long-term success, not merely scrubbing the visible growth. In this section, we explore common moisture scenarios that lead to wall mold and how to recognize them. Look for discoloration, musty odors, or peeling paint as hints that moisture is present behind finishes like drywall or plaster. Before you begin cleanup, assess whether the growth is isolated or part of a larger issue, such as a roof leak or plumbing problem. Understanding the root cause helps you select the right remediation approach and reduces relapse risk.
Safety first: PPE and ventilation
Protecting yourself during mold cleanup is critical. The Mold Removal Lab Team recommends wearing an N95 respirator, disposable gloves, and eye protection. A disposable coverall or long-sleeve shirt and pants help minimize skin exposure. Ventilate the area by opening windows or using a fan that exhausts outdoors, but ensure airflow does not spread spores to other rooms. Do not mix cleaning agents; bleach with ammonia or acids can create dangerous fumes. For small, non-porous patches, soap and water may suffice, but larger areas or porous materials require stronger cleaners or professional intervention. If you have asthma, allergies, or a compromised immune system, pause and seek professional guidance. Safety always comes first.
Detecting moisture sources and containment
Moisture behind walls can stem from leaks, condensation, or high humidity. Start with a visual inspection: check around plumbing fixtures, windows, and roof lines for leaks. Use a moisture meter if available to gauge hidden dampness. Contain the area with plastic sheeting to minimize spore spread while you work. If decay or structural damage is suspected, stop and consult a professional. Containment also protects other living spaces from potential contamination and simplifies your cleanup plan.
Cleaning methods: choosing the right approach for your surface
Cleaning mold requires choosing methods appropriate for the surface. For non-porous surfaces like tile or painted walls, mild soap and water or a diluted solution of white vinegar can remove surface mold. Hydrogen peroxide is another effective option for many surfaces. For small, hard, non-porous patches, a diluted bleach solution can be used with caution—never mix with ammonia or acids. Porous materials, such as drywall or insulation behind the wall, often cannot be fully cleaned and may need removal and replacement to prevent regrowth. Always test a small, inconspicuous area first to ensure the cleaning method won’t damage the finish. After cleaning, rinse thoroughly and allow the area to dry completely before repairing or repainting.
Handling porous materials: when removal is necessary
Mold on porous materials like drywall, insulation, or fabric can embed within fibers. Cleaning alone may not eliminate it, and remediation often requires removal and replacement of the affected material. If you must remove drywall or plaster, take care to minimize dust and use proper containment. Do not leave porous materials damp or reintroduce them into the space until repairs are complete and the moisture problem is resolved.
Drying, sealing, and prevention after cleanup
Drying is essential to prevent mold relapse. Use dehumidifiers and fans to promote air movement and reduce humidity. Ensure all surfaces are completely dry before applying primer or paint. Consider mold-resistant paints and sealants for high-humidity areas like bathrooms and basements. Implement long-term prevention by fixing leaks promptly, improving ventilation, and maintaining humidity below 50% where possible. Regular checks of walls, ceilings, and basements help catch new moisture issues early and reduce the chance of future mold growth.
When to call a professional and what to expect
If the mold covers a large area, involves structural materials, or you have health concerns, professional remediation is recommended. A mold remediation specialist can assess moisture sources, contain the area, and safely remove mold from walls and insulation. For prevention, they may recommend moisture control strategies and building envelope improvements. If you proceed DIY, document your process and monitor humidity and mold growth over time to verify effectiveness. Remember, severe cases or uncertain safety should always involve a qualified pro.
Quick-start checklist for a mold-cleaning project
- Identify moisture source and fix it
- Wear appropriate PPE and ventilate the area
- Contain the workspace to prevent spore spread
- Clean with the method suitable for the surface
- Thoroughly dry the area and apply protective coatings if appropriate
- Reassess humidity and monitor for regrowth over the following weeks
Tools & Materials
- N95 respirator(Ensure a proper fit; replace if damp or damaged)
- Disposable gloves(Chemical-resistant preferred)
- Safety goggles or glasses(Eye protection against splashes)
- Disposable coveralls or long-sleeve clothing(Minimize skin exposure)
- Plastic sheeting or painter's drop cloths(Contain area and protect furnishings)
- Spray bottle(For diluted cleaners like vinegar or hydrogen peroxide)
- Mild dish soap(For initial cleaning on non-porous surfaces)
- White vinegar(Natural mold cleaner option)
- Hydrogen peroxide 3%(Alternative cleaner with antifungal properties)
- Bleach (sodium hypochlorite) 5-6%(Use only on non-porous surfaces in small areas; never mix with ammonia)
- Scrub brushes and sponges(Non-abrasive for painted surfaces)
- Rags or paper towels(Disposable to minimize cross-contamination)
- Moisture meter or hygrometer(Optional but helpful to track humidity)
- Dehumidifier or fan(Promotes quick drying after cleaning)
Steps
Estimated time: 3-6 hours (excludes major repairs or structural fixes)
- 1
Prepare and protect
Clear the area and put on PPE. Cover nearby furnishings with plastic, and open windows or run an exhaust fan to improve airflow. This minimizes exposure and prevents spores from spreading to other rooms.
Tip: Keep a trash bag handy to seal and remove contaminated materials after removal. - 2
Identify moisture source
Inspect for leaks, condensation, and high humidity. Repairing the source is essential before or alongside cleaning to reduce relapse risk. If you’re unsure, consult a professional before proceeding.
Tip: Document moisture issues with photos for future reference or insurance claims. - 3
Test a small area
Start with a small patch to confirm the surface reacts well to your chosen cleaner. This minimizes the chance of damage or discoloration on walls with delicate finishes.
Tip: If the paint lifts or the wall deteriorates, stop and seek professional advice. - 4
Clean non-porous surfaces
Wipe with soap and water, then apply a cleaning solution like vinegar or hydrogen peroxide. Let it sit briefly, then scrub gently and rinse with clean water.
Tip: Avoid mixing cleaners; never combine bleach with ammonia. - 5
Address porous materials
Porous materials (drywall, insulation) containing mold may need removal. If you can’t treat deeply, plan for replacement to prevent regrowth and structural issues.
Tip: Dispose of porous material in sealed bags to minimize airborne spores. - 6
Dry thoroughly
Use a dehumidifier and fans to dry the area completely. Any remaining moisture can allow mold to return, so drying may take several hours or days depending on conditions.
Tip: Ensure surfaces feel dry to the touch and are no longer cool or damp. - 7
Finish and prevent
Apply mold-resistant primer or paint if needed, and improve ongoing moisture control with ventilation and humidity management. Monitor walls over the next weeks for signs of relapse.
Tip: Keep humidity below 50% where possible to deter mold growth.
FAQ
What is the safest way to remove mold from walls?
The safest approach starts with identifying and fixing the moisture source, then cleaning the surface with non-toxic cleaners like soap and water or vinegar, and drying the area thoroughly. For larger or porous areas, professional remediation is recommended.
Start by fixing moisture, clean with safe solutions, and dry completely. For big jobs, call a pro.
Can I use bleach on wall mold?
Bleach can be effective on non-porous surfaces in small areas, but it does not reach into porous materials. Never mix bleach with ammonia or acids, and consider removing porous materials if mold has penetrated deeply.
Bleach works on hard surfaces in small spots but avoid porous materials and never mix with other cleaners.
Is mold on walls dangerous?
Mold exposure can irritate eyes, skin, and lungs, especially for sensitive individuals. It’s important to use PPE, ventilate, and limit exposure while cleaning. Seek professional help if you have health concerns.
Mold can irritate health-sensitive people; protect yourself and seek help if needed.
When should I call a professional?
Call a professional if the mold covers a large area, reappears after cleaning, or is behind drywall or insulation. A pro can assess moisture, contain the space, and safely remove mold.
Call a pro if it’s large, persistent, or behind walls.
How can I prevent mold from returning?
Control humidity, fix leaks promptly, ensure good ventilation, and use mold-resistant paints in damp areas. Regularly inspect walls and ceilings for signs of moisture.
Keep humidity low, fix leaks quickly, and use mold-resistant finishes.
What surfaces are most at risk for mold on walls?
Drywall, plaster, wallpaper, and wood behind finish are common mold-prone materials when exposed to moisture. Porous materials often require replacement rather than cleaning.
Drywall and wood behind walls often need replacement if mold is present.
How long does it take to dry after cleaning?
Drying time varies with humidity and ventilation. Using a dehumidifier and airflow can shorten the process, but it may take hours to days in damp conditions.
Drying depends on humidity; dehumidifiers help speed it up.
Should I test for mold after cleanup?
If you have ongoing moisture problems or health concerns, a post-cleanup assessment can help verify that mold has been removed and moisture levels have stabilized.
Consider a moisture and mold check after cleanup if issues persist.
Watch Video
The Essentials
- Identify and fix the moisture source first.
- Use appropriate PPE and containment to protect yourself and others.
- Choose cleaning methods suitable for surface type; avoid unsafe chemical combinations.
- Dry the area completely to prevent mold regrowth.
- Consider professional remediation for large, damaged, or uncertain cases.