If mold is in the walls: practical remediation guide
Learn how to identify, contain, and safely address mold in wall cavities. Practical steps for DIY fixes and when to hire professionals for larger infestations.

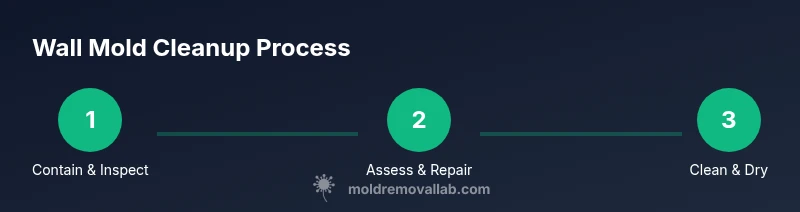
If mold is in the walls, prioritize safety, contain the area, and assess moisture sources before acting. For small, visible patches, you can follow basic cleaning steps and dry the space; for larger infestations or hidden growth, hire a licensed professional. Start by turning off HVAC to stop cross-contamination, then plan remediation and moisture control.
Understanding the stakes when mold is in the walls
Mold that grows inside wall cavities can be more dangerous than surface mold because it thrives in hidden, damp spaces. If you notice musty odors, bubbling paint, or warped wall panels, you may be dealing with hidden growth. The key is to treat it as a moisture problem first and then address the mold. If mold is in the walls, the health risks can be higher for sensitive individuals, including children and people with asthma. Always prioritize ventilation and personal protection when inspecting or handling affected areas. According to Mold Removal Lab, addressing hidden mold promptly reduces the risk of structural damage and improves indoor air quality over time.
Why hidden mold matters: It often indicates ongoing moisture intrusion, which, if left unchecked, can lead to higher repair costs and more extensive remediation later.
How moisture fuels wall mold and how to spot it
Wall mold needs moisture to persist. Common sources include roof leaks, plumbing drips behind walls, high indoor humidity, and condensation on cold surfaces. Early warning signs include persistent dampness, discolored areas on walls, and a stale or moldy smell. A moisture meter can help you gauge relative humidity levels inside wall cavities, especially after rainfall or a known leak. Reducing moisture is the fastest way to prevent new growth; without moisture control, cleaning effort is routinely undone.
Actionable tip: measure RH in living spaces and target areas with higher readings. Keep RH below 50-60% where possible.
DIY vs professional remediation: when to choose
Small, surface-level mold on painted walls or plaster can sometimes be addressed with DIY cleaning, following proper safety precautions. However, mold inside wall cavities, insulation, or behind drywall often requires professional remediation. Professionals can contain the area, remove affected material, and perform post-remediation testing to confirm clearance. If you have ongoing symptoms or a known moisture problem, opting for licensed remediation minimizes health risks and ensures a thorough job. Mold Removal Lab emphasizes that proper containment and standardized cleanup protocols are critical for safety and effectiveness.
Containment and safety precautions you should take
Before you touch anything, establish containment: close doors, seal gaps with plastic sheeting, and turn off HVAC to prevent spores from circulating. Wear an N95 respirator or higher, gloves, and eye protection. Do not attempt to scrub mold from porous drywall if the growth appears extensive or behind walls where you cannot access the area safely. Use a HEPA-equipped vacuum for cleanup and dispose of contaminated materials in sealed bags. Good containment reduces the chance of cross-contamination to other rooms and keeps the remediation process safer for occupants.
Step-by-step approach for small, visible mold on walls
If you have a small, clearly visible mold spot on painted or sealed walls, you can follow a cautious, methodical approach. First, contain the area and protect yourself. Then, clean the surface with a detergent solution, rinse, and dry completely. After cleaning, monitor the area for signs of returning dampness or new growth. This approach assumes the mold is on the surface and the underlying moisture problem has been addressed. If the spot recurs, it’s a signal to bring in a pro for deeper assessment.
Removing mold from walls: practical methods by material type
For painted drywall and non-porous surfaces, you can often remove mold with a detergent solution and a scrub, followed by thorough drying. For plaster or solid masonry, less porous cleanup methods may suffice, but you should still verify that moisture is controlled. Do not rely on bleach for porous materials inside walls, as it may not reach root growth and can produce harmful fumes. If the mold has penetrated insulation or wood studs, more extensive remediation is usually required, sometimes including material removal and replacement.
When to test and verify: mold testing and clearance
Testing helps confirm whether the remediation was successful, especially after visible mold has been removed. Use a reputable mold testing service or lab to obtain readings for mold spore counts and species. Test results guide follow-up actions and can provide documentation for landlords or insurers. The Mold Removal Lab Analysis, 2026, notes that post-remediation testing is a best practice to ensure indoor air quality meets acceptable standards. Remember that tests should be interpreted by qualified professionals to avoid misreadings.
Preventing reoccurrence: ongoing maintenance and ventilation
Prevention focuses on moisture control: fix leaks promptly, improve drainage around the home, run dehumidifiers in damp spaces, and ensure proper ventilation in kitchens and bathrooms. Regularly inspect areas prone to moisture, like basements and crawl spaces, for signs of dampness or mold. Sealing small leaks and maintaining exterior grading helps stop water from entering walls. A proactive maintenance plan saves time and money and keeps indoor air healthier over the long term.
Common mistakes and safety warnings to avoid
Avoid delaying remediation when you suspect mold or delaying moisture fixes. Do not sand or scrape mold-heavy materials without containment, and avoid disturbing mold growth in walls, which can release spores into living spaces. Never mix cleaning agents, especially ammonia with chlorine-based products, as this creates toxic fumes. If you’re unsure about the extent of growth or if you have health concerns, consult a professional. Safety comes first: protect occupants, especially children and allergy-prone individuals, during any cleanup.
Tools & Materials
- PPE kit (N95 mask, gloves, goggles, coveralls)(Ensure proper fit; replace if soiled)
- HEPA vacuum(Use with pre-filter; do not shake out contaminated debris)
- Plastic sheeting and tape(To create containment barriers around the area)
- Detergent or non-ammonia mold cleaner(Follow label directions; avoid mixing chemicals)
- Moisture meter or hygrometer(Measure indoor RH before and after remediation)
- Dehumidifier and/or fans(Use to thoroughly dry materials; avoid circulating spores)
- Waste bags and sealable containers(Double-bag contaminated materials; label clearly)
- Non-porous scrubs and disposable rags(For surface cleaning of painted surfaces)
- Tool for cutting or removing damaged material(Only if material removal is necessary; hire a pro if uncertain)
Steps
Estimated time: 2-6 hours
- 1
Prepare and contain
Establish containment with plastic sheeting, seal doors, and isolate the area from the rest of the home. Put on your PPE before touching any suspect material. This step minimizes the spread of spores and protects occupants.
Tip: Double-bag all debris to prevent cross-contamination. - 2
Assess moisture sources
Identify the moisture source driving the mold, such as a leak or high humidity. Repair the source if possible before cleaning to prevent regrowth.
Tip: Use a moisture meter to confirm dryness after repairs. - 3
Choose cleaning approach
Decide between DIY cleaning for small, non-porous surfaces and professional remediation for hidden or widespread growth behind walls.
Tip: When in doubt, consult a local mold specialist for guidance. - 4
Clean and disinfect
Scrub non-porous surfaces with detergent, rinse, and dry completely. Avoid aggressive scrubbing on porous materials where mold may be embedded.
Tip: Rinse and dry twice to remove residual spores and moisture. - 5
Handle porous materials
If mold penetrates drywall or insulation, consider removing and replacing affected sections. Do not attempt to fully remediate porous materials without proper containment.
Tip: Consult a professional if you suspect cavity growth. - 6
Dry area thoroughly
Run dehumidifiers and fans to achieve a consistently low moisture environment. Ensure any removed materials are completely dry before new installation.
Tip: Target below 50-60% RH in the affected area. - 7
Verify remediation
After drying, conduct a follow-up inspection and consider post-remediation testing via a certified lab to confirm clearance.
Tip: Document results and keep for records.
FAQ
What should I do if mold is behind drywall?
Mold behind drywall usually requires professional assessment and possible removal to address both growth and moisture intrusion. Drying alone may not resolve the issue. If DIY is attempted, avoid disturbing the area to prevent spores from spreading.
Mold behind drywall often needs a professional assessment and possible removal to address moisture and growth safely.
Can I use bleach to kill mold on walls?
Bleach is not ideal for porous materials like drywall because it can fail to reach embedded mold and may cause material damage. Use appropriate cleaners and ensure complete drying; consult a pro for porous wall remediation.
Bleach isn't the best option for porous walls; consider professional-grade cleaners and thorough drying.
How long does remediation take?
Time varies with extent: small, surface mold might be completed within hours; larger or hidden growth can take longer and may involve material removal. A professional assessment provides a clearer timeline.
Remediation time depends on how widespread the mold is; a pro can give you a precise timeline.
Should I test for mold after cleanup?
Post-remediation testing helps confirm clearance and air quality. Use a certified lab or a reputable service to ensure results are valid and actionable.
Post-remediation testing confirms you’re mold-free and safe to reoccupy the space.
What maintenance prevents mold recurrence?
Control moisture with leaks repairs, proper ventilation, and dehumidification. Regular inspections after heavy rain or humidity events help catch problems early.
Fix leaks fast, keep humidity in check, and inspect regularly to prevent mold from coming back.
The Essentials
- Contain the area to stop spread of spores.
- Address moisture first for lasting results.
- Choose DIY or pro remediation based on scope.
- Dry thoroughly to prevent regrowth.
- Test after cleanup to verify success.