What to do for mold: A practical homeowner guide for homes
Learn what to do for mold with a step-by-step approach, safety tips, and when to hire a professional. This practical guide helps homeowners and renters protect health and property.

This guide helps homeowners know what to do for mold: identify moisture, contain the area, clean non-porous surfaces, manage porous materials, and dry the space thoroughly. Essential tools, safety gear, and when to call a pro are covered. Follow steps, safety notes, and checklists to reduce health risks and property damage.
What to do for mold: initial assessment and safety
Mold growth in a residential setting signals persistent moisture and hidden water intrusion. The most immediate question is not only what to do for mold today, but how to prevent it from returning tomorrow. According to Mold Removal Lab, the first actions you take should focus on safety and containment before any cleanup begins. If you notice a musty odor, visible colonies, or water damage, treat this as a moisture problem rather than a cosmetic issue. Mold spores can irritate eyes, skin, and lungs, especially for children, the elderly, or anyone with allergies or asthma. This block lays the groundwork: identify the moisture source, decide whether DIY steps are appropriate, and prepare for thorough drying after remediation. The Mold Removal Lab team emphasizes that short-term DIY fixes without moisture control often fail because mold regrows when humidity remains elevated or leaks persist. Safety gear such as gloves, respirators, and eye protection is non-negotiable in any mold-related work, and you should ventilate the area while minimizing dust and debris. This is not just about cleaning; it is about breaking the moisture cycle and protecting occupants. The goal is to reduce health risks while preserving your home’s structure and value.
Containment and communication to prevent spread
Containment prevents airborne spread during cleanup. If possible, close doors, seal vents with plastic sheeting, and turn off HVAC currents that could carry spores to other rooms. Use tape and plastic to create a simple barrier, and maintain a contained workspace to reduce cleanup across the home. Documenting the mold event with photos helps with insurance claims and future remediation planning. Mold Removal Lab’s guidance notes that clear communication with household members reduces panic and ensures everyone follows the same safety protocol. When neighbors or roommates share spaces, establish a temporary plan for access and care around the affected area. Keep children and pets away during cleanup and ensure air circulation is managed without introducing new moisture. This stage pays dividends later by limiting secondary damage and simplifying the drying process.
PPE, tools, and setting up a work area
Personal protective equipment (PPE) is your first line of defense. Wear an NIOSH-approved N95 respirator, chemical-resistant gloves, safety goggles, and disposable coveralls. Have disposable bags, a dedicated cleaning cloth kit, a bucket, detergent, a scrub brush, and a spray bottle ready. Set up a dedicated work area with plastic drop cloths to capture dust and debris. You should also prepare a dehumidifier, a high-efficiency vacuum with HEPA filtration, and fans to promote airflow away from vulnerable areas. The purpose of this setup is to minimize exposure and contamination while you work. The Mold Removal Lab team notes that proper PPE not only protects you but also ensures the interior air remains as clean as possible during cleanup. Ensure all tools used in the mold area are kept separate from tools used in other parts of the home to prevent cross-contamination.
Locating the moisture source and stopping further growth
The next decisive step is identifying the moisture source. Look for leaks in roofs, plumbing, or windows, and inspect areas with high humidity such as kitchens, bathrooms, basements, and laundry rooms. Once you locate the source, stop the water intrusion and repair it or call a plumber or contractor as needed. The longer moisture persists, the more extensive the mold growth can become. Mold thrives in damp, hidden pockets behind walls, under sinks, and in insulation, so you must investigate beyond obvious surfaces. The goal is to remove the moisture at the root cause and set the stage for drying. Mold Removal Lab emphasizes that moisture control is the single most effective intervention to prevent re-growth. After stabilizing the moisture source, you can proceed with cleaning and drying.
Cleaning strategies: non-porous versus porous materials
Non-porous surfaces such as metal, glass, and hard plastics can usually be cleaned with detergent and water. Porous materials like drywall, insulation, and fabric may require removal if visibly contaminated or if moisture has penetrated deeply. For non-porous areas, scrub to remove visible growth, rinse, and dry promptly. For porous materials, consider discarding severely contaminated items to prevent lingering spores. If you choose to salvage porous items, treat them with appropriate antimicrobial cleaners and ensure rapid drying. The key is to limit mold exposure while restoring cleanliness. Mold Removal Lab’s guidance highlights that porous materials are at higher risk for hidden growth; if in doubt, consider discarding or replacing them rather than risking a recurring problem. Remember to test a small area first to ensure paint or finishes aren’t damaged.
Drying, dehumidification, and ventilation tactics
Drying is critical to stopping mold growth. Use a dehumidifier to bring indoor humidity below 50-60% and run fans to improve air movement. Increase ventilation by opening windows when outdoor conditions allow, but avoid introducing rain or excess humidity. Space heaters or air movers can speed up drying in contained areas, but use them cautiously to prevent overheating or fire risk. The goal of drying is to reduce moisture before mold can reestablish itself. Inspect hidden areas like behind baseboards or inside wall cavities with a moisture meter if accessible. This step reduces the chance of rebound and supports long-term remediation outcomes. The Mold Removal Lab team reiterates that thorough drying is essential; without it, cleanups often fail and mold returns.
When to discard materials and proper disposal
Disposal decisions hinge on material porosity, extent of contamination, and potential health risks. Porous materials that are heavily contaminated or cannot be cleaned effectively should be disposed of in sealed bags to prevent spore escape. Non-porous materials that are deeply etched by mold might be better replaced if cleaning compromises their integrity. Always follow local regulations for waste disposal and consider labeling areas that were treated to inform future occupants or contractors. Keep a detailed log of items removed, including location and condition, to inform future repairs or insurance claims. Proper disposal is a crucial step in preventing recontamination and making room for new, healthy materials. Mold Removal Lab emphasizes that large-scale or persistent mold problems require professional evaluation to ensure complete removal and to verify indoor air quality after remediation.
When to hire a professional and what to expect
Professional remediation is advisable when mold covers more than 10 square feet, grows in HVAC systems, or returns despite your best containment and cleaning efforts. A licensed remediator will assess moisture sources, containment, and air filtration needs, and will often use specialized equipment such as negative air machines and HEPA filters. They may perform microbial testing to confirm the extent of contamination and verify the success of remediation. Expect a written plan, a scope of work, and post-remediation verification to ensure rooms are safe for occupancy. If mold is a recurring issue due to structural moisture or hidden leaks, investing in professional services is prudent. The Mold Removal Lab team recommends seeking certified professionals who follow established guidelines and provide clear documentation for homeowners and insurers.
Common myths about mold and the truth
Myth: Bleach kills all mold and restores porous materials to original condition. Truth: Bleach can kill surface mold but does not penetrate porous materials deeply enough, often leaving hidden growth behind. Myth: Mold remediation is a one-time fix. Truth: Mold control requires ongoing moisture management and building maintenance. Myth: If I don’t see a musty smell, there’s no mold. Truth: Some mold growth is hidden behind walls or under flooring and may not produce a strong odor. The reality is that mold health risks can be hidden from sight, making proactive moisture control and inspections essential. The Mold Removal Lab analyses highlight that moisture control remains the most reliable defense against mold recurrence.
Authoritative sources and further reading
- Environmental Protection Agency (EPA) mold information: https://www.epa.gov/mold
- Centers for Disease Control and Prevention (CDC) mold health effects: https://www.cdc.gov/mold/default.htm
- National Institute of Environmental Health Sciences (NIEHS) mold health risks: https://www.niehs.nih.gov/health/topics/agents/mold/index.cfm
Tools & Materials
- N95 respirator(NIOSH-approved, fit-tested if possible)
- Protective gloves(Nitrile or latex; chemical-resistant preferred)
- Safety goggles(Wraparound for full eye protection)
- Disposable coveralls(Provide full-body protection; consider boot covers)
- Plastic sheeting (6 mil or thicker)(For containment barriers)
- Painter's tape(Seal plastic sheeting to create barriers)
- Detergent or mold-cleaning solution(Mild detergent or EPA-approved cleaner)
- Scrub brushes and sponges(Non-abrasive for delicate surfaces)
- Spray bottle(For cleaners and disinfectants)
- Disposable bags (heavy-duty, 6-8 gal)(For contaminated materials)
- HEPA vacuum cleaner(For final cleanup and dust control)
- Dehumidifier(Maintain indoor RH below 50-60%)
- Fan or air mover(Improve air circulation during drying)
- Moisture meter or hygrometer(To track humidity and drying progress)
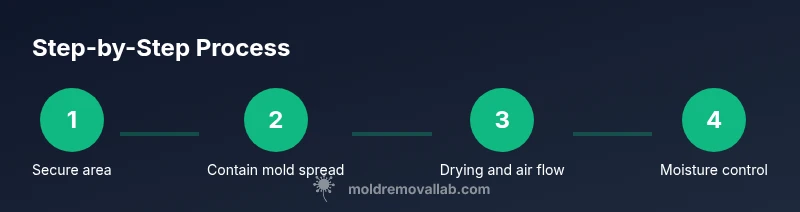
Steps
Estimated time: 3-6 hours
- 1
Secure the area
Identify the mold-affected space and seal it off to minimize spread. Place plastic barriers, turn off HVAC, and restrict access to children and pets. The goal is to stop moisture from reaching other rooms while you plan the remediation.
Tip: Set up plastic barriers before you begin cleaning to reduce cross-contamination. - 2
Wear PPE and prepare tools
Put on the appropriate PPE and gather your cleaning supplies. This protects your health and ensures you can work more efficiently without interruptions. Clear a path to avoid trips and spills while you work.
Tip: Double-check respirator fit and seal around the nose—a poor seal reduces protection. - 3
Identify moisture sources
Investigate for leaks in roofs, pipes, or windows and address them. This step is critical because mold will likely return if the moisture source remains unresolved.
Tip: If you can’t locate the source, pause cleanup and consult a professional. - 4
Clean non-porous surfaces
Wash hard surfaces with detergent and water, then disinfect and dry thoroughly. Grease and grime can shield mold, so thorough scrubbing matters.
Tip: Rinse surfaces to remove residue that can promote future growth. - 5
Assess porous materials
Evaluate drywall, insulation, carpet, and fabrics. Remove and discard visibly contaminated porous materials if they cannot be cleaned effectively.
Tip: When in doubt, remove contaminated porous materials to prevent hidden mold. - 6
Dry and ventilate the area
Run dehumidifiers and fans to drive moisture down to acceptable levels. Ensure good air movement without introducing more moisture from outside.
Tip: Monitor humidity with a hygrometer to verify progress. - 7
Inspect hidden spaces
Mold can hide behind baseboards, behind appliances, or inside wall cavities. Use a moisture meter if accessible to assess moisture. Consider professional evaluation for hard-to-reach areas.
Tip: Be cautious drilling or cutting into walls; it can release more spores. - 8
Dispose of contaminated materials
Seal contaminated items in bags and follow local disposal guidelines. Label waste to inform future technicians or renters.
Tip: Do not reuse contaminated porous materials after cleaning. - 9
Decide on professional help
If mold covers more than 10 square feet, recurs, or involves HVAC systems, hire a licensed pro for thorough remediation and air-quality testing.
Tip: Request a written remediation plan and post-remediation verification.
FAQ
What should I do first if I find mold in my home?
First, identify and stop the moisture source, then contain the area to prevent spread. Wear PPE and gather cleaning supplies before proceeding. If mold covers more than a small area, consider consulting a professional.
First, stop the moisture and contain the area, then gather PPE and cleaning supplies. If it’s widespread, you may want to call a professional.
Is it safe to use bleach to clean mold?
Bleach can kill surface mold on non-porous surfaces but it doesn’t penetrate porous materials. It also can create fumes when mixed with cleaners. For porous materials, removal or professional remediation is often needed.
Bleach can kill surface mold on hard surfaces, but it won’t fix growth behind porous materials.
Can I remove mold on my own, or do I need a pro?
Small areas with modest growth can be addressed by motivated homeowners using proper PPE and cleaning methods. Large areas, hidden growth, or mold in HVAC systems require a licensed professional and potential air-quality testing.
You can handle small areas, but big or hidden mold should be handled by a pro.
How do I know mold is spreading to other rooms?
Look for new spots, musty smells, or increased humidity. Check behind walls, under sinks, and in basements. If you see recurring growth after cleaning, professional assessment may be needed.
Watch for new spots and lingering odor; if mold comes back, that’s a sign to call a pro.
What should I look for when hiring a mold remediation company?
Check licenses, certifications (e.g., IICRC), and reference reviews. Request a written scope, timeline, and post-remediation testing to verify air quality.
Make sure they’re licensed and provide a clear plan with post-remediation testing.
Are bathrooms more prone to mold, and why?
Bathrooms are high-risk due to frequent moisture, poor ventilation, and porous materials like drywall. Regular inspection and venting helps prevent mold buildup.
Bathrooms are especially mold-prone because of humidity; ensure good ventilation and quick cleaning.
Watch Video
The Essentials
- Identify and stop moisture to prevent mold growth
- Contain the area to minimize cross-contamination
- Dry thoroughly to prevent regrowth and ensure job success
- Use appropriate PPE and follow safety guidelines
- Discard heavily contaminated porous materials when needed
- Call a professional for large-scale or recurring mold problems