What to Do for Mold Remediation: A Practical Guide
A practical, homeowner-friendly guide to mold remediation covering safety, containment, cleaning, drying, prevention, and when to call a pro. Learn step-by-step actions to reduce mold growth and protect indoor air quality.

Learn what to do for mold remediation with a practical, homeowner-friendly plan. This guide summarizes safety, containment, cleaning, and prevention steps, plus when to call a pro. You’ll understand moisture sources, select the right tools, and follow a clear sequence to limit mold growth and protect indoor air quality in your home today.
Mold remediation: why it matters and how to start
According to Mold Removal Lab, effective mold remediation begins with stopping moisture intrusion, identifying all mold growth, and following a step-by-step plan. The Mold Removal Lab team found that moisture control is the root cause in most mold cases, so your plan should focus on drying and preventing recurrence. This guide explains what to do for mold remediation in typical homes, with practical steps you can implement safely and without specialized equipment. Mold growth is rarely confined to a single spot; invisible colonies in walls, insulation, and attic spaces can spread if moisture persists. Therefore, your first move is to locate and document all affected areas—this helps you estimate scope, risk to occupants, and potential cost. If you feel unsure, start small: treat a small, contained area first to learn the workflow before tackling larger zones. By approaching remediation as a structured project—moisture assessment, containment, cleaning, drying, and prevention—you reduce health risks and protect building materials. Over the long term, a properly executed plan minimizes recurring outbreaks and improves indoor air quality. The goal is not only to remove visible mold but to address the underlying moisture and ventilation problems causing it.
Assessing the scope: identify growth, moisture, and risks
Start with a careful inspection of all rooms for visible mold and signs of moisture like staining, musty odors, or lingering condensation. Create a simple map of affected areas to track progress and estimate cleanup effort. Pay particular attention to kitchens, bathrooms, basements, and laundry rooms where humidity fluctuates most. Consider hidden growth behind drywall, under flooring, or in insulation—these can enter the air as spores if not addressed. Use a moisture meter or humidity readings to identify persistent high-moisture zones, and note any leaks, roof or plumbing issues, or poor ventilation. Plan remediation around moisture source control: fixing leaks, improving ventilation, and lowering indoor humidity. Based on Mold Removal Lab analysis, controlling moisture is the most important lever to prevent mold from returning once cleanup is complete. This section sets the scope and helps you decide whether a DIY approach is feasible or if professional remediation is warranted.
PPE, containment, and basic testing: safety and preparation
Before you touch any moldy surfaces, assemble protective gear: an N95 or better respirator, nitrile gloves, goggles, and disposable coveralls. These items protect your lungs, skin, and eyes from mold spores stirred during cleanup. Establish containment to prevent cross-contamination: seal doors with plastic sheeting, use negative-pressure methods if available, and minimize dust generation. If you have a testing plan, use simple surface tests for guidance rather than relying on a single kit; professional testing can confirm mold types but is not always necessary after moisture is controlled. The key is to create a controlled environment and reduce exposure for occupants and pets while work proceeds. Natural ventilation should be limited during active cleanup to avoid spreading spores to clean areas. Only proceed to cleaning once containment is in place and airflow is controlled. This stage protects you and others while you address contaminated materials and affected surfaces.
Cleaning nonporous surfaces and treating porous materials
Nonporous surfaces like ceramic tile, glass, and finished metal are cleaned with detergent solutions or EPA-recommended cleaners to remove visible mold. Use a stiff brush for stubborn deposits, followed by a rinse and a dry wipe to minimize residual moisture. Porous materials such as drywall, insulation, and carpet that have absorbed mold are often not salvageable; seal them in heavy-duty bags and remove them according to local regulations. For wood and other porous materials that show surface mold but are structurally sound, you can often salvage them after a careful cleaning and drying process, but trims and baseboards may require replacement if mold has penetrated the fibers. Always dry the area thoroughly after cleaning to prevent regrowth. According to Mold Removal Lab, successful cleaning hinges on removing the spores and moisture together, then maintaining dry conditions to inhibit future growth.
Drying, humidity control, and moisture management
After cleaning, dry the space as quickly as possible using fans, dehumidifiers, and adequate ventilation. Target indoor humidity levels below 50% where feasible, and monitor progress with a hygrometer. Continuous moisture sources—leaks, roof damage, or condensation—must be resolved to prevent immediate recurrence. Leave drying equipment in place for the recommended time, typically 24 to 72 hours depending on room size and airflow, until you can confirm a dry, mold-free environment. Regularly check high-moisture zones like basements and bathrooms, and correct any abnormal humidity patterns promptly. The long-term strategy is to keep humidity stable and ensure any future moisture events are addressed quickly to prevent a new mold cycle from starting.
Documentation, prevention, and monitoring for the future
Record all steps taken, including inspections, areas treated, cleaning methods, and drying times. Take photos before and after, note humidity levels at multiple times, and keep receipts for cleaners and equipment. For prevention, install or repair ventilation fans, fix leaks promptly, insulate cold surfaces, and use a dehumidifier in damp spaces. Develop a simple maintenance routine: check seals around windows, inspect plumbing for leaks quarterly, and run dehumidification during humid months. If mold recurs despite your best efforts, reassess moisture sources and consider professional remediation for a more thorough solution. In all cases, documentation helps you track trends and demonstrates to tenants or inspectors that you took organized, proactive steps. The Mold Removal Lab team recognizes that a proactive, documented approach improves outcomes and reduces long-term risk.
Authority sources and when to call a pro
Authority sources: <ul><li><a href="https://www.epa.gov/mold" target="_blank" rel="noopener">EPA Mold Guidance</a></li><li><a href="https://www.cdc.gov/mold/default.html" target="_blank" rel="noopener">CDC Mold Health Hazards</a></li><li><a href="https://www.osha.gov/mold" target="_blank" rel="noopener">OSHA Mold Safety</a></li></ul>
If mold covers a large area, is growing in HVAC systems, or you have underlying health conditions, call a professional remediation service. Even if you can clean visible mold, professionals may be needed to address hidden growth and structural moisture. Mold Removal Lab emphasizes that professional help is prudent when uncertainty exists about the extent of contamination, when you cannot dry the environment quickly, or when occupants experience persistent symptoms.
Tools & Materials
- N95 or higher respirator(Fit-tested if possible; replace if damp or damaged)
- Nitrile gloves(Long-cinger style for extended work)
- Goggles or safety glasses(Shatterproof and splash-resistant)
- Disposable coveralls(Hooded preferred; disposable to avoid cross-contamination)
- Plastic sheeting and tape(For creating containment barriers)
- Detergent or EPA-approved cleaner(Non-ammonia, non-abrasive for surfaces)
- Disinfectant (optional, for nonporous surfaces)(Use according to label; never mix with ammonia)
- Disposable rags and scrub brushes(Cleanup and scrubbing)
- HEPA vacuum (certified)(For dust and spores after containment)
- Dehumidifier or desiccant(To reduce moisture quickly)
- Moisture meter or hygrometer(Track humidity levels over time)
- Trash bags (heavy-duty)(Seal and dispose of contaminated materials)
- Replacement materials (as needed)(For damaged drywall, insulation, or carpets)
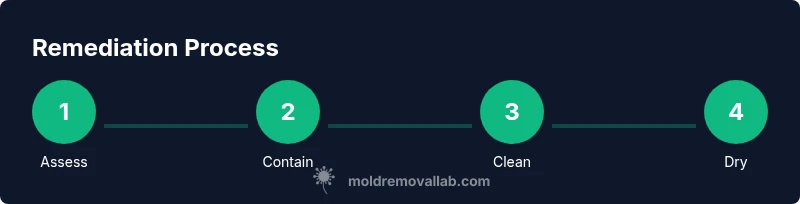
Steps
Estimated time: 6-12 hours total depending on area size and access
- 1
Inspect mold growth and moisture sources
Survey all rooms for visible mold and signs of moisture. Document locations on a simple map, noting leaks, condensation, and humidity hotspots. This helps you scope the work and plan containment.
Tip: Take photos from multiple angles before starting cleanup to track changes. - 2
Contain the affected area
Seal doors and vents with plastic sheeting; close off HVAC ducts if possible. The goal is to prevent spores from spreading to clean spaces and to maintain a controlled environment for cleanup.
Tip: Limit activity in other parts of the home during remediation. - 3
Don PPE and prepare the workspace
Put on respirator, gloves, goggles, and coveralls. Set up containment barriers, and prepare cleaning solutions to minimize disruption and spore dispersal.
Tip: Never skip PPE; mold exposure can aggravate allergies and asthma. - 4
Remove or treat contaminated porous materials
Porous materials with embedded mold should be bagged and disposed of or removed. Nonporous surfaces can be scrubbed with detergent and allowed to dry thoroughly.
Tip: Do not attempt to salvage heavily contaminated porous materials. - 5
Clean nonporous surfaces and dry thoroughly
Wash surfaces with detergent, rinse, and dry completely. Use a HEPA vacuum on dusted areas and ensure moisture is removed to prevent regrowth.
Tip: Apply a drying strategy immediately after cleaning to reduce moisture exposure time. - 6
Address moisture sources and re-check humidity
Repair leaks or condensation problems and improve ventilation. Recheck humidity with a hygrometer to ensure levels stay below 50% where possible.
Tip: Keep humidity low for several weeks after cleanup to deter regrowth. - 7
Document, monitor, and plan follow-up
Photograph cleaned areas, log humidity readings, and schedule a follow-up assessment. Track whether any damp conditions persist that could invite mold return.
Tip: Maintain ongoing moisture management to protect your investment. - 8
Decide on replacement vs. salvage
Assess structural materials for damage; replace irreparably contaminated items and seal remaining areas to prevent future growth. Decide whether a pro should recheck or re-clean areas.
Tip: When in doubt, consult a professional to confirm structural integrity.
FAQ
Can I remediates mold by myself?
For small, contained areas under 10 square feet and with limited moisture, DIY remediation can be feasible with proper safety measures. Larger areas or uncertain conditions should involve a professional to ensure complete removal and prevent cross-contamination.
DIY can work for tiny areas, but larger jobs need a pro to ensure safe and thorough removal.
How long does remediation take?
Time varies with area size, moisture issues, and whether materials must be removed. Simple cases may take a day or two, while larger or more difficult jobs can extend to several days.
It depends on the size and moisture; expect one to several days for typical homes.
What about mold in HVAC systems?
Mold in ducts or on coils requires professional assessment and possible duct cleaning. Do not attempt to clean HVAC components without appropriate safeguards.
Mold in HVAC systems should be evaluated by a professional.
Is testing always necessary after remediation?
Testing is not always required if moisture is controlled and visible mold has been removed. Consider testing if there are continued moisture problems or occupant health concerns.
Testing isn’t always needed; only if humidity remains high or symptoms persist.
What health risks are associated with mold exposure?
Mold exposure can trigger allergies and asthma symptoms in sensitive individuals and can irritate the eyes, skin, and lungs in others. Seek medical advice if symptoms develop.
Mold exposure can trigger allergies and asthma; see a doctor if worried.
How can I prevent mold from returning?
Keep humidity below 50% where possible, fix leaks promptly, ensure good ventilation, and monitor moisture-prone areas regularly. A maintenance routine helps sustain remediation results.
Preventing mold is about moisture control and regular checks.
Watch Video
The Essentials
- Identify moisture sources before cleanup.
- Contain the area to prevent cross-contamination.
- Use proper PPE and follow safe cleaning practices.
- Dry thoroughly and maintain low humidity after remediation.
- Document progress and know when to involve professionals