Mold What to Do: Practical Home Cleanup and Prevention
Learn practical, safety-first steps for mold cleanup in homes and rentals. This guide covers moisture control, safe cleaning methods, and when to call a pro.

This guide helps you identify mold problems, stop moisture sources, and execute a practical cleanup plan. You’ll learn PPE, safe cleaning methods, when DIY is appropriate, and how to prevent recurrence. The steps are organized for homeowners and renters to follow from assessment to prevention.
Understanding Mold and Why It Happens
Mold is a type of fungus that grows where moisture is present. In homes, common moisture sources include leaks, condensation, and consistently high humidity, which create the conditions mold needs to thrive. If you're asking mold what to do, the first step is to understand that remediation starts with moisture control and safe containment. According to Mold Removal Lab, moisture management is the cornerstone of any successful mold plan. Visible growth is often just the tip of the iceberg; mold can hide behind walls, under floors, or inside HVAC plenums where it’s hard to spot. Health concerns range from allergy-like symptoms to more serious respiratory issues for sensitive individuals. Act promptly but carefully, since disturbing mold can release spores and worsen contamination if not done properly. This section explains how mold forms, common hiding places in typical houses, and the practical implications for homeowners and renters.
Safety First: Gear, Containment, and Ventilation
Safety is not optional when addressing mold. Start with proper PPE: an N95 respirator (fit-tested if possible), disposable gloves, eye protection, and a disposable coverall if available. Protect nearby occupants, especially children and pets, by sealing off the work area with plastic sheeting and taped seams. If feasible, turn off the building’s HVAC system to minimize spread and provide targeted ventilation to exhaust air outdoors. Use a dedicated exhaust fan or a box fan placed to blow air out of a window, away from occupied spaces. Remember, containment minimizes contamination and keeps cleanup manageable. These measures reduce immediate exposure while you plan the next steps.
Moisture Control: The Root Cause
Mold thrives where moisture lingers. The most effective mold prevention and cleanup strategy starts with eliminating sources of water intrusion and reducing indoor humidity. Identify leaks in roofs, walls, pipes, or appliances and repair them promptly. Ventilate damp areas like bathrooms and kitchens, and consider dehumidification in humid climates or seasons. A hygrometer can help you monitor relative humidity; aim to keep indoor RH below 50% where possible. Mold Removal Lab analysis shows that moisture control is the most powerful tool in preventing regrowth after cleanup. Maintaining stable moisture levels is essential to avoid repeating cleanup sessions and to protect indoor air quality.
Cleaning and Remediation: When to DIY vs When to Call a Pro
Nonporous surfaces such as tile, glass, and metal can often be cleaned effectively with detergent and water or a mild cleaner. For porous materials like drywall, carpet, or insulation, removal and replacement are often necessary because mold can penetrate fibers and become embedded. Always start cleaning from the cleanest area, moving toward the dirtiest, and wear PPE throughout. After cleaning, use a HEPA-filtered vacuum to capture dust, then dry thoroughly. If the mold covers a large area (for example, larger than a 10-square-foot patch) or if it involves air ducts, insulation, or a recurrent moisture problem, it is best to contact a licensed remediator. This section outlines practical DIY methods and clearly defines when professional intervention is prudent.
Step-by-Step Plan You Can Follow
A practical remediation plan combines assessment, containment, removal, cleaning, and drying in a logical sequence. Start by documenting the affected areas with photos and notes for future reference. Then isolate the space to prevent cross-contamination, address the moisture source, perform safe cleaning on nonporous surfaces, and finally ensure thorough drying. Throughout, prioritize occupant safety and follow local regulations for disposal of contaminated materials. By sticking to a structured plan, you reduce risk and increase the likelihood of a successful, lasting result.
Preventing Future Mold Growth: Maintenance and Monitoring
Prevention is easier than repeated remediation. Keep moisture sources under control by fixing leaks quickly, maintaining seals around windows and plumbing fixtures, and ensuring proper ventilation in damp areas. Regularly inspect areas prone to moisture—basements, bathrooms, kitchens, and crawl spaces—for signs of dampness, condensation, or musty odors. Establish a routine humidity check and use dehumidifiers in moisture-prone spaces during wet seasons. When moisture is well controlled, mold growth becomes far less likely, and the need for cleanup decreases.
Common Pitfalls and Myths About Mold
Many homeowners believe mold remediation is a one-time fix. In reality, mold can recur if moisture problems aren’t resolved. Bleach is not a universal solution for porous materials and can actually damage surfaces or release toxins; label directions and material compatibility must be checked. Another misconception is that visible mold is always dangerous to touch; instead, avoid disturbing mold colonies and consult a professional for large or uncertain areas. Finally, DIY cleanup can be effective, but it should not replace expert assessment when structural issues or contaminated HVAC systems are involved.
Tools & Materials
- N95 respirator(Fit-tested if possible; use elastics behind ears)
- Disposable gloves(Nitrile recommended; double-gloving for heavy contamination)
- Goggles or face shield(Eye protection against splashes and spores)
- Disposable coveralls or long-sleeve clothing(Protect skin and prevent contamination spread)
- Plastic sheeting and tape(Create containment barrier around the work area)
- Detergent and water or mild mold cleaner(Non-ammonia-based cleaners for nonporous surfaces)
- HEPA-filter vacuum(Use for debris collection and final clean-up)
- Rags and disposable cleaning towels(For wiping and disposal)
- Trash bags (heavy-duty)(Seal and dispose of contaminated materials)
- Moisture meter or hygrometer(Track humidity levels and drying progress)
- Dehumidifier or air conditioner(Assist in drying and reducing humidity)
- Fan or ventilation setup(To improve air exchange with outdoors)
Steps
Estimated time: 2-4 hours
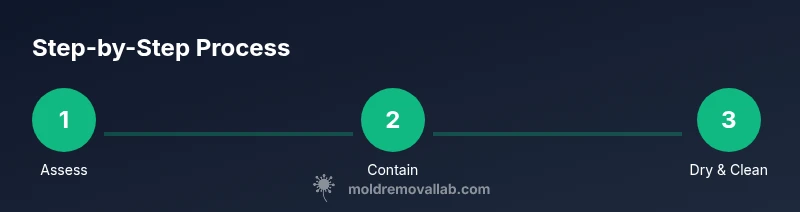
- 1
Assess mold and moisture
Identify all affected areas and estimate the extent of visible mold growth. Note any signs of hidden moisture behind walls or under floors. Document with photos for reference and future follow-up.
Tip: Take measurements of the affected spaces and mark areas with tape to guide removal and cleaning. - 2
Contain the area
Seal off the work zone with plastic sheeting to prevent spores from spreading to clean areas. Minimize traffic through the area and turn off HVAC in the affected zone if safe to do so.
Tip: Use a zipper-access barrier to maintain containment while moving materials in and out. - 3
Remove or treat damaged materials
Replace porous materials such as drywall, insulation, or carpet if mold has penetrated fibers. For nonporous surfaces, proceed with cleaning and disinfection.
Tip: Do not attempt to dry-out or salvage porous items that show mold penetration; containment is essential. - 4
Clean and disinfect surfaces
Clean nonporous surfaces with a mild detergent and water or a dedicated mold cleaner. After cleaning, wipe surfaces with a disinfectant appropriate for the material and finish. Use a HEPA vacuum for debris.
Tip: Always follow product instructions and wear PPE throughout cleaning. - 5
Dry thoroughly and verify
Ventilate the space, run a dehumidifier, and monitor humidity until it stays consistently below target. Re-inspect after 24-48 hours to ensure no regrowth.
Tip: Keep doors and windows closed during drying and re-check humidity regularly in the following weeks.
FAQ
Is mold dangerous to breathe?
Breathing mold spores can cause health symptoms, especially for sensitive individuals. It is important to limit exposure during cleaning and consult a professional for large or persistent problems.
Yes, mold can affect breathing, so limit exposure and seek professional help for large areas.
Can I remove mold myself?
Small, nonporous areas can often be cleaned by homeowners using proper PPE and cleaners. Porous materials with mold growth usually require removal and replacement, and extensive infestations may require a licensed remediator.
You can handle small, nonporous areas, but large or porous infestations require a pro.
What should I use to clean mold safely?
Use detergent and water for nonporous surfaces or a dedicated mold cleaner, following label directions. Bleach is not ideal for porous materials and should be used with caution on nonporous surfaces if appropriate.
Detergent and water work well for many cleanups; bleach isn’t always suitable.
How long does remediation take?
Remediation time varies with the area size, moisture issues, and materials involved. A small cleanup may take a few hours; larger jobs can require days if materials must be removed and replaced.
Timing depends on the extent—smaller jobs are quicker, larger ones take longer.
When should I call a professional?
Call a licensed mold remediator if the affected area is extensive, if there is mold behind walls or in HVAC systems, or if you experience persistent moisture problems despite cleaning.
If in doubt or the area is large, a pro is the safer choice.
Will mold return if humidity is low?
Lower humidity reduces the risk, but any lingering moisture or hidden leaks can allow regrowth. Continuous moisture control is essential.
Even with low humidity, keep monitoring for leaks and dampness.
Watch Video
The Essentials
- Assess moisture before cleanup
- Contain and protect surrounding spaces
- Differentiate DIY steps from professional remediation
- Prioritize thorough drying to prevent regrowth