What Kills Mold on Walls: A Practical Guide for Homeowners
Discover what kills mold on walls and how to remove it safely. Guide from Mold Removal Lab on moisture control, cleaning methods, and when to call pro.

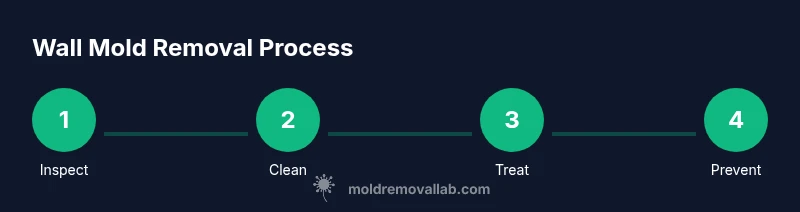
To kill mold on walls, start by stopping moisture and removing the mold safely. Identify and fix the water source, then clean with detergent and water, followed by a mold-killing treatment like white vinegar or hydrogen peroxide. If growth is extensive, or behind wall material, consult a professional remediation service.
Understanding mold on walls
According to Mold Removal Lab, mold on walls typically results from moisture problems that invite mold growth. Mold thrives where dampness persists, especially on porous wall materials like drywall, plaster, or wood paneling. Common moisture sources include roof leaks, plumbing drips, condensation from poor insulation, and high indoor humidity. When you see visible mold, it often means there has been a longer-standing moisture issue behind the surface that allowed colonies to form. Recognizing this helps homeowners avoid simply scrubbing away the surface and missing deeper contamination. The Mold Removal Lab team found that the most effective long-term approach combines moisture control with careful cleaning. By focusing on the root cause and preventing moisture buildup, you reduce both current growth and the chance of rapid re-growth after treatment.
How mold on walls grows and why it returns
Mold spores are always present in indoor air. They take hold when they encounter damp, nutrient-rich surfaces. On walls, the growth pattern often starts behind paint, wallpaper, or drywall where water can accumulate from leaks or high humidity. Even after surface cleaning, spores may linger in porous materials or hidden cavities. A key takeaway from Mold Removal Lab analysis is that you cannot simply disinfect moldy walls and expect a permanent fix if moisture remains unresolved. The fastest path to lasting results is to address the moisture source, then physically remove or seal affected materials if necessary. This approach lowers the chance of regrowth and protects indoor air quality.
Cleaning options that work (and what to avoid)
- Detergent and water: A simple, effective first step for nonporous surfaces or lightly contaminated areas. Scrub with a sponge, rinse, and dry completely.
- White vinegar: A natural mold inhibitor that can be sprayed on affected areas and left to dry. It’s often effective on porous and nonporous surfaces alike and is generally well tolerated in homes.
- Hydrogen peroxide: A mild oxidizer that can help kill surface mold and lighten stains. Apply, wait a few minutes, then scrub and rinse.
- Isopropyl alcohol: Useful for small surface spots; it evaporates quickly and helps reduce residual moisture.
- Bleach: Can be effective on nonporous surfaces like ceramic tile or sealed countertops, but it should not be used on porous materials such as drywall or wood without caution, as it can damage finishes and create harmful fumes. Avoid mixing with ammonia or cleaners that release toxic gases.
- What to avoid: Avoid dry brushing large areas, which can spread spores. Avoid using aggressive solvents on fragile wall finishes and always test a small inconspicuous area first.
Note from the Mold Removal Lab team: cleaning is only part of the solution. If the wall substrate has absorbed a lot of moisture or the mold extends behind the surface, you may need to remove affected material and repair the wall to fully restore safety and appearance.
Safety gear, prep, and containment
Before you start cleaning, prepare the space: wear a protective respirator or at least a P100 mask, gloves, and eye protection. Open windows or use a dedicated fan to improve ventilation. Place plastic sheeting to contain the work area and minimize spread of spores. If you have asthma, allergies, or immune-compromised conditions, postpone the project or hire a pro. After cleaning, discard disposable rags and thoroughly wash reusable tools to prevent cross-contamination. This prep helps ensure that the remediation effort doesn’t introduce mold spores into other parts of your home.
When to call a professional remediation
Small patches (less than a few square feet) on readily accessible surfaces can often be handled by homeowners, provided the moisture source is identified and addressed. For larger areas, hidden growth behind walls, persistent dampness, or mold that reappears after cleaning, professional remediation is advised. A licensed mold remediation contractor can assess structural moisture problems, perform controlled removal of contaminated materials, and perform post-remediation verification. If there is any suspicion of mold growth in HVAC ducts, insulation, or behind furniture, seek professional help promptly. Early intervention reduces health risks and financial costs over time.
Prevention and maintenance to stop recurrence
Prevention is the most effective mold treatment. Ensure proper ventilation in bathrooms, kitchens, and laundry areas. Use dehumidifiers or air exchangers in damp basements or crawl spaces, especially in humid climates. Fix leaks promptly and repair any water intrusion, even minor ones, to avoid ongoing moisture behind walls. Regularly inspect areas around windows, pipes, and the roof for signs of moisture. Consider using mold-resistant paints or sealants on problem walls after treatment. By maintaining stable humidity levels and promptly addressing water intrusion, you reduce the likelihood of mold returning after removal.
Quick case study: small wall patch cleanup
A homeowner noticed a small, fuzzy patch on a bathroom accent wall after a heavy rain. We advised focusing on moisture first: fix the roof leak, ensure ventilation, and dry the area completely. Cleaning involved detergent and water, followed by spraying with white vinegar and a light scrub. After the area dried fully, a mold-inhibiting paint was applied over a clean, dry surface. The patch did not return over the next six months, illustrating the value of moisture control and proper cleaning.
Tools & Materials
- detergent (mild, fragrance-free)(For scrubbing moldy walls and removing dirt without leaving residues.)
- water(Warm water helps dissolve grime and loosen spores.)
- protective mask (N95 or better)(Prevents inhalation of spores during cleaning.)
- gloves (nitrile or latex)(Protects skin from cleaners and mold exposure.)
- eye protection(Goggles or safety glasses to protect eyes.)
- scrub brushes or non-scratch sponge(For scrubbing surface molds without damaging finishes.)
- white vinegar or hydrogen peroxide spray(Mold-killing alternatives for cleaning.)
- disposable rags/paper towels(Contain and throw away mold-containing waste.)
- plastic sheeting and tape(Containment to prevent spores from spreading.)
Steps
Estimated time: 30-60 minutes for cleaning, plus repairs and drying time as needed.
- 1
Identify and address moisture source
Locate the moisture source (roof leaks, plumbing, condensation) and stop it. This prevents fresh mold growth and makes subsequent cleaning more effective. If the source can’t be fixed quickly, postpone cleanup until it is repaired.
Tip: Document the moisture source with photos before repairs. - 2
Ventilate the area
Open windows or use a fan to improve air circulation. Adequate ventilation helps dry surfaces faster and reduces inhalation risk during cleaning.
Tip: Aim for cross-ventilation to move air across the wall surface. - 3
Contain the work area
Seal off the room with plastic sheeting to prevent spores from drifting to nearby rooms. Do not seal too tightly; ensure some airflow to avoid pressure buildup.
Tip: Wash or replace contaminated materials outside the living space when possible. - 4
Clean visible mold with detergent
Mix mild detergent with warm water and scrub the moldy area using a scrub brush or sponge. Rinse with clean water and dry completely before moving to the next step.
Tip: Do not mix cleaners; avoid combining ammonia with bleach. - 5
Apply mold-killing treatment
After cleaning and drying, apply an approved mold-killing agent such as white vinegar or hydrogen peroxide to the area. Let it sit briefly, then rinse or wipe away and dry thoroughly.
Tip: Do a spot test on an inconspicuous area first. - 6
Assess need for material removal
If mold penetrates wall materials (drywall, wood), surface cleaning may not be enough. Remove and replace damp, mold-affected sections as needed.
Tip: Cardboard-backed drywall often needs replacement when mold-damaged.
FAQ
Can bleach kill mold on walls?
Bleach can kill surface mold on nonporous surfaces, but it is less effective on porous wall materials like drywall. It may not reach mold growing inside the material and can produce harmful fumes. Consider safer, penetrating cleaners and address moisture first.
Bleach works on nonporous surfaces, but for walls that soak in moisture, focus on moisture control and safer cleaners; call a pro if growth is behind the surface.
Is mold on painted walls dangerous to health?
Mold on walls can affect indoor air quality and trigger allergies or respiratory symptoms, especially in sensitive people. It’s important to address moisture, clean the surface, and monitor for recurrence.
Mold on painted walls can affect air quality and health, especially for sensitive individuals; address moisture and monitor for returns.
How do I know if mold is growing behind the wall?
Signs include persistent musty odor, ongoing dampness, staining, peeling, or new patches after cleaning. If you suspect behind-wall growth, stop DIY remediation and consult a professional who can test and assess structural impact.
Look for lingering dampness, stains, or odors. Behind-wall growth often requires professional assessment.
What should I do after mold removal to prevent recurrence?
Dry the area completely, fix moisture sources, improve ventilation, and consider applying mold-resistant paint or sealant. Regularly inspect areas prone to moisture for early signs of mold.
Dry thoroughly, fix leaks, and improve ventilation to prevent mold from coming back.
How long does it take to remediate mold on walls?
Time varies with the size of the affected area and moisture issues. Small patches may be resolved within hours, while large or complex cases can take several days, including drying time.
It depends on the size and moisture; small patches can be done in hours, larger cases may take days.
Watch Video
The Essentials
- Address moisture first to stop mold growth
- Use safe, proven cleaning methods for walls
- Contain and protect surrounding spaces during remediation
- Call a professional for large or hidden mold growth