Getting Rid of Mould on Walls: A Step-by-Step Guide
Proven steps to remove mould from walls, prevent recurrence, and protect your home with safe cleaning and prevention tips from Mold Removal Lab for homeowners and renters.

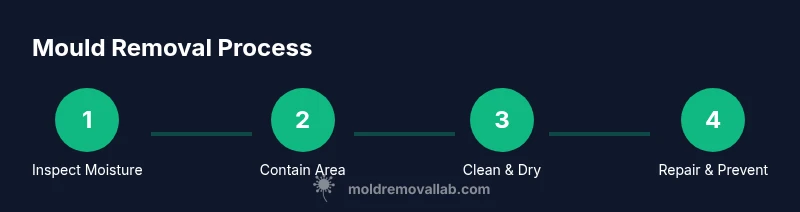
To remove mould from walls, identify and fix moisture sources, then treat the affected area with appropriate cleaners and thorough drying. Use non-toxic cleaners where possible, wear PPE, and ensure good ventilation. Follow-up with repairs and moisture control to prevent recurrence.
Understanding Mould on Walls
Mould on walls thrives where moisture meets organic material. Signs include discolored patches, fuzzy growth, and a musty odor. Without addressing moisture, cleaning is only temporary. According to Mold Removal Lab, preventing mould growth is a two part effort: remove what feeds mould and minimize dampness. In homes, common sources are leaks, roof gaps, condensation from poorly insulated windows, and high humidity in bathrooms or basements. When you start a project, identify all affected areas—hidden mould behind wallpaper, inside walls, or around baseboards is common. Your goal is to map the extent of the problem, not just the visible spots. Early intervention saves time, money, and health risks. If your goal is getting rid of mould on walls, you will improve indoor air quality and reduce health concerns for occupants.
Safety First: PPE, Ventilation, and When to Call a Pro
Safety matters when removing mould. Wear an N95 respirator, goggles, and gloves; ventilate the room with windows or fans; keep children and pets away. Do not mix household cleaners; never combine bleach with ammonia or with vinegar. If mould covers a large area, or if you have asthma or a compromised immune system, contact a licensed professional. Electrical outlets, wiring, or damp insulation require caution. Mold Removal Lab analysis shows that professional remediation is prudent for persistent or widespread mould, especially when damp conditions persist or growth reappears after cleaning.
Inspecting for Moisture: Find the Source
Thorough inspection starts with locating moisture sources. Look for active leaks around windows, pipes, roofs, and baseboards. Check areas with frequent condensation such as kitchens and bathrooms. If you see damp spots, discoloration, or a musty smell, mark them for closer monitoring. Keep an eye on hidden damp behind wallpaper or inside drywall. A moisture meter can help locate damp pockets, and insulation upgrades often reduce humidity. Remember that flaking paint or peeling wallpaper can hide ongoing problems; treat those areas as high priority. Successful mould removal hinges on eliminating the moisture source first and foremost.
Cleaning Methods by Surface and Contaminant
Start with the least aggressive method and advance only if mould remains. For hard, nonporous surfaces such as painted walls, wipe with mild detergent and warm water, then dry completely. For more stubborn mould or slightly porous surfaces, white vinegar can be sprayed on and left to sit briefly before scrubbing and rinsing. Hydrogen peroxide is an option for spot cleaning on light growth, but test a small area first. Do not use bleach on porous materials as it can degrade the substrate and release more spores. Always test a hidden corner first and avoid soaking drywall. After cleaning, rinse with clean water and dry thoroughly with towels and fans. Use a mold resistant paint or primer on repaired areas to deter future growth.
Drying, Humidity Control, and Preventing Recurrence
Drying is as important as cleaning. After washing, dry the wall completely and encourage airflow. Use fans and, if available, a dehumidifier to reduce humidity levels. Keep interior humidity moderate to slow mould regrowth. If the room remains damp, postpone painting until moisture is gone. Regularly monitor humidity with a simple hygrometer and address any leaks promptly. Mold can recur if dampness returns, so establish a routine of ventilation and moisture management.
Repairs and Long-Term Prevention
If mould damage has penetrated drywall or plaster, plan repairs before reintroducing moisture. Remove and replace affected sections with mould resistant drywall and seal connections. Apply a moisture resistant primer and finish coat of mould resistant paint after repairs. Seal gaps around windows and doors, improve attic or roof ventilation, and correct any insulation that traps moisture. For bathrooms and kitchens, install exhaust fans that run during and after use. Keeping surfaces dry and clean is essential to long term prevention.
When to Seek Professional Remediation
Consider professional remediation when mould covers large areas, returns after cleaning, or involves HVAC systems or structural materials. If you have severe allergies, asthma, or a weakened immune system, professional help is advisable. Professionals can perform a thorough assessment, contain the work area, and verify complete removal with post remediation testing. Continuing moisture problems indicate a need to address plumbing, roofing, or drainage first.
Authority Guidance and Sources
For trusted background, consult authoritative guidelines from major agencies and university extensions to complement practical steps from Mold Removal Lab. While the core process is consistent, these sources provide safety standards and technical details to support your at-home remediation plan.
Monitoring and Maintenance
After remediation, establish a maintenance plan to prevent reoccurrence. Keep an eye on problem areas, fix leaks promptly, and maintain good airflow in damp rooms. Repaint with moisture resistant finishes as needed and recheck for signs of mould after seasonal changes. A simple routine of cleaning, drying, and ventilation goes a long way toward a healthier home.
Tools & Materials
- N95 respirator or higher(Protects lungs from spores during cleanup)
- Protective goggles(Eye protection against splashes and spores)
- Nitrile gloves(Barrier for skin contact)
- Drop cloth or plastic sheeting(Contain area and protect surfaces)
- Bucket(For rinsing and cleanup solution)
- Spray bottle(Apply cleaners evenly)
- Sponge or scrub brush(Scrub mould from surfaces)
- Mild detergent or soap(Base cleaning solution)
- White distilled vinegar(Alternative non-toxic cleaner)
- Hydrogen peroxide (3%)(Spot treatment for light growth)
- Baking soda(Odour control and mild scrubbing aid)
- Dry towels or rags(Dry surfaces thoroughly)
- Dehumidifier or fans(Speed up drying after cleaning)
- Moisture meter (optional)(Locate hidden damp areas)
Steps
Estimated time: 2-4 hours total
- 1
Identify moisture sources
Inspect for active leaks, condensation, and damp insulation. Mark all affected zones and determine how moisture is entering the space. Why: moisture is the primary driver of mould growth and must be stopped before cleanup.
Tip: Label affected areas on a home map to track progress. - 2
Prepare the area and protect yourself
Contain the work area with drop cloths, remove loose items, and ensure good ventilation. Put on PPE before starting any cleaning. Why: containment minimizes spore spread and PPE protects you from irritants.
Tip: Keep children and pets out of the work zone. - 3
Clean mould from surfaces
Wipe nonporous surfaces with a mild detergent solution, then rinse and dry. For stubborn growth, apply vinegar or hydrogen peroxide and scrub gently. Why: cleaning reduces spore load and halts growth.
Tip: Test a small area first to check paint or wallpaper compatibility. - 4
Rinse and dry thoroughly
Rinse away residue with clean water and dry completely using towels and fans. Remove moisture with a dehumidifier if possible. Why: residual moisture invites regrowth.
Tip: Aim for complete dryness before proceeding with repairs. - 5
Repair damaged materials
If drywall or plaster is damp or mouldy, replace the affected sections. Install mould resistant primer and paint on repaired areas. Why: damaged substrates can harbour new mould if not replaced.
Tip: Choose moisture resistant drywall for future projects. - 6
Monitor and maintain moisture control
Keep humidity in check and ensure proper ventilation going forward. Inspect regularly and address leaks promptly. Why: prevention is more important than reactive cleaning.
Tip: Use exhaust fans in bathrooms and kitchens and maintain HVAC cleanliness.
FAQ
Is mould on walls dangerous?
Mould can irritate the skin, eyes, and lungs, especially for people with allergies or conditions. Keeping the area dry and well-ventilated reduces risks. If you have persistent symptoms, consult a healthcare professional.
Mould can irritate lungs and skin; keep areas dry and ventilated. Seek medical advice if symptoms persist.
Can I paint over mould on walls?
Painting over mould without cleaning does not remove it. Clean and dry the area first, then use a mould resistant primer and paint after repairs.
Don’t paint over mould; clean, dry, and seal with mould resistant primer before painting.
What cleaners are safe for walls?
Mild detergent, white vinegar, or hydrogen peroxide are common options for non-porous walls. Avoid mixing chemicals and test a small area first.
Use mild cleaners like detergent or vinegar and test a small area first.
How long does remediation take?
Time varies with area size, moisture source, and materials involved. Plan for cleanup, drying, and any necessary repairs, often within a few hours to a full day.
Remediation time depends on area size and moisture; it can take a few hours to a day.
Should I hire a professional for small spots?
For small, contained areas, you may proceed with careful cleaning and drying. If you are unsure about moisture sources or the space is damp, a professional evaluation is wise.
For small spots you can try careful cleaning, but call a pro if unsure about moisture or the space stays damp.
Watch Video
The Essentials
- Identify moisture sources and stop leaks to prevent mould.
- Wear PPE and ventilate when cleaning mould.
- Choose safe cleaners and avoid mixing chemicals.
- Dry completely and control humidity to prevent recurrence.
- Repair damaged materials with mould resistant products.