Kill Mold on Drywall: A Practical Remediation Guide
Learn safe, proven steps to kill mold on drywall, prevent regrowth, and restore a healthy home. Containment, cleaning methods, drying, and moisture control explained by Mold Removal Lab for homeowners and renters.

To kill mold on drywall, isolate the area, protect yourself with PPE, and clean the surface with an EPA-registered cleaner or soap and water. Scrub, rinse, and dry completely; fix the moisture source and maintain low humidity to prevent regrowth. For extensive or deeply penetrated mold, hire a pro for remediation.
Understanding Mold on Drywall
Mold growth on drywall is a common sign of excess moisture. Drywall is porous and provides a food source for mold spores, allowing colonies to establish behind painted surfaces. Some molds appear as fuzzy growth, others as dark spots or staining. Health professionals warn that mold exposure can irritate eyes, skin, and lungs, particularly for allergy-prone individuals. According to Mold Removal Lab, drywall reacts to moisture quickly, so controlling humidity is essential for both remediation and prevention. Visible mold on drywall often indicates unseen moisture behind walls, insulation, or around leaks. The goal of killing mold on drywall is not only to remove surface growth but to stop the moisture source and fix leaks or condensation issues, reducing the chance of recurrence and protecting indoor air quality for occupants. This guidance is designed for homeowners and renters seeking practical, actionable steps.
Key takeaway from Mold Removal Lab Analysis (2026): moisture control is the foundation of successful remediation, and surface cleaning without addressing the root cause will likely fail over time.
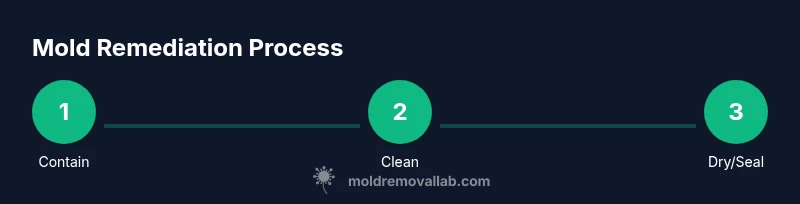
First Steps: Containment and Assessment
Containment minimizes spore spread to adjacent rooms and reduces cross-contamination. Use plastic sheeting to seal the affected doorway and create a simple, passive barrier that can help keep cleanup contained. Avoid disturbing moldy material beyond what’s necessary for assessment. Begin by identifying the moisture source—leaks, condensation, or high humidity—and fix it as part of the remediation plan. Record where growth is most dense and map any areas behind the drywall where moisture could be present. If the substrate appears saturated or the drywall paper is visibly damaged, plan for repair or replacement rather than surface cleaning alone. Good containment, accurate assessment, and moisture source control dramatically improve outcomes for drywalls and keep occupants safer during remediation.
Select Cleaning Methods: What Works on Drywall
Surface cleaning with soap and water can remove loose surface mold. For stubborn growth, use an EPA-registered mold cleaner or a detergent solution. Do not mix cleaners, and never combine ammonia with bleach, which can produce hazardous gases. Bleach may help on nonporous surfaces but drywall is porous, so remediation often requires scrubbing, rinsing, and thorough drying rather than chemical-only approaches. If mold penetrates paint and the drywall paper, cleaning may not fully remove the mold roots, and replacement could be necessary. Some professionals apply antifungal sealants after drying to reduce regrowth risk. This step-by-step approach helps homeowners decide whether a DIY cleaner is sufficient or if a professional assessment is needed.
Step-by-Step DIY Remediation Plan
This section provides a practical sequence for small-area remediation. It emphasizes containment, surface cleaning, and thorough drying while addressing moisture sources. Always follow safety guidelines and consult a professional if you encounter large-scale growth or uncertain moisture conditions. The plan focuses on making the area safe, not just visually clean, and aims to minimize mold exposure for occupants.
Drying, Sealing, and Reassessment
Thorough drying is essential to prevent regrowth. After cleaning, use fans and dehumidifiers to promote air movement and moisture reduction. Reassess the area for any residual staining, lingering odor, or signs of moisture; apply a mold-resistant sealant or primer if the surface is dry and intact, and consider replacing severely damaged drywall panels. If you observe new growth after the area dries, re-evaluate the moisture controls and repair any leaks. Keeping the space dry and well-ventilated helps ensure long-term success and protects indoor air quality.
When to Call a Professional
If mold covers a large area, penetrates the wall cavity, or you cannot locate the moisture source, it’s wise to consult a mold remediation professional. A pro can perform mold testing, safely remove damaged drywall, and ensure proper disposal of contaminated materials. Mold Removal Lab recommends seeking expert help when there is uncertainty about the extent of growth, potential health risks, or structural impact. Early professional intervention can prevent costly damage and health concerns.
Prevention: Keeping Dry, Airflow, and Regular Checks
Preventing mold returns hinges on moisture control, proper humidity management, and regular inspections. Improve ventilation in damp rooms (bathrooms, kitchens, basements), fix leaks promptly, and ensure materials are dried completely after moisture events. Keep surfaces clean and dry, and consider using mold-resistant products in high-moisture areas. Regular checks—especially after weather events or seasonal changes—reduce the chance of hidden mold becoming a long-term problem.
Documentation and Follow-Up
Maintain a remediation log that records dates, moisture events, cleaning methods, and replacement work. Include photographs and moisture readings if available. A written plan helps you track progress and provides a reference if issues reoccur. Regular follow-ups with moisture controls and air quality awareness support a healthier home environment.
Tools & Materials
- PPE set (N95 respirator, protective goggles, gloves)(Ensure a proper fit and replace if damp or contaminated)
- Plastic sheeting and painter's tape(Create containment barriers to minimize spore spread)
- HEPA-equipped vacuum(For cleanup and debris collection)
- Stiff-bristled scrub brushes and non-abrasive sponges(Use to scrub surfaces without damaging paper backing)
- Detergent or EPA-approved mold cleaner(Avoid mixing cleaners; follow label directions)
- Spray bottle and bucket(For applying cleaners and rinsing)
- Rags, microfiber cloths, and disposable towels(For drying and cleanup)
- Dehumidifier or fan-based drying setup(Promotes rapid drying and reduces spores)
- Replacement drywall patch and joint compound(Needed if drywall is saturated or damaged)
- Mold-resistant primer/sealant(Optional after drying to reduce future growth)
Steps
Estimated time: 2-6 hours
- 1
Contain the area
Set up plastic barriers to prevent spores from moving to other rooms. Close doors, cover vents if possible, and minimize activity inside the affected space.
Tip: Seal seams with tape and avoid creating new gaps. - 2
Protect yourself
Put on a properly fitted N95 respirator, goggles, and gloves before touching moldy surfaces. Do not eat or drink in the contaminated area.
Tip: Change PPE if it becomes damp or contaminated. - 3
Assess the extent
Check how far the mold has spread and whether the drywall substrate is intact. Decide if cleaning is sufficient or if replacement is required.
Tip: Take photos for documentation and plan repairs. - 4
Clean affected surfaces
Apply an EPA-approved cleaner or detergent solution, scrub, rinse, and wipe dry. Do not mix cleaners, and avoid ammonia-bleach combinations.
Tip: Work from clean to dirty to prevent cross-contamination. - 5
Dry completely
Use a dehumidifier and fans to thoroughly dry the area until no moisture remains. Recheck for dampness before proceeding with repairs.
Tip: Drying may take hours; patience reduces regrowth risk. - 6
Repair and seal
Patch damaged drywall and apply a mold-resistant primer or sealant if appropriate. Repaint with mold-resistant paint after repairs.
Tip: Ensure repairs address the moisture source to avoid recurrence.
FAQ
What is the best method to kill mold on drywall?
Use an EPA-registered cleaner or soap and water, then scrub, rinse, and dry. If mold is deeply embedded or the area is large, replacement and professional assessment may be necessary.
Clean with an approved mold remover, scrub, rinse, and dry. Deep or extensive mold may require drywall replacement and professional help.
Can I use bleach to kill mold on drywall?
Bleach can help on nonporous surfaces, but drywall is porous. Cleaning and drying, or replacement, are often needed rather than relying on bleach alone.
Bleach isn’t usually enough for drywall; cleaning and thorough drying or replacement is often required.
When should I replace drywall instead of cleaning it?
If mold has penetrated the paper backing or the substrate is saturated, surface cleaning won’t remove the roots and structural damage may occur. Replacement is usually advised.
Deep penetration or soggy drywall means replacement is the safer choice.
Is mold dangerous to health?
Mold exposure can irritate the eyes, skin, and lungs and may trigger allergies in sensitive individuals. If you have ongoing symptoms, consult a healthcare professional and address the mold.
Mold can irritate you, especially if you have allergies or asthma. Take it seriously and address the area.
How can I prevent mold from returning after remediation?
Control moisture by fixing leaks, improving ventilation, and drying the area promptly after any moisture event. Regular inspections help catch early signs of moisture and mold.
Keep the area dry and ventilated, and check regularly for moisture issues.
Watch Video
The Essentials
- Isolate the mold area to prevent spread.
- Fix the moisture source to stop regrowth.
- Use appropriate cleaners; avoid unsafe chemical mixes.
- Dry thoroughly before repairs or sealing.
- Document work and monitor for recurrence.