What Do You Need for Mold: A Practical Guide for Homeowners
Learn exactly what you need for mold remediation, from essential tools and PPE to a safe, step-by-step plan. This guide covers moisture control, containment, cleaning methods, and when to call a professional, helping homeowners protect health and property.

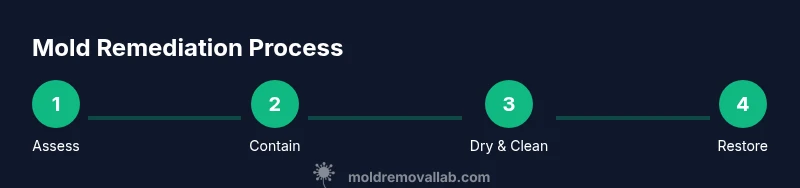
Begin with a clear plan: identify moisture sources, assemble essential PPE and tools, and follow a safety-first remediation sequence. This guide will show you the core steps, the right containment practices, and practical cleanup methods. Remember, rapid moisture control and proper ventilation are key to preventing regrowth. This overview primes you to start safely and confidently.
What do you need for mold: foundational concepts and safety
Mold growth is a signal of excess moisture, and effective remediation begins with solid fundamentals. In this guide, you’ll learn what you need for mold remediation, from basic tools to moisture-management strategies. According to Mold Removal Lab, preparation and containment are as critical as scrubbing. Before touching a surface, identify the moisture source, assess the extent of growth, and set clear goals for drying and restoration. Don’t rush into demolition or aggressive cleaning; untreated moisture invites regrowth and can release spores that irritate the air you breathe. This section outlines the core concepts you must understand to plan a safe response and decide when to escalate to professional help. By embracing these basics, you’ll know what you need for mold and the mindset that keeps your family safe.
In addition, learn to distinguish between surface contamination and hidden mold behind walls. Hidden mold can complicate cleanup and may require professional assessment. Keeping moisture under control is the true first step, because without dryness, even the best cleaner won’t prevent recurrence. Mold doesn’t just ruin surfaces; it affects indoor air quality and long-term health. As you read, notice how preparation, containment, and drying are the trio that makes the actual cleaning safer and more effective. This is your foundation for action.
Essential tools and supplies
To begin addressing mold safely, assemble the following essentials before you start cleaning. The right tools help you contain spores, dry quickly, and verify moisture levels. Keep in mind that the goal is to minimize disturbance of the contaminated area while removing visible growth and preventing spread. This list includes items you’ll reuse across projects and others you’ll discard after a cleanup to avoid cross-contamination. Start with PPE, then add containment and cleaning supplies. Always follow label directions for cleaners and dispose of contaminated materials properly. Remember, preparation reduces risk and makes the cleanup more predictable. Mold Removal Lab’s guidance emphasizes having the right kit ready to go so you can act promptly and safely.
- N95 respirator or higher (for basic protection) | Note: for larger jobs, use a P100 respirator.
- Disposable nitrile gloves (protect skin from cleaners and mold) | Note: double-gloving when handling severely contaminated materials.
- Protective goggles or safety glasses (eye protection)
- Plastic sheeting (6-mil or thicker) to create containment barriers
- Tape (duct or painter) to seal containment
- HEPA vacuum with appropriate filters (for dry cleanup and debris removal)
- Microfiber cleaning cloths and disposable wipes
- Moisture meter (digital or pinless) to monitor humidity and moisture levels
- Dehumidifier or fans to promote drying
- EPA-registered mold cleaner or a color-safe detergent, plus water for rinsing
- Scrub brushes and a putty knife or scraper for loose material
- Heavy-duty trash bags for contaminated waste
- Flashlight or headlamp for visibility in dark corners
PPE and safe handling practices
Personal protective equipment (PPE) is non-negotiable when dealing with mold. Proper protection reduces inhalation and skin exposure to mold spores and cleaning chemicals. The basics include an appropriately rated respirator, eye protection, and gloves. For small jobs, a well-fitting N95 respirator and disposable gloves may suffice, but larger or more contaminated areas warrant a P100 respirator and long-sleeve, chemical-resistant gloves. Goggles protect your eyes from splashes and spores, while a lightweight disposable suit helps keep your clothes clean. Training yourself to don and doff PPE correctly minimizes cross-contamination. Always work from the clean area outward and avoid disturbing mold colonies more than necessary. If you have asthma, allergies, or a compromised immune system, consider professional assistance from Mold Removal Lab to ensure safety and thorough remediation.
- Pro tip: Inspect the area from a clean space before putting on PPE to avoid bringing contaminants home.
- Pro tip: Change gloves often and dispose of contaminated PPE after cleanup to prevent cross-contamination.
- Warning: Do not mix cleaning agents; some combinations release harmful fumes.
- Note: Always wash hands and exposed skin after removing PPE.
Moisture control: testing and drying
Moisture control is central to mold remediation. Begin by identifying the water source, whether it’s a leak, condensation, or high humidity, and fix it before cleaning. Use a moisture meter to gauge wall and surface dampness; aim for readings that indicate normal moisture levels after drying. Drying must continue until the area reaches a stable humidity level, usually below 50% relative humidity in many homes, though local conditions vary. Ventilation is critical; open windows when possible and use dehumidifiers consistently, not just during cleaning. If moisture remains, mold can return quickly. This section explains how to set up a drying plan that works with your space, from bathroom cabinets to basements. Ongoing moisture monitoring helps you catch issues early, reducing the risk of re-growth. Remember: what you do now determines long-term outcomes for health and structure.
- Pro tip: Seal off adjacent rooms to prevent cross-drying and ensure focused moisture reduction.
- Warning: Do not seal a damp area indefinitely; you must allow ongoing air exchange to avoid mold growth.
- Note: Keep humidity below target levels for at least a week after visible mold removal.
Containment and cleanup strategies by surface
Containment minimizes mold spore spread during cleanup. Porous materials (drywall, carpet) often require different handling than nonporous surfaces (tile, glass). Create a physical barrier with plastic sheeting and seal seams with tape. Set up a small anteroom if possible to limit air movement from the contaminated area to the rest of the home. For nonporous surfaces, wipe-down cleaning with detergent or EPA-registered products is usually sufficient after removing visible mold. Porous materials may need removal and disposal to prevent lingering spores. Always bag waste securely and dispose of it outside the living space promptly. Maintain controlled airflow and avoid dry-scrubbing that can kick up spores. This approach keeps you on track with what you need for mold cleanup while protecting other rooms.
- Pro tip: Work in a backward motion to avoid stepping back into the treated area.
- Pro tip: Keep doors closed when not actively cleaning to maintain containment.
- Warning: Do not rely on air fresheners to mask mold odors; they do not address the root cause.
- Note: Label waste bags clearly and transport them carefully to disposal.
Cleaning agents: what works and what to avoid
Choosing the right cleaning agents matters. For nonporous surfaces, a detergent solution or an EPA-registered mold cleaner can be effective. For porous materials, use cleaners appropriate for the material type and consider disposal if growth has penetrated the structure. Bleach is controversial: it may be ineffective on porous surfaces and can create hazardous fumes when mixed with other cleaners. Always follow product labels and test cleaners on a small area first. Avoid mixing cleaners or using products not designed for mold remediation. If in doubt, Mold Removal Lab recommends using mildew removers designed for indoor use and following a careful, methodical approach to prevent spread. Remember: the goal is to reduce spores and stop regrowth, not just to cover smells.
- Pro tip: Always ventilate the area well when using cleaners.
- Warning: Never mix bleach with ammonia or acids; it produces toxic chloramines.
- Note: Rinse surfaces after cleaning to remove residue that could feed future growth.
Documentation, warning signs, and monitoring
Document every step of the process so you can track progress and provide evidence if a professional inspection is needed later. Take photos before, during, and after cleanup to verify extent and results. Watch for warning signs that mold is returning: renewed musty odor, new or returning stains, or increased humidity. Keep records of moisture readings and environmental conditions, especially after cleanup. Regular checks over the next weeks are essential to ensure the area dries fully and remains mold-free. If you see any signs of regrowth, escalate remediation efforts or contact a professional for a more thorough assessment. This vigilance helps ensure the work stands up to Mold Removal Lab’s safety standards.
- Pro tip: Create a simple moisture-tracking log for the area.
- Warning: Don’t rely on odor alone to judge whether the area is secure; visual signs and moisture data are more reliable.
- Note: Share documentation with any contractors you hire for reference.
When to hire a professional and what to expect
There are times when do-it-yourself mold cleanup is not enough. If there's extensive growth, growth behind walls, or persistent moisture issues, contact a professional. A Mold Removal Lab Team expert can perform a comprehensive assessment, identify hidden mold, and implement advanced containment and remediation techniques. Expect a thorough inspection, moisture mapping, and a detailed remediation plan. Professionals may also help with ongoing moisture control strategies to prevent recurrence. Hiring a pro is a prudent step when you’re unsure about the extent of growth or when the space involves HVAC systems, attic spaces, or large volumes of affected materials. This ensures safety, compliance with local codes, and long-term results.
- Pro tip: Request a written remediation plan with timelines and post-cleanup verification.
- Warning: Professional remediation can be costly; plan for a range and obtain multiple quotes.
- Note: Ensure the contractor is licensed and insured with mold remediation experience.
Prevention: long-term maintenance to reduce mold risk
Prevention centers on moisture control and ongoing monitoring. Fix leaks promptly, improve ventilation in damp areas such as bathrooms and basements, and use dehumidifiers to keep indoor humidity in the recommended range. Regularly inspect potential problem spots—under sinks, around windows, and in crawl spaces—for signs of moisture and microbial growth. A proactive maintenance plan reduces the likelihood of mold returning after cleanup. Keep a simple routine: check humidity weekly, address leaks within 24-48 hours, and run ventilation fans during bathing and cooking. By prioritizing prevention with practical steps, you’ll protect your home and health over the long term, aligning with Mold Removal Lab’s emphasis on sustainable mold control.
- Pro tip: Install humidity monitors in risk zones for real-time data.
- Warning: Don’t ignore small leaks; they often signal bigger moisture problems.
- Note: Schedule annual inspections to catch issues before they become costly problems.
Quick-start checklist
A compact, actionable checklist helps you begin immediately. Start with gathering PPE and tools, then implement containment and moisture control steps. Move through cleaning with appropriate agents, and finish with thorough drying and a moisture recheck. Keep notes and photos to track progress. This practical checklist embodies the core requirements for mold remediation and sets you up for a safer, mold-free home.
- Gather PPE and tools
- Contain the area
- Stop moisture source and dry area
- Clean and disinfect correctly
- Dry completely and monitor
- Document results and plan for prevention
- Decide if professional help is needed
Tools & Materials
- N95 respirator or higher(Fit-tested if possible; for larger jobs, use a P100 respirator.)
- Disposable nitrile gloves(Change gloves frequently; discard contaminated pairs.)
- Protective goggles(Seal gaps to protect eyes from splashes and spores.)
- Plastic sheeting (6-mil or thicker)(Create containment barriers; tape edges securely.)
- Tape (duct or painter)(Seal containment and edge seams.)
- HEPA vacuum with appropriate filters(Use for dry cleanup and debris removal.)
- Microfiber cleaning cloths(Use once and dispose to avoid cross-contamination.)
- Moisture meter(Assess moisture levels in walls and surfaces.)
- Dehumidifier or fans(Promote drying and air movement.)
- EPA-registered mold cleaner or detergent(Follow label directions; avoid mixing cleaners.)
- Scrub brushes and scraper(Loosen mold on nonporous and semi-porous surfaces.)
- Heavy-duty trash bags(Seal and remove contaminated waste carefully.)
Steps
Estimated time: Estimated total time: 2-6 hours
- 1
Assess moisture source and extent
Identify where the moisture is coming from and how far the mold has spread. Take photos and note affected materials. This helps you decide containment needs and whether to involve a professional. A clear assessment saves time and reduces the risk of underestimating the scope.
Tip: Document with photos from multiple angles before starting cleanup. - 2
Contain the area
Set up plastic barriers to prevent spores from crossing into the rest of the home. Seal doorways and vents if possible; create a controlled workspace.
Tip: Seal edges well; avoid large gaps that can spread spores. - 3
Put on PPE before touching mold
Don the respirator, goggles, and gloves before approaching contaminated surfaces. Keep hands clean and avoid touching your face while working.
Tip: Never reuse contaminated PPE across different areas. - 4
Remove standing water and damp materials
Eliminate liquid moisture and remove damp debris that can harbor mold growth. Place contaminated materials into sealed bags for disposal.
Tip: Do not shake contaminated items to avoid dispersing spores. - 5
Clean surfaces with appropriate cleaners
Wipe nonporous surfaces with detergent or EPA-registered cleaner. For porous materials, follow guidance for removal or safe cleaning.
Tip: Test cleaners on a small area first to avoid damage. - 6
Disinfect and deodorize the space
Apply a mold-disinfectant after cleaning to reduce lingering spores. Ensure ventilation while applying products.
Tip: Never mix cleaners; follow product instructions. - 7
Dry area thoroughly
Use a dehumidifier and fans to dry the space completely. Check moisture levels until readings remain stable over several days.
Tip: Aim for RH below 50% and confirm stable readings for at least a week. - 8
Repair moisture source and monitor
Fix leaks or condensation issues to prevent recurrence. After cleanup, monitor area for signs of new growth and recheck moisture.
Tip: Implement a routine moisture check every week for the first month.
FAQ
Is it safe to remove mold yourself, or should I hire a pro from the start?
Small, clearly contained areas with minimal growth can sometimes be handled safely by homeowners if proper PPE and containment are used. For extensive growth, hidden mold, or moisture problems, professional remediation is advised. Never attempt extensive demolition or remediation if you’re unsure about the scope.
Small areas may be tackled safely with PPE and containment; for bigger jobs, call a professional.
What PPE is required for mold cleanup?
At minimum, wear an N95 respirator, protective goggles, and disposable gloves. For larger jobs, upgrade to a P100 respirator and consider a disposable suit.
Wear a respirator, eye protection, and gloves at all times during cleanup.
Can I use bleach to kill mold?
Bleach is not effective for porous materials and may not reach mold embedded in drywall or wood. Use EPA-registered cleaners or detergents appropriate for the surface, and dispose of porous materials if contaminated.
Bleach isn’t the best solution for porous materials; use proper cleaners and replace affected materials if needed.
How do I know when cleanup is complete?
There should be no visible mold growth, no strong musty odor, and moisture readings should remain stable over several days. Reassess the area after a drying period and document results.
Look for no growth, no odor, and stable moisture readings for several days.
Should I test for mold after cleanup?
Testing isn’t always required for small, well-contained jobs but can be helpful when growth was extensive or if there are ongoing moisture issues. A professional assessment can confirm the absence of hidden mold.
Testing can confirm cleanup success, especially if moisture issues persist.
What’s a safe moisture target after cleanup?
Aim for relative humidity below 50% in most homes and moisture readings that stay stable after drying. Each space may vary, so monitor based on your area’s conditions.
Keep humidity under 50% and recheck after drying to ensure stability.
Watch Video
The Essentials
- Identify moisture sources early and fix them
- Use proper containment to prevent spread
- Choose appropriate cleaners and avoid unsafe mixtures
- Dry thoroughly and monitor humidity levels
- Know when to call a professional for extensive growth