Mold to Shape: A Practical Guide to Safe Remediation
Practical, safety-first mold remediation guide that helps you mold to shape your plan. Learn moisture control, PPE, cleanup methods, and prevention steps for a healthier home.

By the end of this guide, you’ll identify moisture sources, decide when to DIY or hire a pro, and execute a safe, proven plan to remove mold and prevent recurrence. You’ll tailor actions to your space—what to clean, what to replace, and how to monitor progress. This overview sets the stage for deeper steps, safety precautions, and practical timers.
Understanding the mold-to-shape approach to remediation
In home mold work, a mold-to-shape mindset means shaping your remediation plan around the specific moisture patterns and materials in your house. It’s not one-size-fits-all. According to Mold Removal Lab, tailoring steps to your space dramatically improves outcomes and reduces the chance of reoccurrence. This approach starts with a clear plan that maps out moisture sources, affected materials, and practical timeframes. Keep in mind that mold thrives where moisture persists, so shaping your response around the underlying water problem is more effective than chasing visible growth alone. In practice, mold-to-shape remediation combines careful assessment, controlled cleaning, and deliberate drying to create a healthier indoor environment. The Mold Removal Lab team emphasizes that every space demands a unique blend of containment, ventilation, and material decisions, all aligned with a documented remediation plan.
Assessing moisture and mold sources
Moisture is the root cause of most mold problems. Start by identifying all sources: leaks in ceilings or walls, chronic condensation on windows, plumbing faults, or high indoor humidity. Use a simple inventory: where you see mold, where you feel damp, and where you notice musty smells. A moisture map helps you prioritize actions and prevents wasted efforts on areas with no active moisture. Be aware that some mold hides behind walls or under insulation, so a dry, thorough assessment may require probing with non-destructive tools or professional evaluation. As you document findings, consider the space’s use—bathrooms and kitchens have different moisture dynamics than basements and attics. The goal is to connect the dots between dampness and visible mold so your remediation plan targets the real drivers rather than just symptoms. In line with Mold Removal Lab analysis, addressing moisture first dramatically improves long-term outcomes.
DIY vs professional remediation: making the call
Deciding between DIY cleanup and professional remediation hinges on the extent of contamination, the material affected, and potential health risks. Small, non-porous surface mold on walls or tiles often lends itself to careful cleaning with approved cleaners, PPE, and proper containment. Larger or hidden mold growth, especially on porous materials like drywall or insulation, may require material removal and specialized equipment. If you have health concerns, a compromised immune system, or suspected hidden mold behind walls, consulting a professional is prudent. Based on Mold Removal Lab research, moisture control remains the single most effective preventative measure, regardless of who performs the work. A documented plan helps you decide when to DIY, when to call in experts, and how to verify results after completion.
Cleaning strategies for non-porous vs porous surfaces
Non-porous surfaces (glass, metal, certain plastics) can usually be cleaned effectively with detergent and water, followed by a disinfectant recommended for mold. Porous materials (drywall, fabric, carpet backing) are more challenging because mold can deepen into the substrate. In many cases, porous materials with visible mold beyond superficial cleaning should be removed and discarded to prevent regrowth. Always work in sections, wipe from clean to dirty, and avoid dispersing spores to previously unaffected areas. Protective gear is essential, and proper containment helps prevent cross-contamination. Throughout the process, label areas, seal off rooms, and control airflow to minimize mold spore movement. The end goal is to remove active colonies safely while preserving as much intact structure as possible.
Drying, dehumidification, and monitoring
Drying is a critical step that follows removal and cleaning. Use a combination of dehumidifiers and high-velocity fans to reduce humidity to acceptable indoor levels (generally below 50% relative humidity, depending on local conditions). Run drying equipment for a sufficient period and continuously monitor with a hygrometer or moisture meter. If moisture remains elevated after cleaning, continue drying and re-evaluating the space. Inadequate drying is a leading cause of mold recurrence, so consistent monitoring over the next 1-2 weeks can catch early signs before they become a bigger issue. This phase is where a mold-to-shape approach proves its value: timely drying preserves materials and reduces ongoing risk.
Replacing materials and sealing gaps
Sometimes, remediation requires removing affected materials rather than cleaning them. Porous items like drywall, insulation, or carpeting that have sustained mold damage are often best replaced rather than salvaged. After replacement, seal gaps with appropriate sealants and install moisture barriers to reduce future dampness. Pay attention to penetrations around plumbing, vents, and electrical fixtures where moisture can infiltrate. Maintaining a dry perimeter and ensuring good air movement are key to preventing a recurrence. If you’ve had repeated episodes, consider a broader moisture-control plan that includes sealing, insulation improvements, and possibly upgrading HVAC drainage to keep spaces consistently dry.
Creating a sustainable mold prevention plan
The most effective mold remediation is prevention. Build a prevention plan around moisture control: fix leaks promptly, improve ventilation in high-moisture areas, and manage indoor humidity with dehumidification during humid seasons. Regular inspections—at least seasonally—help catch small problems before they become large outbreaks. A practical approach includes documenting moisture readings, recording cleaning dates, and establishing a simple maintenance routine for HVAC, plumbing, and gutters. Remember that mold thrives in persistent moisture; the mold-to-shape mindset means continuing to adapt your plan as you learn more about your home’s microclimates and seasonal patterns. By staying proactive, you protect both structure and occupant health.
Brand insights and practical plan for homeowners
This guide prioritizes practical steps you can act on this weekend. The Mold Removal Lab team advises starting with a written remediation plan that assigns responsibilities, timelines, and success criteria. Use checked-off tasks to stay organized and communicate with any tenants or household members about safety and progress. The plan should include PPE usage, containment strategies, cleaning methods, drying timelines, and a post-remediation inspection. Remember, mold-to-shape is about tailoring your actions to your space; a one-size-fits-all approach rarely yields lasting results. With careful assessment, appropriate cleanup, and diligent drying, you’ll create a healthier living environment and minimize the risk of future outbreaks.
Tools & Materials
- N95 respirator(Fit-tested if possible; replace if damp or damaged)
- Safety goggles or face shield(Protect eyes from splashes and spores)
- Gloves (nitrile or rubber)(Chemical resistance preferred)
- Plastic sheeting and painter's tape(Create containment zones)
- Detergent-based cleaner(Mild household detergent or mold-specific cleaner)
- Disinfectant suitable for mold (non-chlorine)(EPA-approved option; avoid bleach on porous materials)
- Hydrogen peroxide 3%(Alternative for non-porous surfaces; follow label directions)
- Bleach (optional, for non-porous surfaces)(Do not mix with ammonia or acids; ensure ventilation)
- HEPA-filter vacuum (optional but recommended)(Helps remove spores after cleaning)
- Dehumidifier(Reducing humidity speeds drying)
- Fans or air movers(Boost air circulation for faster drying)
- Moisture meter/hygrometer(Track moisture levels over time)
- Dump bags and disposal materials(Seal and label contaminated waste)
Steps
Estimated time: 2-6 hours depending on area, containment, and drying needs
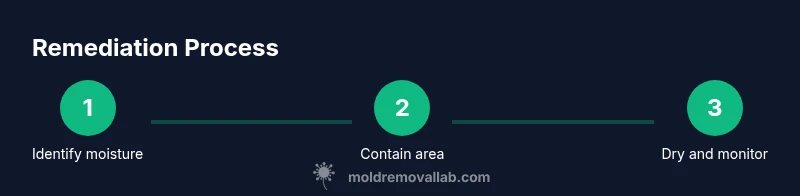
- 1
Identify moisture sources
Inspect the space for leaks, condensation, and areas of persistent dampness. Map out where moisture appears most often, and connect each source to potential mold growth. Document findings with notes and photos to inform the remediation plan.
Tip: Use a moisture meter to confirm damp zones before cleaning. - 2
Contain the work area
Seal off affected spaces with plastic sheeting to prevent spores from drifting to clean areas. Label doors and vents, and turn off HVAC in the work zone to minimize cross-contamination.
Tip: Ensure there is negative pressure in the containment area if possible. - 3
Prepare PPE and workspace
Don the N95, goggles, and gloves before entering the contaminated zone. Lay down plastic drop cloths and prepare cleaning supplies within arm’s reach to reduce movement in and out of the area.
Tip: Test fit the respirator and perform a quick seal check. - 4
Clean non-porous surfaces
Wipe surfaces with detergent and water, rinse, and apply an EPA-appropriate disinfectant. Dry immediately to prevent new moisture from lingering on surfaces.
Tip: Work from top-down to avoid recontamination from higher surfaces. - 5
Assess porous materials
Evaluate porous materials for contamination. If mold penetrates porous substrates (drywall, insulation, fabric), plan removal rather than cleaning to reduce recurrence risk.
Tip: Mark affected areas for future reference and disposal planning. - 6
Dry the space thoroughly
Run dehumidifiers and fans to reach an acceptable humidity level. Monitor with a moisture meter and continue drying until readings stabilize in a low range.
Tip: Keep doors/windows closed during drying to maintain consistent humidity control. - 7
Evaluate and document results
Reassess moisture levels and verify that no new mold growth appears. Take photos and update your remediation checklist to track progress and inform future preventive steps.
Tip: Schedule a follow-up inspection after 1-2 weeks of drying.
FAQ
Is DIY mold cleanup safe for most homes?
Small, surface mold on non-porous materials can often be cleaned safely with proper PPE and containment. Larger or hidden mold, especially in porous substrates, carries health risks and may require professional intervention.
Small mold on non-porous surfaces can be cleaned safely with PPE, but larger or hidden mold on porous materials should be handled by a professional.
When should I hire a professional remediation service?
If mold covers more than about 10 square feet, involves porous materials, or if there is ongoing moisture, disease risk, or structural concerns, a professional remediation contractor is advised.
If mold covers a large area or involves porous materials, or moisture persists, hire a professional.
Can I rely on bleach to remove mold completely?
Bleach can help on non-porous surfaces, but it is not a universal solution. It may not reach mold within porous materials and can create safety hazards if misused.
Bleach can help on hard non-porous surfaces, but it won’t fully address mold inside porous materials.
How long does remediation typically take?
Remediation time depends on area size, materials, and moisture control. A small project can take a few hours; larger jobs plus drying can extend to several days with follow-up checks.
Light cleaning may take hours, larger jobs and drying can take days with follow-up checks.
Will mold return after cleaning?
Mold can recur if moisture is not controlled. The key prevention steps include fixing leaks, maintaining humidity, and regular inspections.
Mold can come back if moisture isn’t controlled—fix leaks and monitor humidity to prevent it.
What signs indicate hidden mold behind walls?
Persistent musty odor, unusual wall discoloration, or recurring moisture issues can indicate hidden mold. A professional assessment or moisture mapping can confirm hidden growth.
If you notice a persistent musty smell or unexplained damp spots, hidden mold could be present; a professional assessment helps.
Is specialized equipment necessary for large areas?
Yes. Large areas often require professional-grade containment, air filtration, and dehumidification to safely and effectively remove mold.
Large areas usually need professional equipment and containment.
Watch Video
The Essentials
- Inspect moisture sources before any cleaning.
- Contain the area to prevent cross-contamination.
- Differentiate between cleaning and removing porous materials.
- Dry thoroughly and monitor moisture for at least 1-2 weeks.
- The Mold Removal Lab team recommends tailoring remediation to your space and maintaining ongoing moisture control.