Mold and Restoration: A Practical Guide for Homeowners
A comprehensive how-to on mold and restoration for homeowners, covering safety, moisture control, remediation steps, and prevention strategies. Learn when to DIY and how to verify dryness with Mold Removal Lab.

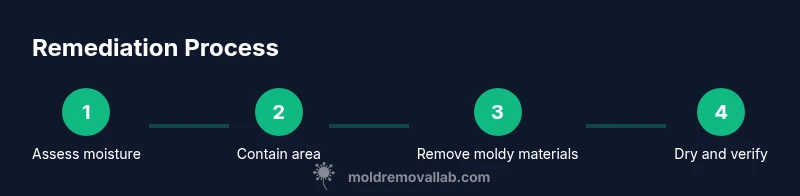
Goal: Learn how to identify moisture sources, contain mold growth, safely remove affected materials, and restore your home. This guide covers essential safety gear, when to DIY versus hire a professional, and a practical step-by-step remediation framework. By the end, you’ll know how to verify dryness and prevent recurrence, so living spaces stay healthy.
Understanding mold and restoration\n\nMold is a sign of excessive moisture, and restoration goes beyond cosmetics to address the root causes. In the context of a home, mold and restoration mean identifying where dampness originates, stopping ongoing water intrusion, and returning affected areas to a safe, healthy state. This section introduces the core idea that remediation is a process, not a one-off cleanup. The Mold Removal Lab team emphasizes that proper restoration starts with a clear plan, because even small moisture problems can become significant mold issues if left unchecked. By understanding the cycle—moisture, mold growth, and material degradation—homeowners can make informed decisions and avoid repeating errors from past repairs. The goal is to restore comfort, indoor air quality, and structural integrity while reducing health risks for you and your family.
This block introduces the core concept of mold and restoration, emphasizing moisture control and safe remediation. The tone is practical and aimed at homeowners seeking durable, long-term results. mold and restoration is presented as a connected process rather than a one-time fix.
Moisture control as the foundation of restoration\n\nEffective mold and restoration work begins with moisture control. Leaks, high humidity, or condensation create a hospitable environment for mold to thrive. Detecting hidden sources—behind walls, under floors, or in crawl spaces—requires a mix of visual inspection and moisture testing. Restore spaces by stopping leaks, improving drainage, and maintaining indoor humidity within a safe range. When done correctly, moisture control prevents regrowth and makes subsequent cleaning, drying, and rebuilding more predictable. Homeowners should document moisture interventions and monitor for signs of dampness after remediation.
Key takeaways from this section\n- Mold signals moisture problems; restoration hinges on moisture control.\n- Identify and fix hidden sources before cleaning.\n- Plan restoration around long-term moisture stability to prevent recurrence.
Tools & Materials
- N95 respirator or P100 respirator(Ensure proper fit before use)
- Disposable coveralls(Hooded or full-body preferred)
- Chemical-resistant gloves(Long cuffs recommended for splash protection)
- Goggles or face shield(Protect eyes from debris and cleaning agents)
- Plastic sheeting (6 mil)(For containment and door/window sealing)
- Duct or painter’s tape(Seal containment barriers and plastic seams)
- HEPA vacuum cleaner(Use with a sealed bag for debris collection)
- Air purifier (HEPA filter)(Helps improve air quality during and after cleanup)
- Moisture meter or hygrometer(Track moisture before, during, and after remediation)
- Dehumidifier(Accelerates drying in enclosed spaces)
- Bucket, detergent, non-ammonia cleaner(Mild cleaning solutions for non-porous surfaces)
- Soft-bristled brush and scrapers(Gently remove surface mold without damaging substrates)
- Trash bags (heavy-duty)(Seal and dispose of contaminated materials)
- Flashlight or headlamp(Inspect dark cavities and behind obstacles)
- Basic tools (putty knife, pry bar)(For surface preparation and minor repairs)
Steps
Estimated time: 24-72 hours
- 1
Prepare the workspace
Before starting, clear the area and put on all necessary PPE. Place plastic sheeting to isolate the space and prevent contamination to adjacent rooms. Establish a containment boundary and ensure workers know the plan and escape routes.
Tip: Double-check PPE fit and seal—a loose respirator or torn gloves reduces protection. - 2
Contain the area to prevent spread
Seal off the affected space with plastic sheeting, creating a negative pressure zone if possible. Use duct tape to secure seams and create an entry/exit path that minimizes cross-contamination. Communicate with other occupants about restricted access.
Tip: Keep doors closed and use a dedicated waste bag for moldy materials. - 3
Remove non-structural, mold-impacted materials
Carefully remove porous materials (drywall, insulation, fabric) that show active mold growth or are damp beyond cleaning capability. Bag and seal these items for proper disposal. Avoid tearing materials in place to prevent spreading spores.
Tip: Label bags clearly and dispose of them according to local waste guidelines. - 4
Clean non-porous surfaces and treat mold
Wipe down hard, non-porous surfaces with an EPA-registered mold cleaner or detergent solution. Gently scrub visible colonies without saturating surfaces. After cleaning, dry surfaces to reduce regrowth risk.
Tip: Avoid mixing cleaners with ammonia or bleach unless explicitly advised. - 5
Dry the space thoroughly
Use fans and dehumidifiers to promote air movement and reduce moisture. Run equipment until moisture readings stabilize at safe levels. Ventilate as much as possible while keeping containment intact.
Tip: Aim for consistent dryness over several days to prevent regrowth. - 6
Inspect for hidden moisture and mold
Re-test moisture in walls, behind baseboards, and under floors. Look for musty odors and damp patches. If moisture remains or new mold appears, escalate remediation steps or call a professional.
Tip: Don’t assume dryness from surface appearance alone. - 7
Repair and rebuild as needed
After confirming dryness, repair structural materials and re-seal the area to prevent future moisture intrusion. Use mold-resistant products where available and maintain proper ventilation in newly restored zones.
Tip: Choose materials with moisture resistance where practical. - 8
Document results and plan prevention
Record moisture readings, cleaning methods, and materials removed. Establish a prevention plan including leaks, drainage improvements, and humidity control to reduce recurrence risk.
Tip: Create a maintenance calendar with seasonal checks.
FAQ
How long does mold remediation typically take?
Remediation duration depends on the extent of contamination, moisture levels, and the size of the affected area. Small, contained sites can be resolved within 1-2 days, while larger, complex cases may take several days. A professional assessment provides a more accurate timeline.
Remediation time varies with contamination extent and space size, ranging from one to several days depending on moisture and materials involved.
Can I DIY mold cleanup, and when should I call a pro?
DIY cleanup is feasible for small, non-porous areas with minimal mold growth and good ventilation. For porous materials, hidden mold, or large affected areas, a licensed professional should handle remediation to ensure safety and thoroughness.
You can tackle small, non-porous mold actions yourself, but large or porous-area mold often needs a pro.
Do I need to remove drywall or insulation during remediation?
Yes—porous materials like drywall and insulation that are moldy or damp beyond cleaning capabilities should be removed to stop the spread and allow proper drying. Non-porous surfaces can often be cleaned and treated without removal.
Often drywall or insulation must come out if mold penetrates deeply.
Should I get a professional mold inspection after remediation?
A post-remediation inspection confirms that all mold has been removed and moisture levels are under control. It verifies the integrity of repairs and helps prevent recurrence.
After remediation, a professional check ensures the area is dry and mold-free.
What signs indicate remediation was unsuccessful?
Persistent odors, recurring dampness, new mold growth, or high moisture readings suggest incomplete remediation. If these signs appear, re-evaluate moisture sources and consider a professional re-assessment.
If dampness or mold returns after cleanup, you may need to reassess moisture sources and remediation methods.
The Essentials
- Identify moisture sources and stop leaks.
- Contain the area to prevent cross-contamination.
- Dry thoroughly and verify dryness before rebuilding.
- Document results and implement long-term prevention.