What to Clean Mold With: A Practical Home Guide 2026
Learn what to clean mold with and how to do it safely at home. This Mold Removal Lab guide covers surface types, safe cleaners, PPE, drying strategies, and when to call a professional.

This guide explains what to clean mold with using common, safe cleaners and proper techniques. You’ll learn how to choose detergents, hydrogen peroxide, or diluted bleach based on surface type, and how to apply cleaners without spreading spores. It also covers essential safety steps, drying thoroughly, and recognizing when professional remediation is needed.
what clean mold with: Core principles
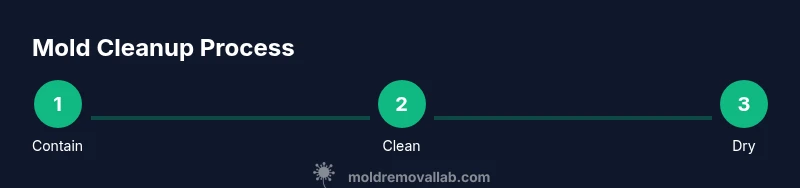
Cleaning mold starts with containment, PPE, and choosing the right cleaning agents based on surface type and porosity. The question what clean mold with is answered by matching cleaners to the surface and mold load, then drying thoroughly to prevent regrowth. According to Mold Removal Lab, the most important steps are preventing spread, wearing appropriate protection, and ventilating the area. Always wear an N95 mask, nitrile gloves, and eye protection. Then, gently remove loose spores with a dry brush or cloth before applying any liquid cleaner. After cleaning, rinse with water and dry completely. Keep the humidity low to prevent future growth.
Surface types and cleaning approaches
Mold behaves differently on porous versus non-porous materials. Non-porous surfaces like ceramic, glass, metal, and sealed surfaces respond well to soap and water, followed by a light disinfectant if needed. Porous materials such as drywall, fabric, or wood can trap spores and moisture, making complete sanitation harder. In these cases, remove and replace heavily contaminated sections when possible, or treat with damp, not soaking, cleaning methods. Ventilation and fast drying are critical to prevent regrowth, especially in basements, bathrooms, and kitchens where humidity fluctuates.
Detergent-based cleaning methods
Begin with a mild detergent solution made from dish soap and warm water. Use a soft brush or sponge to scrub mold off non-porous surfaces in a circular motion, removing visible residue. Rinse with clean water and blot. For stubborn stains, repeat the process once, then move to a disinfectant if appropriate for the surface. Do not over-wet surfaces; mold spores can spread when excess moisture is present. Dry the area promptly after cleaning, ideally within 24 to 48 hours, to minimize regrowth risk.
Disinfectants: bleach and hydrogen peroxide
Disinfectants can supplement cleaning, but they must be used appropriately. Bleach is effective on non-porous surfaces when mixed correctly and used in a well-ventilated area, following label directions. Hydrogen peroxide (3%) is a milder alternative that can be effective on both porous and non-porous surfaces when applied carefully and allowed to sit briefly before rinsing. Never mix cleaners—bleach with ammonia or acids can release toxic gases. Always ventilate and wear eye protection and gloves when using chemical disinfectants.
Drying and preventing regrowth
Moisture control is essential after cleaning. Use dehumidifiers, fans, and cross-ventilation to reduce humidity levels quickly. Dry all cleaned areas completely before furniture or contents are returned. Check for hidden moisture behind walls or under flooring; if you suspect trapped moisture, consider professional moisture mapping. Maintaining humidity below 50% (where safe for occupants) helps prevent future mold problems. Regularly monitor high-moisture zones like bathrooms and basements, and address leaks promptly.
When to salvage or discard porous materials
Porous materials like drywall, insulation, and porous wood can harbor mold spores even after cleaning. If moisture has penetrated deeply or mold recurs after multiple cleanings, disposal may be the safer option. Seal contaminated sections with intact barriers during removal to prevent spread, and bag waste securely for disposal. For large-scale contamination or irregular growth patterns, professional remediation offers more thorough inspection, containment, and treatment options beyond DIY cleanup.
When to call a professional remediation service
If you have extensive growth (more than 10 square feet or multiple rooms), persistent moisture, or underlying structural leaks, a professional remediation service is recommended. Professionals can perform mold testing, containment, specialized filtration, and complete removal of contaminated materials without compromising indoor air quality. Even with DIY cleaning, you may benefit from a consultation to verify that all moisture sources have been addressed and that safety protocols were followed. The Mold Removal Lab team emphasizes that professional guidance reduces recurrence risk and protects vulnerable occupants.
Final recommendations and practical next steps
For most homeowners, a measured approach with careful cleaning, thorough drying, and ongoing moisture control is sufficient for small, localized mold growth. Always start with containment and PPE, then use mild cleaning solutions for non-porous surfaces and assess the need for disinfectants. When in doubt, or when mold covers larger areas or is associated with water damage, contact a trained professional. The Mold Removal Lab team recommends documenting the condition, addressing water leaks, and scheduling follow-up checks to ensure the area remains mold-free over time.
Tools & Materials
- N95 respirator(Protects against airborne spores)
- Protective goggles(Eye protection to prevent splashes)
- Nitrile gloves(Chemical resistance and barrier protection)
- Dish soap or mild detergent(Basic cleaning agent)
- Warm water (not hot)(For dilution and rinsing)
- Non-abrasive scrub brush or sponge(Gentle cleaning to avoid surface damage)
- Spray bottle(For applying cleaning solutions)
- Cloth rags or paper towels(Drying and wiping surfaces)
- Bleach (3-5% solution) or hydrogen peroxide (3%)(Disinfectant options; use per label)
- Ventilation fan or dehumidifier(Facilitates drying and air exchange)
- Plastic sheeting/sealant tape(Containment if needed)
- Trash bags (heavy-duty)(Dispose contaminated materials safely)
Steps
Estimated time: Estimated total time: 2-5 hours
- 1
Prepare the area and PPE
Put on N95 mask, goggles, and gloves. Clear the space and lay down towels or plastic to protect nearby surfaces. Create good ventilation while minimizing airflow to other rooms to prevent spread.
Tip: Test fit your PPE to ensure a comfortable seal. - 2
Contain and isolate
Close doors, seal vents with plastic sheeting if needed, and designate a contained cleanup zone to prevent mold spores from moving to clean areas.
Tip: Use tape to secure plastic flaps and keep a clear path for cleanup. - 3
Identify mold extent
Survey the affected area and classify surfaces as porous or non-porous. Note any water damage or persistent moisture sources that require repair.
Tip: Take photos for documentation and future reference. - 4
Dry brush loose spores
Gently brush or wipe loose mold growth with a dry cloth to minimize airborne spores before applying liquids.
Tip: Avoid aggressive scrubbing that can embed spores deeper. - 5
Apply detergent solution
Prepare a mild detergent solution and apply to the surface with a sponge. Work in small sections and do not soak the area.
Tip: Rinse your sponge frequently to avoid redepositing mold. - 6
Scrub and rinse non-porous surfaces
Scrub the area with a soft brush, then rinse with clean water. Repeat once if needed, and dry promptly.
Tip: Pat dry rather than rubbing aggressively to avoid damaging surfaces. - 7
Disinfect if appropriate
On non-porous surfaces, apply a disinfectant per product instructions. For porous materials, disinfectants may be less effective; rely on removal and drying.
Tip: Never mix chemicals; follow label directions for ventilation. - 8
Address porous materials
If mold has penetrated porous materials, assess whether cleaning is feasible or if replacement is necessary.
Tip: Disposal of contaminated materials should follow local guidelines. - 9
Dry thoroughly
Use dehumidifier or fans to lower humidity and dry the cleaned area completely within 24-48 hours.
Tip: Check behind walls or under floors for hidden moisture with a moisture meter if available. - 10
Inspect for regrowth
Return after a few days to inspect the area for any signs of regrowth. Re-clean if needed.
Tip: Address root moisture problems to prevent recurrence. - 11
Dispose of waste safely
Seal contaminated materials in plastic bags and dispose according to local guidelines.
Tip: Wipe down tools and wash hands thoroughly after disposal. - 12
Document and plan prevention
Record the cleanup process and plan for moisture control measures to prevent future growth.
Tip: Schedule routine checks after periods of high humidity.
FAQ
Is bleach always safe for cleaning mold?
Bleach can kill mold on non-porous surfaces, but it may not reach embedded spores in porous materials. Always follow label directions and ensure good ventilation.
Bleach works on hard surfaces but not always on porous ones; follow the product label and keep the area ventilated.
Can I clean mold myself or should I hire a pro?
For small, localized growth with no water damage, DIY cleaning can be sufficient. Large areas, hidden moisture, or recurring growth warrants a professional remediation.
Small areas may be cleaned yourself, but bigger problems benefit from a pro.
What surfaces are easiest to clean and which should be discarded?
Non-porous surfaces like tile or glass are easier to clean. Porous materials such as drywall and insulation may need removal and replacement if moldy.
Hard surfaces are easier to clean; porous materials often need disposal.
How long does it take to remediate mold properly?
Cleanup duration depends on area size, moisture control, and material type. A small spot may take a few hours, while larger jobs can extend to days.
Time varies by size and moisture control, from hours to days.
Should I paint over mold after cleaning?
Painting over mold is not advised. It can conceal ongoing moisture and regrowth. Address moisture and clean thoroughly before refinishing.
Don’t paint over mold; fix moisture and clean first.
Watch Video
The Essentials
- Protect yourself with PPE before any cleaning.
- Match cleaners to surface type and porosity.
- Dry thoroughly to prevent regrowth.