Mold Specific Cleaners: A Practical Guide for Safe Remediation
Learn how to choose and use mold specific cleaners safely. This practical guide covers cleaner types, safety, prep, technique, and post-cleanup steps to protect indoor air quality and prevent mold recurrence.

With the right mold specific cleaners, homeowners can address common mold growth safely and effectively. This guide explains how to choose enzyme-based or chelating cleaners, how to prep the area, and the best cleaning techniques to prevent recurrence. By following these steps, you’ll minimize exposure risks for you and your family while restoring surfaces.
What are mold specific cleaners and when to use them
Mold specific cleaners are formulated to target mold spores while minimizing surface damage and chemical exposure. They come in enzymatic, oxidizing, and chelating varieties. This section helps you decide when to use them and how they fit into a broader remediation plan. According to Mold Removal Lab, these cleaners are most effective when used as part of a controlled cleaning routine rather than as a quick spray-and-wipe. They work best on non-porous surfaces such as tiles, metal, glass, and sealed wood, and should be paired with thorough drying to prevent regrowth. For porous materials like drywall or cardboard, consider removal and replacement rather than deep cleaning. Mold specific cleaners can reduce residual odors and surface staining when used correctly, but they are not magic bullets for structural remediation.
Understanding the differences between enzymatic cleaners, oxidizers, and chelating agents helps homeowners pick the right product for the surface and mold type. Always read the label for compatible surfaces and concentrations. The goal is to break the mold’s grip on the surface while limiting exposure to occupants and pets. When possible, test cleaners on an inconspicuous area first to verify colorfastness and material compatibility.
Types of mold-specific cleaners
Mold-specific cleaners fall into several broad categories, each with its own use cases and limitations. Enzymatic cleaners work by digesting the organic material that mold feeds on, which can help remove biofilm and make subsequent cleanup easier. Oxidizing cleaners, such as hydrogen peroxide or peracetic acid blends, kill mold spores by breaking down cell walls but may discolor or degrade sensitive materials if not used correctly. Chelating cleaners bind minerals that help mold cling to surfaces, improving rinse and wipe efficiency on mineral-rich substrates. Surfactants (detergent-like agents) help lift mold from surfaces so cleaners can reach embedded spores. Bleach-based products are effective on non-porous surfaces but can be harsh on finishes and release strong fumes, so use with caution and adequate ventilation. When selecting a product, look for clear labeling that specifies mold-specific claims and surface compatibility. Mold removers designed for bathrooms, kitchens, and non-porous materials are typically safer and more predictable than general multi-purpose cleaners.
Choosing between cleaners should be guided by surface type, mold severity, and occupant sensitivity. In some cases, combining an initial enzymatic cleaner with a follow-up oxidizer provides the best chance of thorough removal while minimizing residual odor. Always adhere to the product’s instructions and perform a small-area test before treating larger sections.
Safety and ventilation considerations
Ventilation is critical when working with mold specific cleaners. Open windows and doors if weather allows, and use a portable fan aimed outward to move fumes outside. Wear appropriate PPE: nitrile gloves, eye protection, and a respirator rated for organic vapors if you’re using strong oxidizers or bleach. Never mix cleaners, especially ammonia- or bleach-based products, as toxic gases can form. Store cleaners away from children and pets, and keep a clear, well-lit workspace to avoid spills. If you have asthma or other respiratory sensitivities, consider scheduling remediation when the living space is unoccupied or using a negative air scrubber to minimize airborne particles. Remember that safety is the foundation of effective remediation, and poor ventilation can turn a routine cleaning into a health risk. Mold Removal Lab analysis shows that proper ventilation and PPE dramatically improve outcomes and reduce post-cleanup symptoms.
Documentation and labeling are essential for safety; always verify expiration dates and compatibility with surfaces before application.
Surface prep and cleaning technique
Begin with a dry wipe to remove loose spores and debris, then apply the mold specific cleaner as directed on the label. Allow the product to dwell for the recommended contact time to maximize effectiveness. Use a non-abrasive brush or microfiber cloth to agitate the surface gently, then wipe away residue with a clean, damp cloth. If the cleaner requires rinsing, follow with a final wipe using a dry cloth to remove moisture. Avoid over-wetting porous substrates, which can trap moisture and promote regrowth. Drying is a critical part of the process—prolonged dampness invites mold to return. A dehumidifier or a fan can hasten drying and reduce humidity levels that foster mold growth. Consistency matters: clean all affected areas uniformly and document changes to monitor progress over 24–72 hours.
Cleaning different materials: walls, wood, fabric, metal
Non-porous surfaces like painted walls, ceramic tile, and metal appliance panels respond well to mold specific cleaners with thorough wiping and drying. Painted walls should be treated with care to avoid peeling; test a small patch first. Finishes on wood should be cleaned with products formulated for wood and dried immediately to prevent warping or staining. Fabrics and porous textiles require more caution; surface-clean only when indicated by the product label, and consider professional fabric cleaning for highly porous materials. Metal components (sinks, fixtures) are generally resilient but can tarnish if cleaners contain harsh oxidizers—rinse and dry promptly. Always follow label directions and perform a small-area test on any new material to confirm compatibility.
Post-cleanup steps: drying, containment, disposal
After cleaning, ensure surfaces are completely dry before reoccupying the space. Use dehumidifiers and fans to accelerate drying, and monitor humidity levels with a hygrometer if possible. Containwork areas with plastic sheeting to prevent cross-contamination to unaffected rooms. Collect and seal contaminated wipes, brushes, and disposable towels in a plastic bag and dispose of them according to local regulations. Do not reuse disposable cleaning tools that contacted mold, especially on other surfaces. Consider a follow-up assessment after 24–48 hours to confirm complete dryness and absence of residual odor. Document any ongoing dampness sources and plan repairs to eliminate them.
When to call a professional
If mold covers a large area, or if there are signs of structural damage, you should call a professional. Situations involving musty odors that persist after cleaning, ongoing leaks, or mold growth in concealed spaces (inside walls, ceilings, or HVAC ducts) require expert assessment. A professional remediation service can safely contain, remove, and dispose of mold-infested materials and equipment, and may perform post-remediation testing. If you’re unsure about the extent of contamination or whether your cleaners are appropriate for a given surface, seek a Mold Removal Lab-approved assessment. Early consultation helps prevent long-term health risks and costly repairs.
Choosing safe products: labels and ingredients
Read labels carefully to confirm the product is specifically marketed as a mold cleaner and is appropriate for your surface. Look for ingredients like surfactants, enzymatic blends, or chelating agents, and avoid products with incompatible solvents on delicate materials. Check for safety data sheets and any warnings about respiratory or skin exposure. Beware of products that promise instant, complete mold removal with no drying or ventilation—remediation is a multi-step process, and cleaners are only one part of the solution. Stick with reputable brands that provide clear usage instructions, surface compatibility, and dwell times.
Preventing mold regrowth after cleaning
Preventing mold recurrence starts with controlling moisture. Fix leaks promptly, improve ventilation in high-humidity areas, and use dehumidifiers to maintain indoor humidity below 50–60%. Regularly inspect bathrooms, basements, kitchens, and laundry areas for condensation or water intrusion. Clean and dry any affected areas within 24–48 hours of moisture exposure. Finally, maintain a routine of using mold specific cleaners for routine maintenance in humidity-prone spaces and monitor for odors or visible growth to catch problems early. The collective aim is a drier, cleaner home with less risk of recurrence and better indoor air quality.
Conclusion to keep you confident
Using mold specific cleaners is a practical, science-backed step in remediation when paired with proper safety, ventilation, and drying. The most important habits are to follow label directions, avoid mixing products, and address moisture sources promptly. The Mold Removal Lab team emphasizes that maintenance and prevention are ongoing tasks, not one-time fixes. Consistent, careful cleaning reduces recurrence risk and helps keep homes healthier for families.
Tools & Materials
- Mold-specific cleaner (enzymatic, chelating, or oxidizing)(Choose a product compatible with your surface; avoid bleach on porous materials unless specified.)
- Disposable nitrile gloves(Use one pair per area to avoid cross-contamination.)
- Eye protection(Goggles or safety glasses recommended.)
- Respirator or mask(Prefer organic vapor or P100 for stronger cleaners.)
- Non-abrasive scrub brush(Soft-bristled brushes prevent surface damage.)
- Microfiber cleaning cloths(Lint-free and reusable after laundering.)
- Spray bottle or applicator(Recommended for even application.)
- Plastic sheeting or painter’s tape(Containment to prevent cross-contamination.)
- Drop cloths or old towels(Protect floors and furniture.)
- Dehumidifier or fan(Promotes faster drying and reduces moisture.)
- Trash bags—heavy duty(Seal and dispose of contaminated materials.)
- Moisture meter or hygrometer (optional)(Helps track humidity levels during drying.)
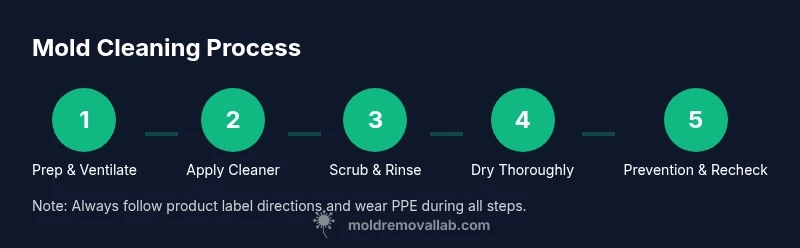
Steps
Estimated time: 60-90 minutes
- 1
Remove loose debris
Put on PPE and use a dry microfiber cloth to wipe away visible mold spores and debris from the surface. Do not scrub aggressively yet; you’re reducing the amount of material to treat and lowering aerosol dispersion.
Tip: Keep the area contained and avoid cross-contamination by sealing off the space with plastic sheeting. - 2
Ventilate the area
Open windows and doors to improve airflow. Position a fan to push air outdoors, not into other living spaces. Adequate ventilation lowers concentration of mold and chemical fumes during cleaning.
Tip: If humidity is high, run a dehumidifier in addition to the fan to support faster drying. - 3
Apply mold-specific cleaner
Apply the cleaner to the moldy area following the product label. Ensure a generous but controlled coating to cover all affected spots. Allow the recommended dwell time for the product to work on the spores.
Tip: Do not mix cleaners; combination can produce toxic gases. - 4
Scrub and agitate
Gently scrub with a soft-bristle brush to lift mold from the surface. Work from the edge toward the center to prevent spreading spores. Wipe away loosened material with a clean microfiber cloth.
Tip: Use circular motions and avoid excessive force that could damage surfaces. - 5
Rinse or wipe away residue
If the product requires rinsing, rinse with clean water and wipe dry. For products that don’t require rinsing, remove residue with a damp cloth followed by a dry cloth to remove moisture.
Tip: Rinse thoroughly on non-porous surfaces to reduce residue that could harbor new mold. - 6
Dry surfaces completely
Use towels and a dehumidifier or fans to dry the area completely. Moisture is the enemy of mold prevention, so ensure no damp pockets remain.
Tip: Check hidden corners and seams where moisture can collect. - 7
Inspect and re-clean if needed
After drying, re-inspect the treated area for remaining mold or odors. If needed, repeat the cleaning process on stubborn spots.
Tip: Document areas with persistent issues to assess moisture sources. - 8
Dispose of waste properly
Place used cloths, disposable PPE, and contaminated materials into sealed plastic bags and remove from the living space promptly.
Tip: Always seal bags before disposal to prevent contamination.
FAQ
What are mold specific cleaners?
Mold specific cleaners are products designed to target mold spores and organic material associated with mold growth. They come in enzymatic, oxidizing, and chelating varieties and are selected based on surface type and mold severity.
Mold-specific cleaners are designed to target mold spores and the materials they feed on, using different active ingredients. Choose the right type for your surface and mold level.
Can I use bleach to clean mold?
Bleach can be effective on non-porous surfaces but is not ideal for porous materials and can create fumes. It may not reach embedded mold. Always test on a small area and follow label directions.
Bleach can work on hard, non-porous surfaces but isn’t great for porous materials and can produce fumes. Test first and follow the label.
Are these cleaners safe around pets and children?
Most mold specific cleaners are formulated with consumer safety in mind, but they still can cause irritation if misused. Ensure good ventilation, keep products out of reach, and follow the manufacturer's safety directions.
They’re generally safe when used as directed, with good ventilation and keeping out of reach of kids and pets.
How long does it take for surfaces to dry?
Drying time varies by material and humidity, but most surfaces dry within a day if proper airflow and dehumidification are used. Check moisture levels and re-run drying if needed.
Most surfaces dry within a day with good airflow, but monitor humidity and re-dry if needed.
Can I clean porous materials like drywall with these cleaners?
Porous materials often require removal rather than surface cleaning, as moisture can drive regrowth. Consult a professional for large or deeply penetrated areas.
Porous materials like drywall usually need removal and replacement rather than surface cleaning.
Should I test for mold after cleaning?
Post-cleanup testing can confirm removal, especially in high-risk spaces. Use a reputable testing kit or hire a professional for definitive results.
After cleaning, consider a test to confirm mold is gone, particularly in damp or previously affected spaces.
Watch Video
The Essentials
- Identify the correct cleaner type for the surface and mold severity.
- Ventilate well and wear appropriate PPE throughout the process.
- Dry surfaces completely to prevent regrowth and odors.
- Follow label instructions and avoid mixing cleaners.
- Consider professional help for large areas or hidden mold.