How to Kill Mold: Safe, Practical Home Remediation Guide
Learn how kill mold safely with a practical, step-by-step remediation plan. This Mold Removal Lab guide covers containment, cleaning, drying, and prevention to improve indoor air quality.

To address mold effectively, you need a practical, safety-first plan. This guide explains how kill mold on typical surfaces using proven methods, proper cleaners, and prevention tactics. According to Mold Removal Lab, containment, thorough cleaning, and quick follow-up maintenance reduce recurrence and protect indoor air quality for homes and renters alike.
how kill mold: A practical approach for homes
Mold growth in homes is often the result of chronic moisture. The phrase how kill mold implies more than a one-step wipe: it requires a deliberate plan that stops water intrusion, contains the affected area, cleans visible growth, and reduces humidity to prevent recurrence. In this guide, you’ll find a practical, safety-first approach that homeowners and renters can implement. According to Mold Removal Lab, beginning with containment and moisture control dramatically improves outcomes, even for stubborn patches. Start by assessing where moisture is coming from — a leaky roof, a damp basement, or a condensation issue in bathrooms — and choose a strategy that matches the extent of the growth.
Next, gather the right tools and materials, and set up a temporary boundary to prevent spores from spreading to rest of the home. The goal is not only to remove visible mold but also to address the underlying moisture problem and establish a plan for ongoing prevention. Remember that the indoor air you breathe matters: mold can trigger allergic reactions or respiratory symptoms in sensitive individuals. With careful steps, consistent drying, and preventive measures, you can reduce mold growth and maintain a healthier living space.
Understanding mold growth and health risks
Mold needs moisture, warmth, and a food source to thrive, so the common-sense defense is moisture control. Left untreated, mold can worsen allergies, trigger asthma symptoms, and irritate eyes or skin. The Mold Removal Lab team emphasizes that health risks vary by person, but reducing dampness and cleaning growth promptly lowers exposure. This section surveys typical mold scenarios in kitchens, bathrooms, basements, and laundry areas, and explains why visible growth is just part of the puzzle—hidden pockets behind walls or under flooring can harbor spores.
In most homes, visible mold indicates a moisture problem. Acting quickly helps protect vulnerable household members, including children and people with respiratory conditions. The aim is not just to remove color or odor, but to stop ongoing exposure and prevent reoccurrence through both cleaning and moisture management. Mold-resistant products and improved ventilation are common, practical upgrades that support long-term safety.
Before you start: safety and prep
Safety comes first. Put on PPE: an N95 mask (or higher), nitrile gloves, eye protection, and disposable coveralls if available. Seal off the work area with plastic sheeting to prevent spores from drifting into clean spaces, and shut down or temporarily redirect HVAC airflow away from the contaminated zone. Photograph affected areas for documentation, and note any leaks or water damage to guide repairs. Ventilate the space as appropriate, but avoid creating cross-draft that spreads spores. Prepare cleaning supplies in advance, and clear the area of porous items that can absorb moisture and harbor mold. This prep reduces the risk of spreading contamination and makes the remediation easier and safer.
DIY methods vs professional remediation
DIY mold cleanup can be effective for small, isolated patches on non-porous surfaces, provided moisture is controlled and the area is contained. Porous materials like drywall or insulation that have absorbed mold growth are often best handled by professionals, because spores can become airborne during removal and hidden mold may persist. This section contrasts common DIY approaches—detergent scrubs, vinegar solutions, and surface sanitizers—with professional remediation practices that include containment, air filtration (HEPA), moisture control, and post-remediation verification. It also discusses when to involve a licensed pro, especially for extensive damage or mold growth after leaks and floods.
The remediation workflow explained
A practical remediation workflow includes containment, moisture control, removal/ cleaning, drying, and restoration. Start by isolating the area with plastic barriers and adjusting humidity control. Next, address the moisture source—repair leaks, fix condensation issues, and improve ventilation. Clean visible mold using a detergent solution on non-porous surfaces; for porous materials that cannot be cleaned, removal may be required. Thorough drying is critical; moisture meters help verify targets below 50% humidity. Finally, restore with mold-resistant paints or sealants and monitor for recurrence. Each stage reduces the chance of regrowth and protects occupants.
Long-term prevention and maintenance
Prevention is easier than repeated remediation. Maintain indoor humidity below 50% with dehumidifiers and good ventilation, repair leaks promptly, and fix design flaws that trap moisture. Use exhaust fans in bathrooms and kitchens, and consider mold-resistant products in high-moisture areas such as basements and laundry rooms. Regular inspections—especially after heavy rain, flooding, or rapid temperature changes—help catch problems early. The Mold Removal Lab team recommends a simple annual check of ceilings, walls, and basements for signs of dampness, staining, or odors, plus immediate action if anything unusual appears.
When to call a professional
Professional remediation is advised when mold covers a large area, persists after DIY cleaning, or involves hazardous materials such as black mold suspected growth in HVAC systems. A licensed contractor can perform containment, proper removal, and post-remediation verification to ensure safety and compliance. If you or family members have severe allergies, asthma, or compromised immune systems, professional oversight is especially important. They can also advise on building envelope improvements to prevent future moisture intrusion.
How to verify cleaning progress and prevent recurrence
Verification involves visual inspection, odor checks, and moisture readings over time. Reassess humidity levels, confirm all damp areas have dried completely, and monitor for new staining or musty smells. Implement a preventive plan that includes rapid leak repair, improved ventilation, regular cleaning of problem areas, and the use of mold-resistant finishes where appropriate. Regular maintenance reduces the likelihood of future mold issues and protects indoor air quality.
Common myths about mold remediation
Mold remediation is not a one-size-fits-all task; it requires moisture management and proper cleaning. A common myth is that bleach alone can solve most mold problems; while bleach can kill surface mold on non-porous surfaces, it does not address porous materials or hidden growth. Another myth is that odor means all mold is gone; odor may persist if spores remain. The honest approach combines containment, cleaning, drying, and prevention, guided by professional standards when needed. This section dispels myths and emphasizes safe, evidence-based practices.
Tools & Materials
- N95 respirator(Fit-tested if possible; replace if damp or damaged)
- Disposable gloves (nitrile)(Non-latex to avoid irritation; 3-4 mil or thicker)
- Safety goggles or face shield(Eye protection against splashes and spores)
- Protective coveralls(Disposable or washable; covers skin and clothing)
- Plastic sheeting or painter's tape(To seal off the work area and create containment)
- Buckets, spray bottles, and sponges(For cleaners and rinsing; keep separate stations)
- Mild cleaners (detergent soap)(Dish soap or laundry detergent for initial cleaning)
- White vinegar and/or baking soda(Alternative cleaning agents; use for odor control)
- Hydrogen peroxide (3%)(For non-porous surfaces as a supplementary sanitizer)
- HEPA vacuum (optional)(Helpful for reducing airborne spores when used carefully)
- Moisture meter or hygrometer(Track humidity levels during drying)
- Dehumidifier or controlled ventilation(Aids drying and keeps humidity low)
Steps
Estimated time: 2-8 hours
- 1
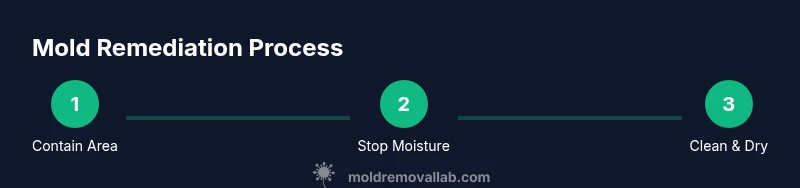
Identify and contain the mold area
Walk the space to locate all mold growth and close off the zone with plastic sheeting. Use tape to seal doors and vents where feasible, preventing spores from spreading to clean areas. Label the containment for easy reference and plan route for removal.
Tip: Seal the boundary, then document the exact affected zones with photos before work begins. - 2
Stop the moisture source
Repair leaks and fix water intrusion sources. If possible, dry the area immediately after any water exposure. Improved ventilation during drying helps reduce humidity more quickly.
Tip: Temporary fixes can fail; ensure permanent repairs are scheduled. - 3
Protect yourself and the space
Wear PPE consistently and keep non-essential items out of the work zone. Turn off or minimize HVAC flow through the contaminated area to limit spore distribution.
Tip: Check mask seal and eye protection compatibility before starting. - 4
Clean non-porous surfaces
Scrub hard, non-porous surfaces with a detergent solution, then rinse and dry completely. For added sanitation, lightly apply 3% hydrogen peroxide to the surface after cleaning, then allow to dry.
Tip: Do not mix cleaners; keep work area well-ventilated. - 5
Address porous materials
Porous materials like drywall or insulation that are visibly moldy may require removal. Bag and dispose of contaminated materials responsibly per local guidelines.
Tip: If uncertain, consult a professional before removing structural materials. - 6
Dry thoroughly and monitor moisture
Use a dehumidifier and targeted fans to dry the space until moisture readings stabilize. Maintain humidity below 50% for several days to prevent regrowth.
Tip: Regularly re-check after drying is complete to confirm stabilization. - 7
Restore and prevent recurrence
Rebuild or seal surfaces with mold-resistant products where appropriate. Reopen the area gradually and observe for new growth or odors over the coming weeks.
Tip: Document changes and schedule a follow-up check.
FAQ
What is the first step to kill mold effectively?
The first step is to identify and contain the mold area, then fix the moisture source. Containment minimizes spore spread, while addressing the moisture source prevents regrowth.
Start by containing the area and fixing the moisture source to stop mold from spreading.
Is bleach effective for killing mold?
Bleach can kill surface mold on non-porous surfaces but it doesn’t reach into porous materials like drywall. Cleaning, drying, and moisture control are essential for real remediation.
Bleach may work on non-porous surfaces, but moisture control and thorough cleaning are key for real remediation.
Can I handle mold cleanup myself?
Small, isolated patches on non-porous surfaces can be DIY if you follow safety precautions. Large areas or porous materials are better handled by professionals to prevent spread and ensure thorough drying.
DIY is possible for small areas, but larger jobs should involve professionals.
How can I prevent mold from returning after cleanup?
Control moisture by fixing leaks, using dehumidifiers, improving ventilation, and choosing mold-resistant materials where appropriate. Regular inspections help catch issues early.
Keep humidity low and fix leaks to prevent mold from coming back.
Do I need to test for mold after cleanup?
Testing is optional in many cases if there is no ongoing moisture and the area looks and smells clean. Testing may be warranted if hidden mold is suspected or symptoms persist.
Testing isn’t always necessary unless you suspect hidden mold or ongoing symptoms.
What signs indicate hidden mold behind walls?
Musty odors, hidden stains, or musty smells behind walls can indicate hidden mold. If you notice these signs, limit disturbance and consult a professional for assessment.
Look for musty smells or hidden stains behind walls; if in doubt, get a professional check.
The Essentials
- Contain the area to prevent spread
- Address moisture first to stop mold growth
- Use appropriate cleaners and thorough drying
- Consider professional help for large or hidden mold
- Maintain low humidity to prevent recurrence