How to Clean Mold: A Practical Step-by-Step Guide
Learn safe, effective mold cleanup with practical steps, protective gear, moisture control, and proven methods from Mold Removal Lab for healthier homes.

You will learn how to clean mold safely by controlling moisture, isolating the area, and using the right protective gear. This guide walks you through a step-by-step cleanup, appropriate cleaning agents, thorough drying, and ongoing moisture management to prevent future growth. Follow these practices to protect your home and health.
What clean mold means for home safety
According to Mold Removal Lab, clean mold means more than removing a visible stain. It means actively eliminating ongoing growth by addressing moisture sources and creating conditions that deter future colonization. Mold can take hold in hidden pockets behind drywall, under carpets, or inside wall cavities, so a thorough approach is essential. Cleaning mold safely requires a plan: containment to prevent spread, appropriate cleaning agents chosen by surface type, mechanical removal where necessary, and complete drying to stop regrowth. The Mold Removal Lab team emphasizes that exposure can vary with surface type and location; what works on a tile corner may not be suitable for porous drywall. This lays the groundwork for a practical, homeowner-friendly cleanup that reduces health risks and preserves indoor air quality. By committing to moisture control and careful technique, you can safeguard your family and property.
- Key signs to address: visible mold growth, musty odors, damp or water-stained surfaces.
- Porous materials like drywall, carpet, and fabric often require removal and replacement rather than simple cleaning.
- Nonporous surfaces like glass, metal, and sealed concrete respond to detergent solutions and light scrubbing.
- Always wear PPE and follow local guidance when handling mold.
- Document moisture sources (leaks, condensation, poor ventilation) to prevent recurrence.
Before you start: planning and safety
Clean mold projects start with a plan and protective gear. Set safe clearance by closing doors, sealing off the area with plastic sheeting, and turning off nonessential HVAC circulations to prevent spreading spores. Use an N95 respirator or better, safety goggles, gloves, and long sleeves. Invite others to stay away from the work zone. Ventilate only if outdoor air is safe to bring inside; direct any airflow outside the home. Inspect for hidden moisture: leaks under sinks, roof intrusion, or high humidity; a basic moisture check helps define the scope and reduces the chance of regrowth after cleanup. Mold Removal Lab's guidance emphasizes documenting findings and scheduling cleanup during a period with manageable humidity for progress monitoring. This preparation reduces health risks and sets realistic expectations for the project.
Cleaning agents and safety considerations
Choose cleaners appropriate for each surface. For hard, nonporous surfaces (tile, glass, metal), a detergent and water scrub followed by a light disinfection can be effective. Avoid mixing cleaners; never combine bleach with ammonia or other cleaners. For porous materials that are damaged by moisture (drywall, carpet), consider removal and disposal rather than attempting restoration. If you use disinfectants, apply them per label directions and allow surfaces to dry completely. Household hydrogen peroxide (3%) can be used cautiously on nonporous surfaces, but test first on a hidden area. A vinegar solution can be used sparingly on some surfaces, but always verify compatibility with the material. Drying is as important as cleaning, so plan for thorough drying after the work is done to prevent relapse. The goal is to clean without spreading spores and to restore as much as possible to original conditions, within safety limits.
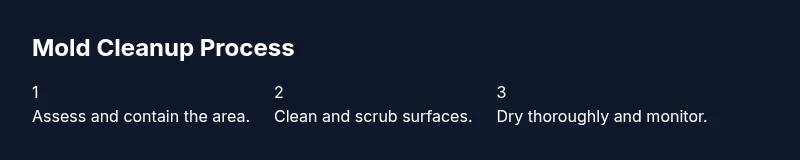
Step 1: Isolate and contain
Containment begins by closing the door and sealing any gaps with plastic sheeting and tape to limit mold spores from migrating to adjacent areas. Create an air path away from living spaces by positioning a fan exhaust toward an exterior window or door, ensuring it does not blow ducted air into other rooms. Post signs to keep others away from the work zone. These measures help protect the rest of the home and belongings while you work. Good containment also reduces cleanup time and exposure. After securing containment, verify that moisture sources are addressed and plan for the next steps.
Step 2: Remove damaged materials and prep surfaces
Where building materials are visibly damaged by moisture, plan for removal or disposal following local codes. Bag contaminated debris in sealed plastic bags to prevent spores from escaping. For remaining surfaces, clear away loose mold and dust with a damp cloth rather than dry sweeping, which can aerosolize spores. Pre-cleaning with detergent and water on hard surfaces minimizes residue and facilitates subsequent disinfection. Always wear PPE during removal and handling of suspect materials.
Step 3: Clean hard surfaces and porous materials
For nonporous surfaces, scrub with detergent and water, then rinse and dry thoroughly. In some cases, a mild-disinfectant spray can be used after cleaning; follow label directions. Porous materials that cannot be adequately cleaned or dried should be removed from the area. Do not attempt to salvage severely contaminated items. After cleaning, inspect surface texture for any remaining mold staining and plan for replacement if necessary.
Step 4: Drying and moisture control
Mold needs a dry environment to stop growth. Use dehumidifiers and good air circulation to dry the area as quickly as possible. Monitor the space for several days and ensure surfaces stay dry to the touch. Keep doors closed and fans in operation until dryness is achieved. Once dry, recheck for any residual signs of moisture or odor and proceed to repairs if needed.
Step 5: Reinspection and root-cause repair
After cleanup, re-check for signs of residual moisture, leaks, or condensation. Fix the underlying moisture issue—leaky pipes, roof leaks, or inadequate ventilation—to prevent recontamination. Repaint or replace affected finishes if needed, using mold-rated primers if appropriate. Schedule follow-up checks to ensure mold does not recur.
Authority sources
For trusted guidelines, see:
- https://www.epa.gov/mold
- https://www.osha.gov/mold
- https://www.cdc.gov/mold
Tools & Materials
- N-95 respirator mask(Ensure proper fit; replace if damaged.)
- Protective goggles(Goggles with indirect ventilation.)
- Chemical-resistant gloves (nitrile)(Long sleeves; avoid latex if you have sensitivity.)
- Plastic sheeting (6 mil or heavier)(To create containment barriers.)
- Tape (painter's or duct tape)(Seal plastic sheeting at doors and vents.)
- Dish soap or mild detergent(Used for initial cleaning.)
- Buckets and microfiber cloths(For scrubbing and wiping.)
- Non-porous scrub brush(Tile, metal, glass surfaces.)
- Dehumidifier or fans(To dry area after cleanup.)
- Moisture meter (optional)(To track humidity levels.)
Steps
Estimated time: 2-4 hours
- 1
Assess and contain area
Close the room, seal with plastic, and create a dedicated airflow path to minimize spore spread. Post a sign and limit access until cleanup is finished.
Tip: Verify containment is secure before starting work. - 2
Protect yourself and surfaces
Put on PPE and prepare drop cloths or plastic to protect adjacent surfaces. Keep pets and kids away from the area.
Tip: Check PPE fit and replace if damp or damaged. - 3
Identify moisture source
Locate leaks, condensation issues, or high humidity contributing to mold growth. Plan repairs before finishing cleanup.
Tip: Address moisture first to prevent recurrence. - 4
Remove damaged materials
Safely bag and dispose of porous materials that are mold-damaged. Use containment to prevent cross-contamination.
Tip: Follow local disposal guidelines for contaminated material. - 5
Clean remaining surfaces
Scrub nonporous surfaces with detergent and water; rinse and dry thoroughly. Avoid aerosolizing spores during cleaning.
Tip: Use damp cloths rather than dry sweeping. - 6
Disinfect where appropriate
If needed, apply a surface disinfectant per label directions and allow to air dry completely.
Tip: Do not mix cleaners; follow label safety recommendations. - 7
Dry thoroughly and monitor
Run dehumidifiers and fans to finish drying. Check for damp smells or soft spots daily for a few days.
Tip: Continue ventilation until the area feels completely dry. - 8
Repair and prevent
Fix underlying moisture issues (leaks, ventilation gaps) and implement ongoing humidity control to prevent future mold growth.
Tip: Install a humidity monitor if possible.
FAQ
Can all mold be cleaned by homeowners?
Many small mold problems can be cleaned by homeowners when there is no extensive growth or hidden mold behind walls. Large infestations or mold behind structural materials should be handled by professionals.
Most small mold problems can be cleaned at home, but big infestations or hidden mold need a professional.
Is bleach effective for cleaning mold?
Bleach can help on nonporous surfaces but is not effective on porous materials like drywall. Detergent and water should be the primary cleaners; disinfectants may be used after cleaning according to labels.
Bleach isn’t always the best choice, especially on porous materials.
How long does cleanup take?
Time varies with the extent of growth. Small areas may be cleaned in 1–2 hours with thorough drying; larger areas can take several hours to complete and dry completely.
Time depends on how much mold there is and how fast the area dries.
What humidity level indicates it’s safe to reoccupy?
Aim to reduce visible moisture and avoid damp smells. Use a moisture meter if available and ensure surfaces stay dry to touch after cleaning.
Keep monitoring moisture; ensure it stays dry before reoccupying.
When should I hire a professional?
Consider a professional remediation service for extensive growth, mold behind walls, or if you are unsure about safety steps. A licensed pro can assess structural issues and ensure proper containment.
If in doubt, consult a licensed mold remediation professional.
How can I prevent mold from returning?
Fix leaks promptly, improve ventilation, use dehumidifiers in damp areas, and clean spills quickly to keep humidity under control.
Preventing moisture is key to stopping mold from coming back.
Watch Video
The Essentials
- Contain the area before cleanup to limit spread.
- Address moisture as the root cause first.
- Choose surface-appropriate cleaners and avoid mixing chemicals.
- Dry thoroughly and monitor humidity after cleaning.
- Plan and perform follow-up checks to prevent recurrence.