Water Mold Remediation: A Practical How-To
Learn a practical, step-by-step approach to identifying, cleaning, and preventing water mold in homes. This guide covers moisture control, safe remediation strategies, and when professional help is needed for lasting results.

Water mold is a mold that flourishes in damp environments, often after leaks or condensation. It can appear on walls, textiles, and insulation and may trigger symptoms in sensitive people. Practical remediation starts with moisture control, careful cleaning, and deciding whether DIY methods are enough or if professional help is required.
What is water mold and why it matters
Water mold refers to mold that thrives in damp conditions, often after leaks or condensation. It can appear on walls, ceilings, textiles, and insulation, and it may trigger health symptoms in sensitive individuals. Causes include persistent moisture, warm temperatures, and limited air movement. For homeowners, water mold signals ongoing moisture problems that can damage materials and air quality. According to Mold Removal Lab, moisture control is the most effective defense against regrowth. Identifying the moisture source is the first critical step, because you cannot dry out what you do not locate. If you notice musty odors, damp patches, or peeling paint, treat it as a warning sign and start moisture reduction immediately.
In many homes, a rapid response yields better long-term results. As you plan remediation, keep in mind that water mold can persist behind walls and under flooring if the moisture problem continues. Begin with a simple moisture audit: check for leaks, look for condensation on windows and pipes, and monitor relative humidity with a gauge. This proactive approach minimizes damage and makes later cleanup more straightforward.
Common sources of moisture that fuel water mold
Leaks from roofs, pipes, or appliances are the most obvious culprits behind water mold growth. Even seemingly minor drips can create a persistent damp zone behind drywall or under carpets. Condensation on cold surfaces—such as metal ducts or uninsulated walls—promotes sustained moisture levels, especially in poorly ventilated rooms. High humidity from daily activities like cooking, showering, or laundry without adequate ventilation also feeds mold growth. A poor dehumidification strategy, blocked exhaust fans, and continuous water intrusion can turn a small patch into a larger problem over weeks or months.
How water mold differs from other molds
Water mold tends to proliferate in areas where moisture is present for extended periods, rather than blooming after brief dampness. It often hides behind walls or under flooring, making it harder to detect early. Compared with drywall-destroying black mold or surface mildew, water mold can affect insulation and wooden framing, increasing the risk of structural damage if ignored. The key distinction is moisture dependency: controlling humidity and eliminating water sources typically halts regrowth more effectively than merely scrubbing visible patches.
Quick moisture-control strategies to prevent growth
Effective prevention starts with source control and air movement. Fix leaks promptly and inspect plumbing fixtures regularly. Use exhaust fans in bathrooms and kitchens, and run a dehumidifier in damp spaces such as basements or laundry rooms. Aim to keep humidity below a practical threshold in your climate (often around 50-60%, adjusted for season). Improve air exchange by opening doors between rooms or using a small fan to move air across surfaces prone to condensation. These steps slow or stop water mold from re-establishing itself after remediation.
Cleaning safely: when DIY works vs when to call a pro
Nonporous surfaces like tile, glass, and sealed countertops can often be cleaned with standard cleaners or a mild detergent. For tougher growth on hard surfaces, a commercially labeled mold cleaner or a bleach solution (when appropriate for the surface) can be effective. Porous materials such as drywall, insulation, or fabric may require removal and replacement if visibly contaminated or water-damaged. Always wear PPE (mask, gloves, protective eyewear) and never mix cleaning agents. If you notice spreading growth, persistent odor, or symptoms worsen after cleaning, seek professional remediation.
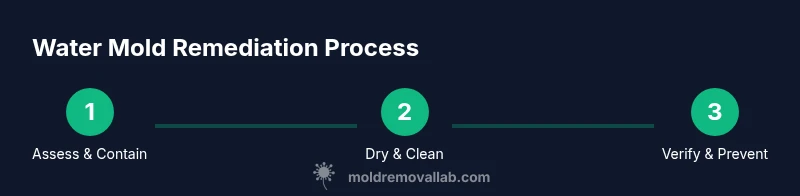
Step-by-step remediation workflow for visible growth
Visible growth should be addressed methodically to prevent recontamination. Start by isolating the area with plastic sheeting to minimize dust. Remove and dispose of damaged porous materials that cannot be saved. Clean nonporous surfaces with an appropriate cleaner, rinse, and dry thoroughly. Use a hygrometer or moisture meter to confirm that humidity levels are below the target before proceeding. Finally, repaint or seal surfaces if needed and monitor the area for several weeks to ensure no regrowth occurs.
Inspection and testing options to verify removal
After remediation, perform a moisture assessment and test for residual spores if you have access to reliable kits or lab analysis. Visual inspection alone is insufficient—dry patches can mask hidden moisture behind walls. For many homeowners, a professional mold inspector provides the most comprehensive verification, including surface swab tests and environmental air sampling. A routine follow-up check after a month helps ensure the remediation was successful and that conditions remain stable.
Maintenance to prevent recurrence
Establish a routine that includes monthly checks of high-risk areas like basements, bathrooms, and laundry rooms. Clean gutters and downspouts to prevent water intrusion, and ensure exterior grading directs water away from the foundation. Maintain HVAC and bathroom exhaust systems to control humidity, and replace damp items before mold has a chance to take hold. By combining proactive maintenance with rapid response to leaks, you reduce the likelihood of water mold returning.
Tools & Materials
- N-95 or higher respirator mask(Seal face tight; replace disposable masks after use)
- Safety goggles(ANSI Z87.1 compliant)
- Chemical resistant gloves(Nitrile recommended)
- Plastic sheeting (6 mil or thicker)(For containment of work area)
- HEPA vacuum(HEPA-rated for dust and spores)
- Mold cleaner or detergent(EPA-registered cleaner suitable for surfaces)
- Mild bleach solution (if surface appropriate)(Use only on non-porous surfaces; never mix with ammonia)
- Dehumidifier(Aim for humidity below 50-60%)
- Moisture meter / hygrometer(Track RH and surface moisture)
- Plastic trash bags(Heavy-duty bags for disposal of contaminated materials)
- Scrub brushes, non-metal(For scrubbing nonporous surfaces)
Steps
Estimated time: 60-120 minutes
- 1
Assess area and don PPE
Begin by inspecting visible mold growth and moisture sources. Put on an N-95 mask, goggles, and gloves before touching any material. This protects you from spores and irritating chemicals and marks the start of a safe remediation workflow.
Tip: Do a quick ventilation check before starting; open windows if weather allows. - 2
Identify moisture sources and reduce humidity
Locate leaks, drips, or condensation that feed growth. Repair leaks and use a dehumidifier to reduce relative humidity to a level suitable for your climate. This reduces the chance of regrowth once cleaning starts.
Tip: Keep a moisture meter nearby to verify ongoing dryness. - 3
Contain the area to prevent spread
Seal off the affected zone with plastic sheeting and tape. This prevents spores from circulating to other rooms during cleanup. Label the area as work in progress to minimize foot traffic through the zone.
Tip: Avoid disturbing mold during containment; plan safe containment steps. - 4
Clean nonporous surfaces safely
Wipe down hard, nonporous surfaces with a suitable cleaner. Rinse and dry those surfaces completely to prevent residual moisture. For stubborn patches, repeat cleaning and consider a second pass after drying.
Tip: Ventilate well, and avoid mixing cleaners. - 5
Address porous materials
Porous materials such as drywall, insulation, or fabrics with visible growth should be removed and disposed of if contaminated deeply. If feasible, replace with new material after cleaning surrounding areas.
Tip: Document which materials were removed for future reference. - 6
Dry out and monitor
Continue dehumidification and air movement until moisture meters read low and surfaces are dry. Recheck humidity in several spots to confirm even drying.
Tip: Set aside time to monitor daily for at least 72 hours after cleanup. - 7
Verify removal and prevent recurrence
Perform a final inspection and, if possible, a surface test or professional assessment to confirm removal. Implement preventive measures such as improved ventilation and timely leak repairs to keep mold from returning.
Tip: Keep records of repairs and maintenance for future reference.
FAQ
What is water mold and how is it different from other molds?
Water mold thrives in persistent moisture and may hide behind walls, making it harder to detect than surface molds. Remediation focuses on moisture control, proper cleaning, and material replacement when necessary.
Water mold grows where moisture stays, which makes it harder to detect and clean. Moisture control is the key to effective remediation.
Is water mold dangerous to health?
Exposure can trigger allergy symptoms and respiratory irritation in sensitive individuals. People with asthma or compromised immunity should take extra caution and seek professional assessment if symptoms appear.
Exposure may irritate the lungs and eyes; people with allergies or asthma should be especially careful.
Can I remove water mold myself?
Small, nonporous patches can be cleaned safely with approved cleaners. Large growth or porous materials likely require professional remediation for thorough removal.
DIY is possible for small, nonporous areas, but larger or porous growth should be handled by pros.
What cleaners are best for water mold?
Use EPA-approved mold cleaners on hard surfaces; for some surfaces, a diluted bleach solution is acceptable. Avoid mixing cleaners and always follow product directions.
EPA-approved cleaners work on hard surfaces; do not mix chemicals and follow instructions.
How long does it take to dry after remediation?
Drying time varies with climate and area size, but expect several hours to days of dehumidification and ventilation after cleanup.
Drying can take hours to days depending on the space and humidity.
When should I call a professional?
If growth covers a large area, involves porous materials, or recurs after cleaning, professional remediation is advised.
Call a pro if the growth is extensive or keeps coming back.
What maintenance prevents water mold recurrence?
Regularly check for leaks, keep humidity low, ensure proper ventilation, and address water intrusion promptly to prevent recurrence.
Fix leaks quickly, keep humidity in check, and ensure good ventilation.
Watch Video
The Essentials
- Control moisture to prevent regrowth.
- Use proper PPE and safe cleaners.
- Contain and dry the area promptly after leaks.
- Test for hidden moisture and verify removal.
- Maintain long-term prevention to reduce recurrence.