Mold and Mildew Removal: A Practical How-To Guide
Learn practical, moisture-focused mold and mildew removal strategies for homes. This guide covers safe DIY steps, professional remediation when needed, and long-term prevention to improve indoor air quality.

Goal: Safely remove mold and mildew from typical indoor areas and prevent return. You’ll learn when to DIY and when to call a professional, what gear to wear, and which cleaners to use. By following this step-by-step approach, you’ll improve indoor air quality and reduce health risks. According to Mold Removal Lab, moisture control is the key to lasting results.
What mold and mildew removal means in homes
Mold and mildew removal is the process of identifying, cleaning, and preventing regrowth of mold and mildew in living spaces. Mold tends to grow as irregular patches that can appear black, green, or brown and may spread behind walls; mildew typically looks like a slimy or powdery coating on surfaces. Understanding the difference helps you select the right cleaning approach and reduces the risk of damage to materials. The Mold Removal Lab team emphasizes that successful removal starts with identifying moisture sources and stopping them at their source. Without addressing moisture, cleaning products achieve only temporary results. In practical terms, mold and mildew removal involves careful inspection, safe containment, surface-appropriate cleaning, thorough drying, and ongoing moisture management. This article focuses on practical, homeowner-friendly techniques that balance safety, effectiveness, and cost.
Health risks and when to call a pro
Exposure to mold and mildew can cause allergic reactions, respiratory irritation, and, in some cases, more serious health problems for sensitive individuals. Symptoms can range from coughing and throat irritation to headaches and fatigue, especially in damp, poorly ventilated rooms. If you notice persistent growth, odd odors, or unusual allergy-like symptoms after cleaning, consider consulting a mold remediation professional. For large areas, mold behind walls, or construction-related contamination, DIY removal is not advised. The Mold Removal Lab Team recommends erring on the side of caution and seeking professional remediation when the growth seems extensive or is accompanied by moisture problems that you cannot quickly fix. Always prioritize safety and health when addressing mold and mildew.
Common sources and signs of mold growth
Mold and mildew commonly take hold where moisture accumulates: bathrooms with inadequate ventilation, basements with high humidity, kitchens near leaky plumbing, and crawl spaces with poor insulation. You might notice staining on walls, musty odors, or visible colonies that look fuzzy or powdery. Early signs include condensation on windows, damp patches on drywall, or texture changes on wood and fabric. Regular inspections after wet seasons or plumbing repairs help catch problems before they escalate. Mold Removal Lab analysis shows that most mold problems start with moisture rather than a mysterious unseen event, so tracking humidity and leaks is the best defense. Documenting problem areas makes future remediation faster and less disruptive.
Safety first: gear and containment
Before you begin mold and mildew removal, assemble PPE: an N95 respirator (or better), chemical-resistant gloves, eye protection, and a disposable coverall. Use plastic sheeting to create a containment zone around the affected area to prevent spores from traveling to other rooms. Turn off intake vents and avoid using fans that pull air from clean areas into the work zone. Remember to dispose of contaminated materials in sealed bags. If you are cleaning a water-damaged area, you may need dehumidifiers or portable air movers to speed up drying after cleaning. Proper PPE and containment reduce inhalation risks and protect surfaces from cross-contamination.
Cleaning solutions and surface compatibility
Choose cleaners based on the surface type. Non-porous surfaces (tile, glass, metal) respond well to diluted household bleach, hydrogen peroxide, or commercial mold cleaners when used according to label directions. Porous materials (drywall, wallpaper, fabric, carpet) often require more conservative approaches, as spores can embed and resist cleaning. Start with a detergent wash, then consider a disinfectant on non-porous areas. Avoid mixing cleaners, and never mix bleach with ammonia or vinegar in ways that release dangerous gases. Always test a small, inconspicuous patch first to verify that finishes aren’t damaged. For stubborn spots, gentle scrubbing followed by thorough drying is usually effective.
DIY vs professional remediation: when to hire
DIY mold and mildew removal can be effective for small, well-contained areas, provided you follow safety guidelines and address the moisture source. When growth covers more than a few square feet, involves ceilings, walls, or sub-surface materials, or reoccurs after cleaning, professional remediation is typically warranted. A licensed mold remediation contractor can perform a thorough assessment, locate hidden growth, fix moisture problems, and ensure that containment and air filtration systems are adequate. The Mold Removal Lab Team stresses that professional remediation often prevents costlier damage down the line and reduces the risk of health issues for occupants.
Moisture management: drying, ventilation, humidity
Mold and mildew thrive in damp environments. After cleaning, dry the area completely using fans and dehumidifiers, and improve ventilation to reduce humidity. Use exhaust fans in bathrooms, run dehumidifiers in basements, and repair leaks promptly. Consider installing or upgrading vents and insulation in problem areas. A proactive approach to moisture management minimizes the chance of regrowth and creates long-term protection for your home. Consistent monitoring of humidity levels and ongoing maintenance are essential, as moisture is the primary driver of mold issues.
Cleaning protocol by surface type
Non-porous surfaces: scrub with detergent, rinse, disinfect if desired, and dry thoroughly. Porous materials: remove contaminated portions, bag and dispose if necessary, and treat surrounding areas with care. In some cases, encapsulation or replacement may be required for severely compromised materials. Always follow label directions for cleaners and wear PPE during the process. Record the steps you take and the dates to track progress and identify recurrence. This practical protocol helps homeowners perform effective mold and mildew removal without guesswork.
Prevention and long-term maintenance
After removal, focus on prevention: fix leaks, address humidity, improve drainage, and use air purifiers with HEPA filtration if needed. Regular cleaning and inspections prevent future growth and keep indoor air quality high. The key is consistency: conduct routine checks for moisture, dry damp areas quickly, and address odors that indicate hidden mold. By adopting a preventive mindset, you reduce the need for future remediation and protect your family’s health.
Documentation and homeowners rights
Keep records of inspections, cleaning dates, and any remediation work. This documentation supports future claim submissions with landlords or insurers and can be valuable when selling or renting a home. If you suspect health risks or persistent growth, consult a qualified professional for a formal assessment and remediation plan. Clear documentation ensures you can reference progress and maintain accountability for improvements in your home.
Case studies: small job vs large infestation
While every house is different, small spots behind a bathroom vanity are very different from a large crawl-space infestation. In small jobs, careful containment, proper cleaners, and thorough drying often resolve the issue quickly and affordably. In larger infestations, hidden growth behind walls or in structural cavities may require specialized equipment and professional remediation. In both scenarios, addressing moisture sources remains the most important step, as this prevents reoccurrence and protects occupant health.
What not to do: common mistakes
Avoid relying on bleach as a universal solution or scrubbing aggressively on delicate finishes. Do not ignore moisture sources, skip containment, or delay drying after cleaning. Never mix cleaners, and never remove contaminated materials without proper disposal. Finally, do not assume visible mold means the problem is solved—hidden growth may persist. Following best practices reduces health risks and improves the odds of lasting mold and mildew removal.
Tools & Materials
- N95 respirator or higher-grade mask(to protect from spores)
- Protective gloves (nitrile or rubber)(extended wear)
- Safety goggles(eye protection)
- Disposable coveralls or old clothing(to avoid contamination)
- Plastic sheeting or painter's tape(to contain area)
- Scrub brushes (non-metal)(for scrubbing)
- Sponges or microfiber cloths(for wiping surfaces)
- Buckets(for mixing cleaners)
- Mild detergent or soap(base cleaning agent)
- Vinegar or hydrogen peroxide (optional)(natural cleaners or disinfection)
- Bleach (only for non-porous surfaces)(dilute per label; never mix with ammonia)
- Moisture meter or hygrometer(monitor humidity)
- Trash bags (heavy-duty)(dispose contaminated materials safely)
- Fan or dehumidifier(speed up drying)
Steps
Estimated time: Estimated total time: 2-4 hours, plus drying time up to 72 hours
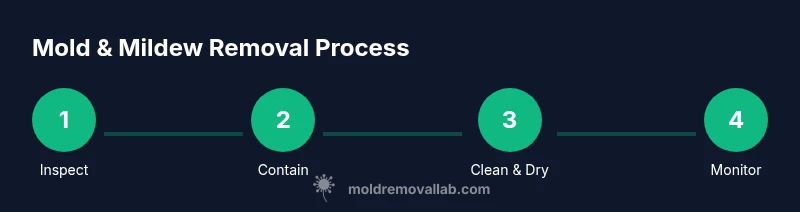
- 1
Assess the area and identify moisture sources
Survey the space for visible mold, water stains, and damp patches. Look behind walls or under sinks using safe inspection methods. Note leaks and document affected materials for later reference.
Tip: Take photos and measurements to guide containment and to track changes over time. - 2
Contain the work area to prevent spread
Seal the area with plastic sheeting, creating a single entry point. Keep doors closed and turn off central HVAC to avoid circulating spores. Post clear signs to keep others out during the remediation.
Tip: Use tape to seal seams and ensure there are no gaps where air can flow in or out. - 3
Prepare cleaning solution and PPE
Put on PPE before mixing cleaners. Prepare only the amount you’ll need to limit exposure. Never mix cleaners; follow label directions for dilution and contact times.
Tip: Label prepared solutions to avoid cross-contamination and reuse. - 4
Clean surfaces with proper brushing and wiping
Scrub non-porous surfaces with detergent, then rinse. Apply a disinfectant if appropriate, and allow surfaces to dry fully. Porous materials may require removal or replacement.
Tip: Use gentle, circular motions and avoid saturating porous materials that harbor spores. - 5
Dry thoroughly and monitor moisture
Run a dehumidifier or fans to dry the area completely. Check moisture levels with a hygrometer and re-run drying equipment as needed until readings stabilize.
Tip: Do not resume normal use of the room until humidity stabilizes at a safe level. - 6
Dispose of contaminated materials and re-inspect
Bag and seal all contaminated materials in sturdy trash bags. Remove containment carefully to avoid spreading spores. Re-inspect after 24–48 hours to confirm no regrowth.
Tip: Document disposal and re-inspection with timestamps for future reference.
FAQ
Is bleach effective for mold and mildew removal?
Bleach can kill mold on non-porous surfaces, but it may not reach mold roots in porous materials. For many surfaces, alternative cleaners provide better long-term results. Always follow label directions and test first.
Bleach can work on hard, non-porous surfaces, but it isn’t a universal solution. Test first and follow the product’s instructions.
Should I test for mold before cleaning?
Testing can confirm the presence and type of mold, especially in suspected hidden growth. If you have persistent symptoms or extensive growth, professional assessment is advised.
Testing helps confirm what you’re dealing with, especially if growth is hidden or extensive.
Can renters clean mold themselves?
Yes, for small, clearly contained growth with proper safety steps. Large infestations or mold behind walls should be handled by landlords or licensed professionals.
Renters can handle small areas, but big problems require a professional.
What’s the best way to dry after cleaning?
Use a combination of dehumidifiers and fans to move air and reduce humidity. Open windows if weather permits, but avoid introducing more moisture during damp conditions.
Dehumidifiers and fans help dry the area; keep air moving and humidity low.
How long before mold might return after cleanup?
Return depends on moisture control. If leaks aren’t fixed and humidity remains high, growth can recur. Ongoing moisture management reduces recurrence.
If moisture isn’t controlled, mold can come back; fix leaks and control humidity.
The Essentials
- Start with moisture control to prevent recurrence
- Choose surface-appropriate cleaners and follow label directions
- Contain the area to protect other spaces
- Dry thoroughly to stop regrowth
- Document steps for future prevention