How to Mold: Practical Mold Remediation Guide for Homes
A thorough, actionable HowTo guide on mold remediation for homeowners and renters. Learn moisture control, safe cleaning methods, and long-term prevention to create a healthier living environment.

This guide explains how to mold a safer, healthier home by controlling moisture, cleaning contaminated areas, and preventing regrowth. You’ll learn essential steps, required safety gear, and practical habits that reduce mold exposure. By following these actions, homeowners and renters can lower moisture problems and protect indoor air quality. This approach emphasizes safety, cleanliness, and proactive maintenance.
Understanding mold growth basics
Mold growth hinges on moisture, warmth, and organic material. According to Mold Removal Lab, mold spores are part of the natural environment, and they become a problem only when moisture persists and surfaces stay damp. In most homes, common hotspots include bathrooms, basements, kitchens, laundry areas, and areas where leaks occur. Spores can land on walls, wood, fabric, or insulation, and they will multiply when there is a steady moisture supply and an available food source. Understanding these triggers helps you target the root causes rather than blasting with cleaners alone. This section outlines the key factors that enable growth, how to spot early signs, and practical, low-cost steps you can take to curb conditions that favor mold. You’ll learn to identify recurring moisture issues, such as condensation on windows, hidden leaks behind walls, or elevated humidity after cooking, and to prioritize remediation in those zones. With this knowledge, you can develop a proactive plan that reduces exposure and supports healthier indoor air. The Mold Removal Lab team notes that stopping moisture is the central task of any remediation effort; cleaning is a necessary follow-up, not a substitute for environmental control.
Preparing your space for mold remediation
Before you begin, set up a safe, contained work area and gather the tools you’ll need. Isolate the space with plastic sheeting and tape to prevent cross-contamination. Turn off the HVAC system in the affected zone if possible to minimize airflow carrying spores to other rooms. Clear personal items and move valuables away from the work area. This preparation reduces exposure risk and makes the cleanup more efficient. Create a simple plan for waste disposal, and ensure you have secure bags ready for contaminated materials. The goal is to create a controlled environment where you can clean, dry, and monitor progress without spreading mold.
How to mold a safer space by detecting hidden moisture
Hidden moisture is the stealth driver of mold problems. To mold a safer space, actively look for signs that moisture is persisting behind walls, under flooring, or inside insulation. Use a moisture meter or hygrometer to check humidity levels in suspect zones, and inspect for musty odors, staining, or softening materials that indicate water damage. Address any leaks or condensation sources first, then consider moisture-permeable materials that may need removal. Early detection is essential: addressing moisture before visible mold takes hold makes remediation far more effective and reduces the likelihood of regrowth. The goal is to create conditions unfavorable to mold by removing excess moisture and improving air circulation.
Cleaning methods and safety guidelines for non-porous surfaces
When mold is confined to hard, non-porous surfaces, you can begin with soap and water or a mild detergent solution. For stubborn patches, a light household cleaner can help lift grime, but avoid mixing cleaners, especially with bleach or ammonia. Always wear PPE, including an appropriate respirator, gloves, and eye protection, and work from the outer edge of the patch inward to prevent spreading. Rinse with clean water and dry thoroughly. For porous materials that have absorbed mold, removal is often necessary, as cleaning alone may not prevent return. If you choose to salvage any item, ensure it is truly clean and dry before returning it to the space.
Drying and ventilation strategies to prevent regrowth
Drying is a critical step after cleaning. Use a combination of dehumidifiers and well-placed fans to reduce moisture quickly. Improve ventilation by opening windows where safe and running ventilation fans that move air through the space, not across moldy areas. Avoid installing fans that circulate air from contaminated zones back into living areas. Consistent airflow and humidity control help prevent regrowth by maintaining dry, unfavorable conditions for mold colonies.
Long-term prevention strategies to keep mold at bay
Prevention centers on moisture control and environmental maintenance. Repair leaks promptly, install proper exterior grading and downspouts to prevent water intrusion, and monitor humidity levels with a hygrometer in problem areas. Consider replacing porous materials that show recurrent moisture exposure with mold-resistant alternatives where feasible. Regular cleaning routines, integrated with moisture checks, create a durable defense against mold growth and protect indoor air quality over time.
Common mistakes and pitfalls to avoid
Avoid treating symptoms without addressing the moisture source. Do not rely solely on bleach for porous materials, as it often fails to penetrate and eliminate mold roots. Do not skip PPE or ventilation, even for small patches, because spores can irritate lungs and eyes. Avoid using high-heat drying methods in areas with sensitive materials, and never mix cleaners with ammonia or other hazardous chemicals. Finally, do not ignore recurring dampness; persistent moisture signals a hidden problem that needs professional assessment.
When to call a professional for mold remediation
If mold covers a large area, involves porous materials like drywall or insulation, or if you have health concerns, consider professional remediation. Professionals can assess moisture sources, contain the area, and use specialized equipment to safely remove mold and prevent cross-contamination. Seek certified fungal remediation services when in doubt, and verify that the contractor follows industry guidelines and local regulations.
Authority sources and recommended reading
For authoritative guidance on mold and indoor air quality, consult key sources from reputable agencies and institutions. This section provides direct links to trusted information to help you verify best practices and stay up to date with safety standards.
Quick reference: warning signs of moisture and mold
Keep an eye out for musty odors, visible stains, warped surfaces, peeling paint, and increased condensation. These signs warrant immediate inspection and action to prevent further damage and health risks.
Tools & Materials
- Personal protective equipment (PPE)(N95 respirator, protective goggles, nitrile gloves)
- HEPA vacuum(For debris pickup and dust control)
- Detergent and mild cleaners(For initial surface cleaning)
- Water spray bottle(Dilute cleaners and rinse surfaces)
- Plastic sheeting and tape(To contain the work area)
- Scraper or putty knife(For removing adhered mold from hard surfaces)
- Microfiber cloths(For wiping and drying surfaces)
- Bucket(Mix cleaning solutions and rinse tools)
- Moisture meter or hygrometer(Monitor humidity levels in affected areas)
- Dehumidifier and portable fans(Assist drying; use as needed based on space)
- Trash bags (heavy-duty)(Contain contaminated materials securely)
- Mold-resistant sealant or paint (optional)(Apply after drying to reduce future moisture absorption)
Steps
Estimated time: Total time: 2-6 hours
- 1
Survey moisture sources
Identify visible leaks, condensation points, and hidden moisture behind walls. Use a moisture meter if available to pinpoint problem areas. Document findings with photos for reference.
Tip: Label areas with tape flags to guide subsequent cleanup. - 2
Isolate the work area
Set up plastic barriers around the affected zone and seal doors. Turn off HVAC to prevent spores from traveling through the system. Keep pets and children away from the area.
Tip: Create negative pressure by pulling air out of the space with an exhaust fan if possible. - 3
Don PPE before touching contaminated areas
Put on a properly fitted respirator, gloves, and eye protection. PPE minimizes inhalation exposure and skin contact with mold.
Tip: Inspect PPE fit and replace if damaged or damp. - 4
Remove or cover contaminated materials
Remove heavily contaminated porous materials if safe to do so; otherwise, cover and isolate them. Place materials in sealed bags for disposal.
Tip: Avoid disturbing moldy materials more than necessary to prevent spore spread. - 5
Clean non-porous surfaces
Scrub hard, non-porous surfaces with detergent solution; rinse and dry completely. Use circular motions to lift mold from the surface.
Tip: Rinse tools frequently to prevent cross-contamination. - 6
Address porous materials carefully
Porous items with extensive mold growth may need removal for safe disposal. If salvage is possible, ensure thorough cleaning and drying before reintroduction.
Tip: When in doubt, remove and replace rather than risk regrowth. - 7
Dry the space thoroughly
Run a dehumidifier and use fans to promote airflow until surfaces are completely dry. Monitor moisture with a meter to confirm stabilization.
Tip: Aim for consistent dryness over several hours to prevent relapse. - 8
Repair moisture sources
Fix leaks, improve ventilation, and adjust humidity control to prevent future dampness. Verify that no new moisture pathways exist.
Tip: Keep an eye on problematic zones after rain or high humidity. - 9
Reassess and seal surfaces
After drying, inspect for any remaining signs of mold. Apply mold-resistant sealant or paint if appropriate; monitor for regrowth over the next weeks.
Tip: Retest humidity and look for odors as indicators of potential recurrence.
FAQ
Is bleach effective for cleaning mold?
Bleach is not always effective for mold on porous materials. It may not remove roots and can cause incomplete remediation. Detergent cleaning and removing contaminated materials are often more reliable.
Bleach isn't always reliable for mold on porous surfaces; cleaning with detergent and removing affected material is often better.
How long does mold remediation take?
The duration depends on the extent of contamination and the materials involved. Smaller, contained areas can be addressed quickly, while larger infestations require more time and possibly professional help.
Remediation time varies with how extensive the mold is and what materials are affected.
Can I remove mold myself?
Small, non-porous mold patches can often be addressed by a careful DIY approach. Larger areas or porous materials typically require professional remediation to ensure safety and effectiveness.
You can handle small non-porous patches yourself, but larger or porous mold should be handled by pros.
What are signs of hidden moisture?
Musty odors, staining, warped materials, and persistent dampness are common indicators of hidden moisture behind walls or under flooring. Investigate and address leaks promptly.
Look for musty smells, stains, warped surfaces, and dampness that don’t go away.
Will mold return after cleaning?
Mold can return if moisture sources aren't controlled. Ongoing humidity management and regular inspections are essential for lasting results.
Mold can come back if moisture isn’t controlled, so maintain humidity and inspect regularly.
Should I wear PPE for small patches?
Yes. Even small patches can release spores. Wear appropriate protective gear and ensure good ventilation during cleanup.
Always wear PPE like a mask and gloves, even for small patches.
Watch Video
The Essentials
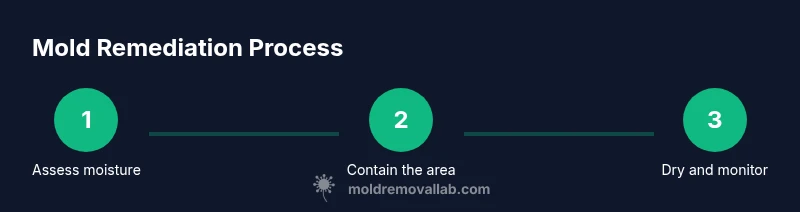
- Identify and fix moisture sources first.
- Contain the area to prevent cross-contamination.
- Dry thoroughly to prevent regrowth.
- Use PPE and follow safe cleaning practices.
- Know when to call a professional for larger issues.