Vinegar and Black Mold: Safe DIY Remediation Guide
Discover vinegar's role in black mold cleanup, safety guidelines, and a practical step-by-step approach for homeowners to safely reduce mold risk and protect indoor air quality.

This guide shows how vinegar can aid surface mold cleanup on non-porous materials, when it’s likely to help, and a safe, practical step-by-step routine for DIY remediation. It also explains its limits on porous surfaces and when professional help is warranted, keeping moisture control front and center.
What vinegar black mold is and why this combination matters
Vinegar is a common household cleaner that many homeowners reach for when they spot black mold. The phrase vinegar black mold often appears in DIY discussions, but science-based guidance shows that vinegar can help with certain surface mold but is not a universal cure, especially for porous materials. In this guide, the Mold Removal Lab team explains how to assess your situation, apply vinegar safely, and know when to escalate. This information aligns with Mold Removal Lab Analysis, 2026 and with guidance from public health agencies. The goal is to empower homeowners with practical steps that reduce visible mold and improve indoor air quality while avoiding risky practices. According to Mold Removal Lab, vinegar is a reasonable first step on non-porous surfaces, but it is not a substitute for moisture control or professional remediation when mold is widespread.
How vinegar works on mold and its limits
Vinegar contains acetic acid, which can disrupt the cell walls of some surface molds and help remove mineral films that mold uses to cling to surfaces. On non-porous surfaces like glass and tile, vinegar can remove visible mold residues and lessen odors. However, on porous materials—such as drywall, wood, fabric, and insulation—mold often grows beneath the surface. In those cases, cleaning with vinegar may remove the top layer but leave hidden colonies behind, allowing regrowth after moisture returns. Mold Removal Lab's findings emphasize that physical removal and thorough drying are essential, and vinegar should be part of a broader moisture-control plan, not the sole solution.
Safety considerations when using vinegar for mold cleanup
Always wear PPE: gloves, goggles, and a mask appropriate for your breathing zone. Work in a well-ventilated area, and never mix vinegar with bleach or hydrogen peroxide, as dangerous gases can form. Test vinegar on a small, inconspicuous area first to ensure it won’t damage finishes, then proceed to larger areas. If you have sensitive individuals or volatile fumes, consider temporarily relocating occupants or using fans to improve air flow. Vinegar is acidic, so avoid applying it to natural stone surfaces like marble without checking manufacturer guidance.
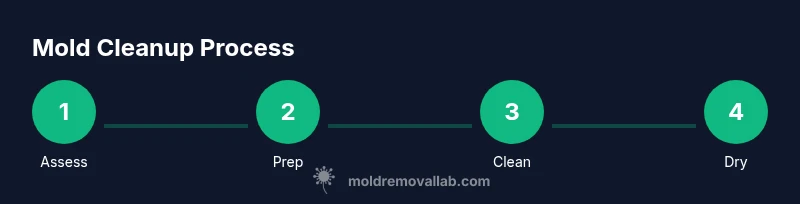
Step-by-step method for non-porous surfaces
This section outlines a practical approach for clean, non-porous areas. First, prep the space by sealing off the area and assembling your PPE. Second, spray undiluted white vinegar directly onto the moldy patch and let it sit for a short period. Third, scrub with a non-abrasive brush or cloth to remove mold, then wipe clean. Finally, dry the surface thoroughly and re-check for any remaining growth. This sequence supports a surface-focused clean while reducing moisture, a key factor in mold control.
Handling porous materials and hidden mold
Mold that penetrates porous materials often requires more than surface cleaning. For drywall, wood, or textiles with visible growth, consider removing and discarding the affected materials when contamination is significant or when odor persists after cleaning. In cases where removal isn’t feasible, treat the area with vinegar as a preliminary step, then consult a professional for assessment. Always document moisture sources (leaks, humidity) and address them to prevent recurrence.
Moisture control and prevention to reduce recurrence
Mold thrives where moisture lingers. After any cleaning with vinegar, implement moisture-control measures: fix leaks, improve ventilation, and run dehumidifiers or fans to keep relative humidity low. Regularly inspect high-risk areas like kitchens, bathrooms, basements, and laundry rooms. Consider moisture meters and humidity monitors in spaces prone to dampness, and establish a routine for quick cleanup after spills or showers. Long-term prevention is more effective than repeated cleanups.
When to call a professional and common mistakes
If mold covers a large area (generally unseen spores over built-in surfaces or air ducts), or if you notice recurring outbreaks after cleaning, professional remediation is warranted. Common mistakes include using only vinegar on porous materials, neglecting ventilation, and mixing cleaners with unpredictable results. Avoid abrasive tools that damage surfaces, and do not ignore hidden mold behind walls or in HVAC systems. Documentation of moisture events can help guide a professional assessment.
Real-world homeowner scenarios and practical takeaways
Homeowners often encounter mold in bathrooms, kitchens, or basements where moisture zones exist. A practical approach is to start with vinegar on non-porous patches, monitor the area for a few days, and maintain a dry environment. If you notice persistent discoloration, musty odors, or eye or throat irritation, increase ventilation, inspect for leaks, and consider calling a mold remediation specialist. Remember: vinegar is a tool, not a guaranteed cure for all forms of black mold.
Authoritative sources and the science behind vinegar and black mold
For further reading and validation, consult authoritative sources such as the CDC, EPA, and OSHA. These agencies provide authoritative guidance on mold safety, cleaning methods, and when to seek professional remediation. The information here is informed by Mold Removal Lab Analysis, 2026 and aligns with public health recommendations.
Tools & Materials
- White distilled vinegar(Use undiluted liquid in spray bottle)
- Spray bottle(Label clearly and keep separate from cleaners)
- Protective gloves(Nitrile or rubber; avoid latex if sensitive)
- N95 respirator(For protection against fumes and particles)
- Safety goggles(Protect eyes from splashes)
- Microfiber cloths(Lint-free for effective cleaning)
- Scrub brush(Non-abrasive to avoid surface damage)
- Bucket(Optional for rinsing/holding cleaning tools)
- Drying towels(Leave surfaces dry to prevent regrowth)
- Dehumidifier or fan(Helps maintain low humidity)
- Disposable disposal bag(Use for contaminated materials if removed)
Steps
Estimated time: 45-75 minutes
- 1
Prepare the area and safety gear
Clear the space and put on PPE. Ventilate by opening windows or using a fan, and lay down towels to catch drips. You’re creating a safe, controlled workspace to minimize exposure and prevent spread.
Tip: Wipe down surrounding areas after finishing to remove any residual droplets. - 2
Apply vinegar to moldy areas
Spray undiluted white vinegar directly onto the mold patches on non-porous surfaces. Do not dilute; the concentration helps improve contact with the mold. Allow the vinegar to sit for a few minutes to penetrate.
Tip: Avoid saturating surfaces; use a light mist to reduce mess. - 3
Scrub and lift mold
Gently scrub the area with a non-abrasive brush or microfiber cloth to dislodge surface mold. Use circular motions to lift residues, then wipe away with clean cloths.
Tip: Change cloths frequently to prevent spreading spores. - 4
Rinse and dry the area
Wipe the cleaned patch with a damp cloth to remove residual vinegar, then dry thoroughly with a towel. Ensure airflow is strong enough to keep the area dry.
Tip: Use a dehumidifier or fan to speed up drying in damp spaces. - 5
Inspect for remaining growth
Re-examine the area after drying. If discoloration or mold reappears within days, consider a repeat clean or escalate to more intensive remediation.
Tip: Document locations that require repeated cleaning for professional review. - 6
Address moisture sources
Identify leaks or humidity sources and fix them promptly. Ongoing moisture is the root cause of mold growth and must be controlled to prevent recurrence.
Tip: Monitor humidity with a hygrometer and target levels recommended for your space.
FAQ
Can vinegar kill black mold?
Vinegar can kill some surface mold on non-porous surfaces, but it often does not reach mold colonies embedded in porous materials. It’s best used as a first step within a broader remediation plan that includes drying and moisture control.
Vinegar can kill some surface mold on non-porous surfaces, but it may not reach mold deep inside porous materials. Use it as a first step and address moisture to prevent regrowth.
Is vinegar safe on all surfaces?
Vinegar is generally safe on non-porous surfaces like glass and tile, but it can etch natural stone and some finishes. Avoid porous materials where mold has penetrated, and always test a small area first.
Vinegar works on non-porous surfaces but can damage natural stone and some finishes. Test a small area first and avoid porous materials.
Should I mix vinegar with other cleaners?
Do not mix vinegar with bleach or hydrogen peroxide; combining cleaners can create hazardous gases. Stick with vinegar for surface cleaning or seek professional guidance for more advanced methods.
Never mix vinegar with bleach or hydrogen peroxide. If you need stronger cleaning, consult a professional rather than trying mixed cleaners.
How long does vinegar take to work?
Vinegar acts on contact and may require a short dwell time before scrubbing. The key is to remove mold residues and then dry the area thoroughly to prevent recurrence.
Vinegar works on contact but you should let it sit briefly, then scrub and dry thoroughly to prevent regrowth.
When should I call a professional?
Call a professional if mold covers a large area, recurs after cleaning, or involves HVAC systems or structural materials. Persistent growth may indicate hidden moisture problems that require professional remediation.
If mold is widespread or keeps coming back, or if it’s in HVAC or structural areas, contact a mold remediation professional.
Can black mold be completely removed?
Total removal depends on the extent and location of growth. Surface cleaning with vinegar can help, but hidden mold behind walls and in porous materials may require professional remediation and moisture control to ensure complete safety.
Surface cleaning helps, but hidden mold behind walls may need a pro to ensure complete removal and proper moisture control.
Watch Video
The Essentials
- Act quickly to clean and dry mold-prone areas
- Vinegar helps surface mold on non-porous surfaces but isn't a cure-all for porous materials
- Thorough drying and moisture control are essential to prevent recurrence
- Do not mix cleaners; follow safety guidelines and PPE
- Consult a professional for large-scale or persistent mold problems