Clean Mold with Vinegar: A Practical DIY Cleaning Guide
Learn how to clean mold with vinegar safely, when it’s effective, and how moisture control prevents regrowth. A practical DIY guide from Mold Removal Lab covering surfaces, safety, dwell times, and maintenance.

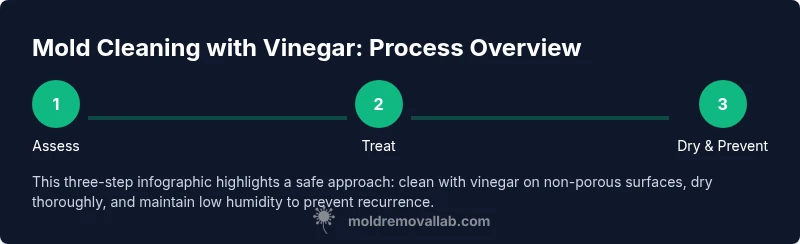
According to Mold Removal Lab, you can clean some mold with vinegar, especially on non-porous surfaces, but it is not a cure-all. This approach can help reduce surface mold when moisture is controlled and the growth is small and isolated. For larger infestations, porous materials, or hidden growth, professional remediation and moisture management are advised. Use an unscented 5% vinegar, spray generously, let it sit for 60 minutes, then scrub and rinse, while ensuring good ventilation and protective gloves.
What vinegar is and isn’t for mold
Vinegar is a mild acid (acetic acid) that has some antifungal properties, which is why many homeowners reach for it as a first step in mold cleanup. When you clean mold with vinegar, you’re leveraging its acidity to disrupt the mold’s surface attachment and reduce visible growth on certain materials. However, vinegar is not a universal fix. It does not reliably kill all mold spores, nor does it penetrate deeply into porous substrates like drywall, wood, or fabric. For this reason, many mold experts, including the Mold Removal Lab Team, frame vinegar as a spot-cleaning agent for small, surface-level outbreaks on non-porous surfaces such as glass, tile, metal, and sealed concrete. It should never replace professional remediation for larger infestations or complex growth behind walls. Always pair cleaning with moisture control to prevent a quick return, and wear PPE to protect your skin, eyes, and lungs during cleanup. According to Mold Removal Lab, the key to safe, effective remediation lies in hydration control of the area and careful evaluation of the surface type you’re treating. 2026 Mold Removal Lab Analysis emphasizes moisture management as the cornerstone of any mold-safe outcome.
When vinegar can help and when to avoid it
Vinegar can be a helpful first step on non-porous surfaces where mold growth is small and superficial. On these surfaces, a thorough wipe-down after letting the vinegar sit for a dwell time of about 60 minutes can reduce visible mold and make future cleaning easier. Avoid using vinegar as your sole method on porous materials such as drywall, untreated wood, or fabric, because the solution may not penetrate deeply enough to kill hidden mold and odors may persist. In those cases, moisture management and professional assessment are usually required. Always start with a patch test to ensure the vinegar does not damage the surface, and never mix vinegar with bleach or other cleaners, which can release hazardous gases.
Surface types and cleaning method with vinegar
Different materials respond differently to vinegar. For smooth, non-porous surfaces (glass, tile, metal, sealed surfaces), spray undiluted or 5% vinegar, ensure full coverage, and let it sit for about an hour before scrubbing with a soft brush or microfiber cloth. Avoid saturating porous materials; instead, dampen the surface and wipe away the mold residue. On porous substrates like drywall, wood, or fabric, vinegar may reduce surface growth but is unlikely to eradicate embedded mold. In those cases, remove and replace severely affected sections if possible, dry the area promptly, and address the moisture source. Remember to ventilate well and wear PPE throughout the process.
Practical cleaning protocol: safe use of vinegar
Before you begin, clear the space and open windows for airflow. Don PPE, including gloves, goggles, and a mask. Apply 5% vinegar to the moldy area using a spray bottle, saturating the affected zone without oversaturating adjacent areas. Let it dwell for about 60 minutes, then scrub with a soft-bristle brush and wipe away residue with a microfiber cloth. Rinse only if the surface allows, then dry thoroughly with towels or a fan. Dispose of contaminated materials in sealed bags and store cleaning tools separately to avoid cross-contamination. Finally, recheck the area after a day or two to ensure there’s no regrowth.
Aftercare: drying, moisture control, and prevention
Drying is crucial after any mold cleaning. Use fans, dehumidifiers, and air circulation to bring relative humidity below 60% (ideally 40-50%). Address the moisture source that caused the mold originally—leaks, humidity, or condensation—and repair structural issues promptly. Regularly inspect prone areas (basements, bathrooms, kitchens, and crawl spaces) and improve ventilation to minimize future mold growth. For fabrics, carpets, or porous building materials with visible mold, consider professional restoration or replacement to ensure long-term safety. Maintaining a clean, dry environment is the best defense against mold recurrence and health risk.
When to escalate to professional remediation
If mold covers a large area, returns after DIY cleaning, or is hidden behind walls or insulation, seek professional remediation. Porous materials with extensive contamination may require removal and replacement to ensure safe, thorough cleanup. Health considerations—such as allergies, asthma, or compromised immune systems—also warrant professional assessment. The Mold Removal Lab Team strongly recommends moisture-control strategies alongside any remediation—without addressing the moisture source, mold is likely to return. If you encounter black or rapidly spreading mold, stop and call a professional to prevent exposure or structural damage.
Tools & Materials
- 5% distilled white vinegar(unscented; not flavored; use as the primary cleaner)
- spray bottle(prefer a bottle with a wide spray pattern)
- nitrile gloves(protect skin from mold and cleaners)
- safety goggles(shield eyes from splashes)
- mask/respirator(protect lungs from spores)
- microfiber cloths(for wiping and drying)
- soft scrub brush(gentle brushing without scratching)
- bucket or pan(useful for rinsing if water is used)
- sealed trash bags(dispose of contaminated materials safely)
- dehumidifier or fan(aids drying and moisture control)
Steps
Estimated time: 45-90 minutes
- 1
Prepare area and PPE
Clear the space of belongings and furniture. Open windows or run a fan to improve airflow. Put on gloves, goggles, and a mask before handling moldy surfaces.
Tip: Ventilation reduces exposure to mold spores. - 2
Test patch and plan
Test a small patch with vinegar to check for surface reaction. Decide if the material is non-porous and safe for vinegar cleaning.
Tip: If surface darkens or warps, stop and use a different approach. - 3
Apply vinegar and dwell
Spray vinegar generously over the moldy area. Do not oversaturate; allow 60 minutes of contact time to penetrate the surface.
Tip: Avoid letting vinegar run into outlets or gaps. - 4
Scrub and wipe
Scrub with a soft brush, then wipe with a microfiber cloth. Rinse only if the surface tolerates water, and dry immediately.
Tip: Use circular motions to lift mold residues. - 5
Dry thoroughly
Use towels and a fan or dehumidifier to dry the area completely. Check humidity levels and ensure air can circulate around the cleaned spot.
Tip: Prolonged moisture invites mold return. - 6
Inspect and seal
Inspect for residual mold and seal any cracks or leaks that caused moisture. Replace heavily contaminated porous materials if necessary.
Tip: Document condition for future remediation planning.
FAQ
Is vinegar safe to use on all mold?
Vinegar can reduce surface mold on non-porous surfaces but is not effective for porous materials or extensive infestations. For large or embedded mold, professional remediation is safer.
Vinegar helps on non-porous surfaces, but not on porous ones or large infestations. For bigger problems, get a professional.
Should I use bleach with vinegar?
Do not mix vinegar with bleach; it produces toxic chlorine gas. Use vinegar alone or combine with other non-bleach cleaning methods if needed.
Don’t mix vinegar with bleach—it creates chlorine gas. Use vinegar alone or other safe cleaners.
How long should vinegar sit on mold?
Let vinegar sit for about 60 minutes on the affected area, then proceed with scrubbing. Longer dwell times may not add benefit for most surfaces.
Let it sit for about an hour, then scrub. Don’t overdo the dwell time.
Can vinegar prevent mold from returning?
Vinegar helps remove surface mold, but prevention primarily depends on moisture control, ventilation, and timely repair of leaks or condensation sources.
It helps with the surface, but keeping moisture low is what really stops it from coming back.
When should I call a professional?
Call a professional if mold covers a large area, recurs after DIY cleaning, or is hidden behind walls or insulation. Health concerns also warrant expert evaluation.
If the mold is widespread or keeps coming back, or if it’s behind walls, get a professional.
Is vinegar a disinfectant?
Vinegar has mild antimicrobial properties but is not registered as a disinfectant. For formal disinfection, use EPA-registered products appropriate for mold.
Vinegar isn’t a registered disinfectant; for official disinfection use approved products.
Watch Video
The Essentials
- Assess mold on first: surface mold on non-porous surfaces responds better to vinegar.
- Ventilate and PPE are essential for safe DIY cleanup.
- Vinegar helps with surface cleanup but isn't a replacement for professional remediation on porous materials.
- Moisture control is the real defender against mold recurrence.
- Call a pro for large infestations or mold behind walls.