Vinegar Mold Treatment: A Practical DIY Guide
Learn how to use vinegar for mold treatment on non-porous surfaces, when to escalate to professional help, and best practices to prevent regrowth. Includes Step-by-Step instructions, safety tips, and expert guidance from Mold Removal Lab.

Vinegar mold treatment can be an effective DIY option for small patches on non-porous surfaces. According to Mold Removal Lab, apply white distilled vinegar full-strength, let it dwell for at least 60 minutes, then scrub and dry. It’s not universal, and porous materials or large infestations may require professional remediation. Always wear PPE.
What vinegar mold treatment is and isn't
Vinegar mold treatment refers to using white distilled vinegar as a cleaning agent to remove visible mold from non-porous surfaces. The acetic acid in vinegar can inhibit some mold growth and help lift spores for removal. However, vinegar is not a universal fungicidal solution and does not reach mold growth inside porous materials or wall cavities. For that reason, it's best suited for small, surface-level growths on glass, tile, metal, sealed counters, and other non-porous surfaces. Before starting, assess whether the affected area is a small patch (less than a few square feet) and clearly accessible. If you see extensive mold growth, persistent musty odors, or symptoms of water damage, escalate to professional remediation. Always address the underlying moisture problem first, because without moisture control mold will return. The Mold Removal Lab team emphasizes that vinegar can be a first step in a broader remediation plan, but professional intervention may be required for robust or recurring outbreaks.
Why vinegar mold treatment may help but isn't a cure
Vinegar contains acetic acid that can inhibit some surface mold and help lift spores from non-porous materials. According to Mold Removal Lab Analysis, 2026, vinegar can reduce visible mold on non-porous surfaces like glass, ceramic, and sealed countertops, especially when applied to fresh stains. However, porous materials such as drywall, untreated wood, upholstery, and carpeting often harbor microscopic mold in pores and along insulation, where vinegar penetration is limited. In these cases, mold may return even after surface cleaning. Vinegar should be viewed as a first-step cleaner, not a guaranteed cure, and it should be paired with moisture control, thorough drying, and, when needed, professional remediation for deeper growth or health concerns. The key is to combine cleaning with moisture management to prevent recurrence.
Surface compatibility and limitations
Not all mold-friendly environments respond equally to vinegar. On non-porous surfaces (tiles, glass, metal, sealed countertops), full-strength vinegar can disrupt mold growth and help with visible cleanup. On porous materials (drywall, unsealed wood, fabric), mold can penetrate beyond the surface, making vinegar far less effective. Before treating any material, perform a small test in an inconspicuous area to ensure the surface doesn’t react negatively. On stone surfaces like marble or limestone, the acidity of vinegar can etch the stone over time, so avoid using it on such materials. If the mold growth is extensive or located behind walls, under flooring, or in insulation, avoid attempting home remedies and contact a licensed remediator. Mold Removal Lab stresses moisture control as the core component of any mold strategy; without addressing leaks or humidity, mold will nearly always return after cleaning.
Safety precautions and PPE for mold work
Mold exposure can irritate eyes, skin, and the respiratory system, so protective gear is essential. Always wear gloves (nitrile or latex), eye protection, and a properly fitted mask or respirator (N95 or higher) when handling mold and cleaning agents. Ensure the area is well-ventilated—open windows or use a fan directed away from you—to minimize inhalation exposure. Keep children and pets out of the work zone. Do not mix vinegar with bleach or ammonia, as this can release toxic gases. Store vinegar away from heat sources, and dispose of rags and cloths used for cleaning in sealed bags to prevent mold spores from escaping into living spaces. Following these safety guidelines will reduce health risks while you pursue mold cleanup.
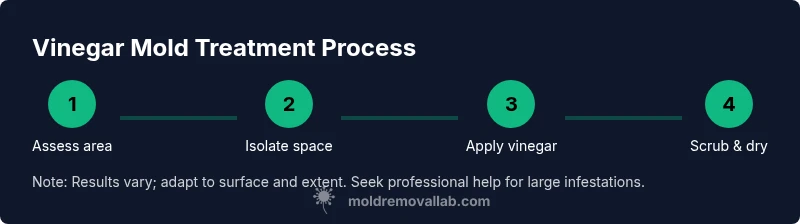
Step-by-step overview
Below is a concise, task-focused overview of the process for small patches of mold on non-porous surfaces. It is designed to be used in conjunction with the detailed Step-by-Step section that follows, and should be adjusted based on the area and material you’re treating. Always begin with moisture control and surface testing, then proceed to cleaning, drying, and re-evaluation.
Tools & Materials
- White distilled vinegar (5% acidity)(Use undiluted, store-bought, white vinegar.)
- Spray bottle(Clean, empty spray bottle; label 'Vinegar Mold Treatment'.)
- Protective gloves(Latex or nitrile; avoid skin contact.)
- Safety goggles(Eye protection against splashes.)
- N95 mask or respirator(Protect lungs from mold spores.)
- Non-abrasive scrub brush or sponge(For scrubbing without scratching.)
- Microfiber cloths(For wiping and drying.)
- Plastic sheeting or drop cloth(To contain work area if mold is widespread.)
Steps
Estimated time: 60-90 minutes
- 1
Prepare space and gather materials
Clear the area and remove nearby items to prevent contamination. Put on PPE: gloves, goggles, and a respirator. Ventilate the space if possible, and test a small area with vinegar to check for surface reactions. This step reduces the chance of spreading spores.
Tip: Lay down a drop cloth or plastic sheeting to catch drips; label your spray bottle for safety. - 2
Isolate the work area
Close doors to the treated room and use plastic sheeting to seal off adjacent spaces if feasible. This minimizes cross-contamination and protects occupants. Inspect for any existing leaks and repair before cleaning.
Tip: If you smell mold strongly in other rooms, stop and address moisture sources first. - 3
Apply vinegar to the affected area
Spray full-strength white vinegar directly onto the moldy surface until it is thoroughly wet. Do not dilute. Allow the vinegar to sit for at least 60 minutes to give the acetic acid time to act on mold spores.
Tip: Avoid over-saturating porous materials; if the area soaks the vinegar quickly, apply again after a short wait. - 4
Scrub and agitate the mold
After the dwell time, scrub the area with a non-abrasive brush or sponge to lift mold residues. Wipe away loosened material with microfiber cloths. Repeat if the stain persists, but do not overwork the surface to avoid damage.
Tip: Work from the outer edge toward the center to prevent spreading spores. - 5
Rinse and dry the surface
Rinse the cleaned area with a damp cloth if appropriate for the surface, then dry thoroughly with a clean towel or dry microfiber cloth. Use a fan or dehumidifier to speed up drying and reduce moisture lingering in cracks.
Tip: Residual moisture is a primary trigger for mold regrowth; ensure complete dryness. - 6
Reassess and plan next steps
After drying, re-inspect the area for any remaining mold or musty odor. If mold returns within days or weeks, escalate to professional remediation and address the moisture source. Keep records of cleaning attempts for future reference.
Tip: Document moisture problems and consider temporary fixes until professional help is available.
FAQ
Can vinegar kill all molds?
Vinegar can kill some molds on non-porous surfaces and help with surface cleanup, but it is not a universal mold killer. Hidden mold in porous materials often requires other methods or professional remediation.
Vinegar can kill some molds on non-porous surfaces, but it's not universal and may not address hidden mold in porous materials.
Is vinegar safe to use around children and pets?
Vinegar odor can be irritating; ensure good ventilation and keep children and pets away from the area during treatment.
Ventilate well and keep kids and pets away while you work.
Can I use vinegar on wood or painted walls?
Vinegar can be used on sealed or finished surfaces like painted walls, but avoid unfinished wood and porous materials where mold can hide.
You can use vinegar on sealed surfaces, but test first and avoid unfinished wood.
How long does vinegar mold treatment take to dry?
Drying times vary with humidity and surface type; expect 1-2 hours for small, dry environments, longer if the area remains damp.
Dry times vary; usually an hour or two in dry conditions.
When should I call a professional?
Call a professional if mold covers a large area, recurs after cleaning, or you have health concerns or extensive water damage.
If mold is extensive or keeps coming back, consult a professional.
Watch Video
The Essentials
- Identify surface type before treatment.
- Use full-strength vinegar on non-porous surfaces.
- Never mix vinegar with bleach or ammonia.
- Porous materials often require professional remediation.
- Control moisture to prevent mold return.