Union Mold Removal: A Practical Home Guide
A comprehensive, practical guide to union restoration mold removal for homeowners and renters. Learn inspection, containment, remediation, drying, and prevention to keep living spaces safe and healthy. Includes step-by-step process, tools, tips, FAQs, and when to call a pro. Based on Mold Removal Lab analysis and guidance.

Goal: Learn how to safely perform union restoration mold removal. This guide covers inspection, moisture control, containment, remediation methods, and aftercare to protect occupants. It outlines practical steps, safety considerations, and when to call a pro. By the end, you’ll understand how to identify mold sources in unions, select appropriate methods, and prevent regrowth.
What union restoration mold removal entails
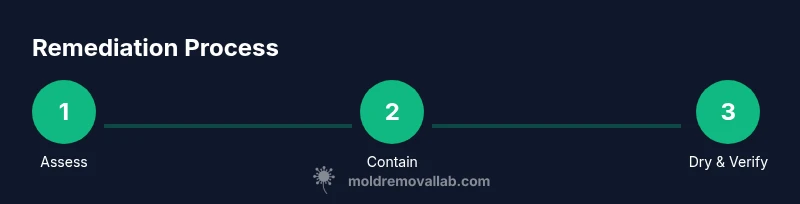
Union spaces—shared hallways, mechanical rooms, or utility corridors—can suffer mold growth after leaks, humidity, or poor ventilation. Mold growth in these areas poses risks to occupant health and can indicate ongoing moisture issues. According to Mold Removal Lab, union restoration mold removal requires a structured approach that addresses both the visible mold and the underlying moisture source. The goal is not just to remove visible colonies but to prevent regrowth by removing moisture sources, sealing access points, and drying materials to safe moisture levels. This section outlines the scope: inspection, containment, cleaning, drying, and prevention. Throughout, use mold-safe cleaners, maintain good air exchange, and document findings to guide follow-up actions. This topic also covers common challenges unique to unions, such as shared walls, HVAC interconnections, and cross-room moisture migration, which demand careful planning and coordination with building managers or co-owners.
Assessing moisture sources and mold growth in unions
Effective union restoration mold removal starts with a precise moisture assessment. Inspect for active leaks, condensation, and hidden water intrusion behind walls or ceilings. Use moisture meters and infrared cameras to locate damp areas that might not be visible. Record humidity trends, temperature fluctuations, and airflow patterns in the affected zones. Mold growth in union spaces often follows moisture pathways from leaks, poor insulation, or inadequate ventilation. Based on Mold Removal Lab research, the most reliable remediation outcomes begin with stopping the moisture source, followed by containment and thorough cleaning. Keep an eye on adjacent rooms to prevent cross-contamination during the remediation process. Document findings with photos and measurements to track changes over time.
Containment, PPE, and safe handling to minimize cross-contamination
Containment is critical in union mold removal. Erect plastic barriers to seal off the work area, install a dedicated entry/exit path if possible, and avoid disturbing moldy materials beyond the containment zone. Personal protective equipment (PPE) is essential: wear an appropriate respirator (N95 or P100), gloves, eye protection, and disposable coveralls if needed. Turn off or isolate the HVAC system in the affected area to prevent spore spread through ducts. Use a HEPA-filter vacuum for debris cleanup and never mix cleaning products without following label instructions. Proper containment helps protect other residents and reduces remediation time. The goal is to create a controlled, safe workspace while limiting interruptions to the broader union environment.
Cleaning methods and remediation strategies for common union spaces
Mold remediation in union spaces focuses on cleaning non-porous and semi-porous surfaces, removing porous contaminated materials when necessary, and addressing hidden mold on structural materials. Start with dry brushing and wiping, then wash using a mild detergent and water. For hard surfaces, rinse and dry thoroughly. Use EPA-registered mold cleaners or household cleaners that are compatible with the surface. Porous materials like drywall or insulation that are mold-damaged beyond cleaning should be removed and disposed of safely. When possible, use antimicrobial products following the product label and ensure the area remains well-ventilated. Document each surface cleaned and the materials removed to support future inspections.
Drying, dehumidification, and monitoring to prevent regrowth
Drying is the linchpin of successful mold remediation. After cleaning, run a dehumidifier and/or air movers within the containment to achieve low humidity levels and promote faster drying. Monitor environmental conditions with a moisture meter and hygrometer, aiming for stable readings over 24–48 hours. If humidity remains high, increase airflow, seal leaks, or consider temporary ventilation strategies to speed up drying. Once surfaces are dry, remove containment and perform a final inspection for remaining mold traces or musty odors. Ongoing monitoring—especially after major leaks or bursts—helps catch regrowth early and prevents long-term health risks.
Aftercare, prevention, and maintenance for long-term health
Preventing mold recurrence in unions requires ongoing moisture control and maintenance. Repair leaks promptly, insulate cold surfaces, and ensure adequate ventilation in boiler rooms, storage areas, and mechanical spaces. Schedule routine inspections after heavy rainfall or seasonal thaw cycles. Use moisture meters periodically to confirm consistent low humidity in vulnerable zones. Consider preventive measures like improving airflow with mechanical ventilation and regularly cleaning air ducts or vents where feasible. Real-world prevention also includes establishing a written maintenance plan and educating residents on early mold warning signs, so problems are addressed quickly and minimize escalation.
When to call a professional and next steps
Not all mold situations are appropriate for DIY remediation. If you encounter widespread visible growth (greater than a small area), mold in HVAC ductwork, or recurring moisture issues, contact a licensed mold remediation professional. A pro can assess structural integrity, perform advanced air testing if needed, and ensure compliance with local regulations. Coordination with building management or homeowners associations may be required in unions. For safe progression, prepare documentation of prior moisture events, measurements, and photos to share with the remediation team. The next steps typically include a formal remediation plan, containment adjustments, and a post-remediation verification to confirm that mold levels and moisture are under control.
Tools & Materials
- N95 or P100 respirator(Ensure proper fit; replace filters if damp or soiled)
- Protective gloves (nitrile)(Use double-layered gloves when handling moldy porous material)
- Safety goggles or face shield(Protect eyes from splashes and spores)
- Plastic sheeting and painter's tape(Create containment barriers around the work area)
- HEPA-filter vacuum(For debris cleanup and to minimize airborne spores)
- Detergent and clean water(Mild detergent mixed as directed; avoid harsh solvents)
- EPA-registered mold cleaner or household cleaner(Follow label directions; do not mix cleaners)
- Dehumidifier or desiccant measures(Aim to reduce relative humidity below 50% where feasible)
- Moisture meter or RH gauge(Use before and after remediation to verify dryness)
- Leak repair materials(Seal and fix sources of moisture promptly)
- Waste bags and disposal bags(Seal contaminated materials securely for disposal)
- Clock or timer for drying cycles(Helpful to track drying phases)
Steps
Estimated time: 6-12 hours depending on area size and moisture level
- 1
Assess area and prepare PPE
Survey the space to locate moisture sources, mold growth, and cross-contamination risks. Put on N95/P100 respirator, gloves, eye protection, and a disposable coverall if needed. Document initial conditions with photos for reference.
Tip: Do not touch moldy areas with bare hands; use tools and PPE to minimize exposure. - 2
Set up containment
Isolate the work area with plastic sheeting and tape to prevent spores from spreading to adjacent union spaces. Post warning signs and restrict access during remediation.
Tip: Seal gaps around doors and vents using tape and plastic; ensure airflow is controlled rather than free-flowing. - 3
Stop moisture intrusion
Identify and repair the moisture source if possible (leaks, condensation, or poor insulation). If immediate repair isn’t feasible, implement temporary measures to reduce ongoing moisture.
Tip: Document moisture sources with photos; plan permanent fixes with a maintenance team. - 4
Remove non-salvageable materials
Carefully remove porous materials heavily contaminated by mold or damaged by moisture. Place in sealable bags for disposal per local regulations.
Tip: Avoid tearing material aggressively to minimize dust and spore release. - 5
Clean and disinfect hard surfaces
Wash non-porous surfaces with detergent and water, then apply EPA-registered cleaner or appropriate mold disinfectant following label directions.
Tip: Allow surfaces to air dry completely after cleaning to prevent residual moisture. - 6
Dry the area thoroughly
Run dehumidifiers and air movers within containment. Monitor RH with a hygrometer or moisture meter; target stable readings below 50% when possible.
Tip: Keep doors closed and maintain ventilation directed away from surrounding spaces to avoid cross-contamination. - 7
Inspect and verify dryness
Recheck all surfaces and materials for dampness. If any area remains damp, repeat cleaning and drying steps and extend monitoring.
Tip: Take post-remediation photos and save moisture readings for future reference. - 8
Plan prevention and maintenance
Develop a prevention plan that includes regular moisture checks, venting improvements, and prompt leak repairs in union spaces.
Tip: Educate residents on mold warning signs and when to report issues promptly. - 9
Schedule follow-up verification
Arrange a follow-up check after 2–4 weeks or after any major water event to confirm mold has not returned and dryness is sustained.
Tip: Document verification with a checklist and photos for accountability.
FAQ
What is union restoration mold removal and why does it matter?
Union restoration mold removal is the process of identifying, containing, and removing mold in shared spaces of a building or cooperative living arrangement, followed by moisture control to prevent recurrence. It matters because mold can affect indoor air quality and occupant health, especially in communal areas with shared vents or walls.
Union mold removal is about safely identifying and removing mold from shared spaces, then keeping moisture low to prevent return.
Do I need a professional for mold in a union space?
If mold covers a large area, or if it’s in HVAC systems, insulation behind walls, or if moisture issues persist, hire a licensed remediation professional. They can perform a thorough assessment, testing if needed, and ensure proper containment and disposal.
For large areas or complex spaces, a professional is usually the safest option.
How long does union mold removal typically take?
Time varies with area size and moisture severity. Small patches may be addressed in a day; larger or system-wide issues can take several days, including drying and follow-up checks. Plan for remediation in stages and allow time for verification.
It depends on size and moisture, from a day to several days with follow-up checks.
Can mold come back after remediation?
Yes, if moisture sources aren’t addressed or if drying is incomplete, mold can regrow. The remediation plan should include moisture control and post-remediation verification to minimize recurrence.
Mold can return if moisture isn’t controlled; follow-up checks are essential.
Is household bleach safe for mold in union spaces?
Bleach can be effective on some non-porous surfaces but is not a cure-all and can create fumes in enclosed spaces. Use EPA-registered cleaners and follow label directions. For porous materials, removal and replacement are often required.
Bleach isn’t always the answer; use recommended cleaners and consider material replacement for porous items.
What signs indicate a moisture problem after remediation?
Look for dampness on walls, musty odors, ongoing condensation, or high humidity readings despite cleaning. Persistent signs suggest sources of moisture or insufficient drying and should trigger a recheck.
Watch for damp spots, smells, and humidity that stays high after cleanup.
Watch Video
The Essentials
- Assess moisture sources before removing moldy materials.
- Contain the work area to prevent cross-contamination.
- Dry thoroughly to prevent regrowth and hidden mold.
- Document findings and plan prevention for long-term health.
- Know when to call a professional for complex or recurring issues.