Stone Molds: Identification, Removal & Prevention Guide
Learn to identify stone molds on natural stone surfaces, safely remove them, address moisture sources, and prevent recurrence with practical steps backed by Mold Removal Lab in 2026.

Stone molds on indoor stone surfaces pose health risks and can damage stone if left untreated. This guide helps homeowners identify growth on stone, safely remove it, address the moisture source, and set up a lasting prevention plan. You’ll learn about stone-specific differences, safe cleaners, and when to call a professional. According to Mold Removal Lab, moisture control is the keystone of success.
What stone molds are and why they form
Stone molds refer to fungal growth that colonizes surfaces like marble, limestone, slate, and granite when moisture is present. These molds can appear as black, green, or white patches and may produce musty odors. Stones behave differently from ceramic tile or painted walls: natural stone is often porous, and even small leaks or condensation can create microhabitats where spores settle and colonize. Common environments include bathrooms with natural stone surfaces, kitchens with damp stone countertops, basements with stone walls, and outdoor stone features that stay damp. Health-wise, mold spores may trigger allergic reactions and respiratory symptoms in sensitive individuals, especially when found in living areas or bedrooms. The goal is not simply to remove the visible growth but to understand why stone molds appeared in the first place; moisture and poor air exchange are the root culprits. This section sets the foundation for safe remediation that protects you, your family, and the stone’s integrity. We’ll cover material properties, how to identify mold versus mildew, and why certain strategies work better on stone than on other surfaces. Remember, stone molds are a sign that moisture control needs attention.
description===null]: null
tip":
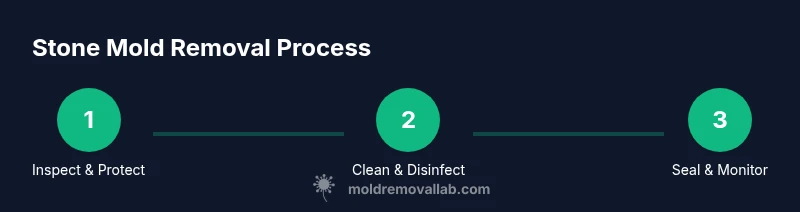
Tools & Materials
- Spray bottle(Empty bottle for applying cleaner)
- Protective gloves (nitrile)(Powder-free, chemical-resistant)
- Safety goggles(Eye protection against splashes and spores)
- N95 respirator(Protects against inhaling spores)
- Plastic drop cloths(Contain area and protect nearby surfaces)
- Stiff nylon scrub brush(For scrubbing stone surfaces without abrasion)
- Non-acidic stone-safe cleaner(pH-neutral cleaner suitable for stone)
- Hydrogen peroxide 3%(Disinfectant that’s generally safe on many stones; test first)
- Soft microfiber cloths(For wiping and drying without scratching)
- Stone sealer compatible with your stone type(Optional for long-term protection)
Steps
Estimated time: Total time: 60-90 minutes
- 1
Assess mold growth and origin
Survey the affected area and note moisture sources nearby (leaks, condensation, ventilation gaps). Take photos for reference and plan containment to prevent spores from spreading. This step sets expectations and helps determine whether a larger moisture issue exists beyond the surface mold.
Tip: Document the area before starting any removal to track changes over time. - 2
Protect the workspace
Lay down plastic drop cloths to protect floors and adjacent surfaces. Remove or cover items nearby that could be affected by cleaning solutions. Ensure good ventilation but avoid bringing outdoor moisture inside.
Tip: Open windows or run a dehumidifier to reduce humidity during the process. - 3
Prepare cleaners and tools
Mix or pour your stone-safe cleaner into a spray bottle. Have hydrogen peroxide ready for spot disinfection after scrubbing. Keep brushes, soft cloths, and a separate rinse bottle handy for controlled cleaning.
Tip: Do a small test patch on an inconspicuous area first to ensure no surface damage. - 4
Apply cleaner and agitate mold
Lightly spray the affected area and let it sit for a few minutes to loosen organic matter. Use the stiff brush to agitate the growth in a circular motion without abrading the stone surface.
Tip: Never use high-pressure scrubbing on delicate stone finishes. - 5
Rinse and disinfect
Rinse away residue with clean water and wipe dry. If residual mold remains, apply hydrogen peroxide to the spot and allow it to sit briefly before re-scrubbing and drying.
Tip: Do not mix cleaning agents; stick with the recommended products only. - 6
Dry thoroughly and monitor
Dry the area completely with microfiber cloths and keep the space well-ventilated. Use a dehumidifier to reduce ambient humidity and watch for ongoing damp spots that might indicate hidden leaks.
Tip: Moisture is the enemy—permanent dryness helps prevent recurrence. - 7
Seal the stone (optional but recommended)
If your stone type supports sealing, apply a compatible stone sealer according to product directions to reduce porosity and make future cleaning easier.
Tip: Ensure the stone is fully dry before applying sealer to avoid trapping moisture. - 8
Establish prevention and maintenance
Address root causes such as leaks, ventilation, and humidity. Schedule regular inspections and cleanups, particularly in moisture-prone areas like bathrooms or basements.
Tip: Use moisture-aware habits (dehumidifier, vent fans) to minimize future mold risk.
FAQ
What causes stone molds to grow on indoor stone surfaces?
Mold on stone surfaces typically grows where moisture is present. Leaks, condensation, high humidity, and poor ventilation create conditions that encourage stone molds. Addressing moisture and airflow is essential to prevent recurrence.
Moisture is the key driver. Fix leaks, improve airflow, and keep the area dry to stop mold from returning.
Are household cleaners safe for stone molds on natural stone?
Some cleaners are stone-safe, especially pH-neutral products designed for natural stone. Avoid strong acids or bleaches on porous stones, and always test a small patch first before broad application.
Use a pH-neutral cleaner and test first on a hidden spot to protect the stone.
Can I clean stone mold myself or should I hire a pro?
For small, surface-only mold on non-porous stone, you can clean it yourself with appropriate PPE. Extensive growth on porous stone, hidden leaks, or large areas may require professional remediation to prevent damage and ensure safety.
You can handle small spots, but large or stubborn growth warrants a pro.
Should I seal stone after removing mold?
Sealing can reduce porosity and make future cleaning easier, but only after the stone is completely dry and compatible with your stone type. Sealing is a preventive step, not a fix for existing moisture problems.
Sealing helps prevent future mold if the stone is fully dry and compatible with the sealant.
What humidity level helps prevent stone mold growth?
Maintaining good humidity control reduces mold risk. Use ventilation and dehumidification to keep moisture levels down, especially in bathrooms and basements with stone features.
Keep the space dry using ventilation and a dehumidifier to limit mold growth.
When should I call a professional for stone mold?
If mold covers large areas, the stone is porous and absorbing moisture, or you notice persistent growth after cleaning, consult a Mold Removal Lab recommended professional remediation service.
If the mold keeps coming back after cleaning, or you see leaks, call a pro.
Watch Video
The Essentials
- Identify moisture sources and address them first
- Use stone-safe cleaners and non-abrasive scrubbing
- Dry thoroughly and consider sealing after cleaning
- Monitor humidity to prevent recurrence