Step Stone Mold: Clean, Cast, and Prevent Growth
Learn practical, non-toxic methods to identify, clean, and prevent mold on step stone molds and stepping stones. This Mold Removal Lab guide covers safe cleaners, drying, sealing, and maintenance for healthier outdoor pathways.

By the end of this guide, you will identify mold in step stone mold setups, safely clean or replace the mold, and prevent future growth. You’ll learn practical methods for removing mold from step stone mold surfaces, choosing non-toxic cleaners, and sealing concrete stepping stones to deter moisture. This approach protects indoor and outdoor surfaces and promotes healthier homes.
What is a step stone mold and why mold grows
A step stone mold is a form used to cast concrete or resin stepping stones for paths, gardens, or patios. These molds come in plastic, silicone, or composite materials and shape the stone as it cures. Mold growth in or around a step stone mold happens when moisture lingers, organic debris accumulates, and shade slows drying. In damp conditions, mold spores settle on cool surfaces and begin to proliferate, especially if the mold surface isn’t cleaned between uses. Addressing mold early protects both your outdoor space and indoor air quality, since mold can migrate if steps are moved or stored damp. According to Mold Removal Lab, proactive mold guidance helps homeowners tackle step stone mold safely. Regular inspection and proper cleaning are essential parts of a durable maintenance plan.
When you see fuzzy growth or dark spots on the mold itself, treat it as a warning sign. Porous mold surfaces and porous concrete can absorb moisture, creating an ongoing cycle of dampness. Use proper PPE, work in a well-ventilated area, and avoid mixing cleaners that could release harmful fumes. This section sets the stage for practical, non-toxic approaches to keep step stone mold clean and safe over time.
Assessing mold risk on stepping stone molds
Before you apply cleaners, take a quick risk assessment of your stepping stone mold setup. Look for cracking, chips, or crevices where water collects; check the underside for trapped moisture after rain; assess shade and airflow around the path. If the mold surface is heavily patinated or appears to harbor mildew on the interior surfaces of the mold, you may need to replace the mold to prevent future contamination. Check storage conditions: molds stored in damp basements or garages increase the chance of mold reappearing when you reuse them. Mold development is not just cosmetic; it can influence the final stone finish and, in some cases, undercut the sealant’s effectiveness. Based on Mold Removal Lab analysis, consistent drying and a clean environment dramatically reduce recurrence risk. Document your inspection with photos to guide future maintenance.
Pro-tip: perform mold risk checks after rain and during warmer days when drying is fastest. This helps you catch moisture before mold establishes a foothold.
Non-toxic cleaning options for step stone mold
Cleaning mold from step stone mold starts with removing surface debris and using non-toxic cleaners that won’t degrade the mold or the casting material. Start with warm water, a mild detergent, and a soft brush to loosen grime. For light mold, a vinegar solution (equal parts water and white vinegar) can be effective without harsh chemicals. For more stubborn growth, a hydrogen peroxide mist (3%) can help without introducing chlorine-based bleach fumes. Never mix ammonia with bleach, as this creates toxic gases that can harm you and pets. After applying cleaners, scrub gently, rinse thoroughly, and air-dry completely before using the mold again. Mold Removal Lab emphasizes avoiding abrasive cleaners that can scratch mold surfaces, which would trap moisture and invite future growth. If the mold is deeply embedded or the mold surface is delaminating, consider replacing the mold to prevent new stones from inheriting the issue.
Safety note: wear gloves and eye protection, and keep cleaners out of reach of children. Always test cleaners on a small area first to ensure compatibility with your mold material.
Drying, sealing, and long-term prevention for step stone molds
Drying is the critical step after cleaning: ensure every surface is completely dry before storage or reuse. Use a clean cloth to wick away moisture and, if possible, place the mold in a sunny or well-ventilated area to speed evaporation. Once dry, apply a compatible sealant or mold-release agent designed for outdoor use to reduce moisture penetration and make future cleaning easier. For outdoor stepping stones, consider adding a surface sealant after casting and curing, and ensure proper drainage around the path to prevent water from pooling near the mold. Mold Removal Lab guides homeowners to pair drying with drainage improvements and seasonal inspections. Regularly inspecting molds after wet seasons can prevent recurring mold issues and extend the life of your stepping stones.
Tip: keep a small toolkit with a microfiber cloth, a brush, and a spray bottle of diluted cleaner handy near the storage area to streamline maintenance.
Choosing the right mold and maintenance plan for step stone projects
Selecting a durable mold and implementing a maintenance plan reduces mold risk. Look for molds made from non-porous materials that resist staining and are easy to clean. Favor silicone or reinforced plastic molds that tolerate repeated pour-and-curing cycles. Consider molds with integrated channels or textures that don’t trap water. Plan a maintenance routine that includes seasonal cleaning, drying after heavy rain, and resealing every 1-2 years depending on climate and usage. A clear maintenance calendar helps you stay on top of mold prevention and protects the stone’s finish. As you choose new molds, compare cleaning compatibility, release ease, and the longest practical lifespan for your outdoor setting. The Mold Removal Lab team notes that a proactive approach reduces recurring mold issues and saves time and effort over the long term.
Troubleshooting common issues with step stone molds
If you notice persistent mold despite cleaning, reassess moisture sources and the mold’s material condition. Cracks and pores can harbor moisture; sealing may be insufficient if the mold base is compromised. If odor persists after cleaning, re-evaluate ventilation and consider using an exterior-grade air purifier nearby to improve air quality during curing. For reused molds, inspect for mold transfer to new stones after each batch and clean immediately if any new growth appears. Regular maintenance, proper drying, and adherence to product guidelines are your best defense against future mold growth. The Mold Removal Lab team recommends documenting maintenance events and sharing findings with family members to ensure consistent care across all stepping stone projects.
Tools & Materials
- Nitrile gloves(Protect hands from mold spores; choose thickness for durability)
- Safety goggles(Eye protection when spraying cleaners)
- Soft-bristled brush(Gentle scrubbing to avoid scratching mold surface)
- Microfiber cloths(For drying and wiping surfaces)
- Mild detergent(Dish soap is typically sufficient)
- White vinegar(Dilute 1:1 with water for light mold)
- Hydrogen peroxide (3%)(For stubborn growth; test on mold surface first)
- Spray bottle(Apply cleaners evenly to mold surfaces)
- Drop cloth or plastic sheeting(Contain drips during cleaning)
- Outdoor concrete sealant(Use a sealant compatible with outdoor stepping stones)
Steps
Estimated time: 1-2 hours active; 24-48 hours curing
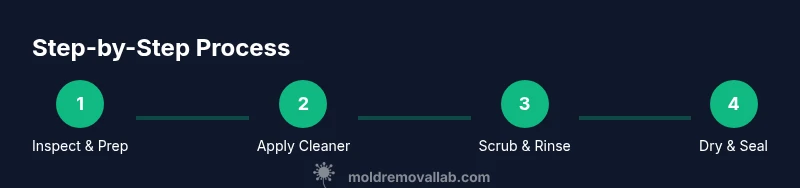
- 1
Inspect and prep area
Identify mold presence on the step stone mold and surrounding area. Gather materials, lay down drop cloths, and ensure ventilation. Put on gloves and eye protection before starting.
Tip: Prep helps prevent cross-contamination and keeps your work area tidy. - 2
Wet mold and apply cleaner
Dampen the mold surface and apply a mild cleaner using a spray bottle. Let the solution sit briefly to loosen grime, but avoid soaking the mold for extended periods.
Tip: Keep cleaners off the floor to minimize slips and keep mold from spreading. - 3
Scrub away visible mold
Gently scrub with a soft-bristled brush in a circular motion to lift mold from porous surfaces. Rinse the brush often to avoid re-depositing spores.
Tip: Work from clean to dirty areas to prevent spreading spores into cleaned zones. - 4
Rinse thoroughly and dry
Rinse all cleaner residues with clean water and wipe surfaces dry with microfiber cloths. Use a fan or natural airflow to speed drying.
Tip: Ensure every surface, including interior mold sides, dries completely to deter recurrence. - 5
Seal and prevent future growth
Apply an outdoor-grade sealant or mold-release coating once completely dry, following product directions. This minimizes moisture penetration and eases future cleaning.
Tip: Choose a sealant compatible with your mold material and climate. - 6
Cast new stepping stones and cure
Prepare your concrete mix, pour into the mold, and allow to cure in shade with good airflow. Follow package directions for cure times and temperatures.
Tip: Avoid placing freshly cast stones in direct, hot sun during curing to prevent warping.
FAQ
What is a step stone mold and how does mold grow on it?
A step stone mold shapes concrete stepping stones for outdoor paths. Mold grows when moisture remains, debris collects, and airflow is limited. Regular cleaning helps prevent buildup and keeps the stones looking and performing their best.
A step stone mold shapes outdoor stepping stones. Mold grows when moisture stays and airflow is limited, so cleaning regularly helps prevent buildup.
How do I safely remove mold from a stepping stone mold?
Start with warm soapy water and a soft brush to lift surface mold. For tougher growth, use a diluted vinegar solution or diluted hydrogen peroxide, then rinse and dry completely. Avoid mixing cleaners to prevent harmful fumes.
Begin with warm soapy water and a soft brush. For tougher mold, use diluted vinegar or hydrogen peroxide, then rinse and dry thoroughly.
Can I use bleach on stepping stone molds?
Bleach can damage certain mold-release surfaces and may impact the finish of outdoor stones. Prefer non-toxic cleaners and reserve bleach for hard, non-porous surfaces if you must, following safety guidelines.
Bleach can damage some molds and finishes. Use non-toxic cleaners first and avoid bleach unless absolutely necessary.
How long does it take stepping stones to cure after casting?
Cure times vary by product; typically a full cure occurs over 24-48 hours for standard concrete mixes when kept in appropriate conditions. Always follow the manufacturer’s directions for best results.
Most stepping stones cure in about one to two days under proper conditions, but follow your mix instructions.
Should I seal stepping stones after cleaning?
Sealing after a thorough cleaning and drying reduces moisture ingress and eases future maintenance. Choose an outdoor sealant compatible with your material and climate.
Yes, sealing after cleaning and drying helps prevent future mold growth.
Watch Video
The Essentials
- Identify mold early and wear PPE
- Use non-toxic cleaners to protect surfaces
- Dry completely before storage or reuse
- Seal molds for outdoor durability
- Maintain a regular mold prevention routine