Bathroom Mold: Identify, Clean, and Prevent for a Healthier Home
A practical, step-by-step guide to identifying, cleaning, and preventing bathroom mold. Learn safety protocols, moisture control, and long-term prevention with expert guidance from Mold Removal Lab.

This guide helps you identify, safely remove, and prevent bathroom mold by targeting moisture, isolating the work area, and using proper cleaners. Start with non-porous surfaces, address leaks, and know when to call a professional. Mold Removal Lab guidance emphasizes moisture control as the key to lasting success.
Introduction to bathroom mold
Bathroom mold is a common issue in homes that experience recurring moisture buildup in showers, sinks, and behind tiles. It grows where humidity, condensation, and leaks linger. The Mold Removal Lab team notes that bathroom mold often starts as a harmless-looking stain or fuzzy growth and can become a health concern if ignored. In this section, you’ll learn how to spot signs of mold, distinguish it from mildew, and start with practical, safe remediation steps. We’ll emphasize moisture control as the most effective long-term defense, because removing mold without addressing the source only provides a temporary fix. By understanding how bathroom mold forms and spreads, you can plan targeted cleaning, reduce exposure, and prevent future regrowth.
Common Types of Bathroom Mold
Bathrooms host several mold species that thrive on damp surfaces such as grout lines, caulk, and shower doors. The most frequently encountered in residential settings include Cladosporium and Aspergillus, with the notorious black mold (Stachybotrys chartarum) grabbing headlines when present in large patches. Real-world testing often reveals a mix of species in humid bathrooms. Regardless of species, health effects are possible, especially for people with allergies, asthma, or a compromised immune system. Routine cleaning targets visible growth, but persistent or spreading mold may indicate an ongoing moisture problem that requires more robust action.
Moisture: The Fuel for Bathroom Mold
Moisture is the catalyst for bathroom mold. Condensation from showers, leaky pipes behind walls, and poor ventilation create a hospitable environment for mold spores to settle and multiply. To reduce growth, focus on moisture control as the foundation of remediation: fix leaks, improve exhaust ventilation, and keep bathroom surfaces dry after use. While DIY cleaning can remove surface mold on non-porous surfaces like tiles, mold in porous materials (drywall, wood, insulation) can embed within the matrix and recur if moisture remains. Regular checks for hidden leaks behind vanities or under sinks help catch problems before they become widespread.
PPE and Safety Precautions for DIY Remediation
Before you start, assemble appropriate PPE. A properly fitted N95 respirator, chemical-rated gloves, eye protection, and disposable coveralls help protect your lungs, skin, and clothing from mold spores and cleaning agents. Work in a well-ventilated area and avoid creating aerosols by misting cleaners gently. If you have severe allergies, asthma, or a compromised immune system, consider hiring a pro sooner rather than later. Remember to keep children and pets out of the work zone. Discard contaminated materials in sealed bags after use.
Cleaning Non-Porous Surfaces: Techniques That Work
Non-porous bathroom surfaces, such as ceramic tile, glass, and enamel, respond well to routine cleaning. Use a detergent solution to remove visible residue, then apply a mold-killing cleaner following the product instructions. For many households, a diluted bleach solution can be effective on non-porous surfaces (for example, a 1:10 ratio of bleach to water) if used with proper ventilation and PPE. Let the solution sit briefly to inactivate mold before scrubbing and rinsing. Dry the surface thoroughly to prevent quick rebound growth. Remember: never mix cleaners with ammonia or other cleaners that can produce dangerous gases.
Handling Porous Materials: When to Toss and When to Dry
Porous materials like drywall, ceiling tiles, carpet, and insulation can harbor mold that is difficult to remove completely. If the mold has penetrated deeply or the material remains damp after cleaning, it’s usually best to remove and replace the affected sections rather than try to dry and sanitize. If you only have surface mold on porous materials and you can dry and sanitize, do so promptly and consider encapsulation methods to seal exposed areas. When in doubt, consult a professional to avoid releasing spores into lived spaces.
Mold Testing and Verification: Do You Need It?
Home mold testing is not always necessary to determine if an area is clean, but it can be useful in cases of persistent mold, unclear sources of moisture, or health concerns. Sampling should be performed by a qualified professional (or a well-equipped lab, following proper protocols). After remediation, re-testing or visual inspection confirms success. If you suspect hidden mold behind walls or under flooring, a professional assessment is advised.
Prevention: Long-Term Solutions for Bathroom Mold
Prevention relies on continuous moisture management and regular inspection. Install or upgrade a bathroom exhaust fan and run it during and after showers for at least 20-30 minutes, or as recommended by the device manufacturer. Repair leaks promptly, seal grout lines, and maintain adequate ventilation. Regular cleaning with appropriate products and prompt attention to condensation can dramatically reduce the chance of regrowth. Over the long term, consider moisture meters or smart humidity monitors to help track conditions and trigger cleanup or dehumidification.
Daily Habits and Maintenance Schedule
Develop a simple routine to keep moisture in check: wipe down shower walls after use, squeegee doors, check under sinks for leaks, and replace weather-stripped caulk if needed. Create a monthly checklist that includes inspecting the grout, testing the exhaust fan, and cleaning any visible mold with the recommended method. Small, consistent actions can prevent big mold problems and keep bathrooms healthier for everyone.
Real-World Scenario: A Typical Bathroom Mold Case
A family noticed a persistent musty odor and dark staining along the shower grout. They identified a slow-leak behind the wall, added a high-capacity exhaust fan, and started a moisture management plan. Over a few weeks, surface mold diminished, and the space was verified with routine checks. This case highlights the importance of addressing the moisture source, using proper PPE, and selecting cleaning methods appropriate for the materials involved. Sustained maintenance prevented reoccurrence, illustrating Mold Removal Lab's emphasis on moisture control as the core strategy.
Authority Guidance and Further Reading
To support your efforts, consult authoritative sources on mold and indoor air quality: • Environmental Protection Agency (EPA) mold guidance: https://www.epa.gov/mold/mold-guide • Centers for Disease Control and Prevention (CDC) mold information: https://www.cdc.gov/mold/default.html • Occupational Safety and Health Administration (OSHA) mold safety resources: https://www.osha.gov/molds
Quick Wins and Next Steps
Start with a moisture control plan today: fix any leaks, improve ventilation in the bathroom, and schedule a surface cleaning of visible mold on non-porous areas. For persistent problems or mold behind walls, plan a professional assessment. By combining moisture control with proper cleaning practices, you can substantially reduce bathroom mold and protect your home's health.
Tools & Materials
- N95 respirator(Fit-tested if possible)
- Safety goggles(Chemical splash protection)
- Disposable coveralls(Prevent clothing contamination)
- Gloves (nitrile or rubber)(Chemical-resistant)
- Scrub brushes(Stiff-bristle for grout)
- Bucket(For rinsing and mixing cleaners)
- Spray bottle(Apply cleaners evenly)
- Detergent or mold cleaner(Follow product label)
- Diluted bleach solution(Non-porous surfaces only; 1:10 bleach to water)
- Plastic sheeting(Contain the work area)
- Tape and markers(Label containment zones)
- Trash bags(Seal and dispose contaminated materials)
- Dehumidifier or fan(Use to dry area quickly)
Steps
Estimated time: 2-6 hours, depending on extent and accessibility
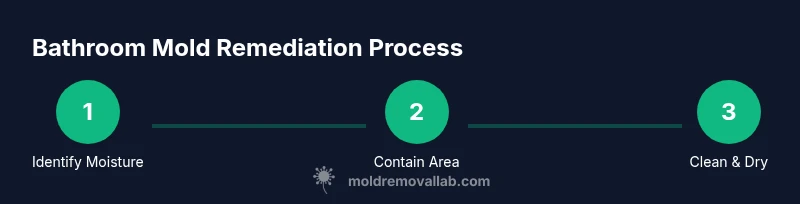
- 1
Prepare and Protect Yourself
Put on PPE, gather all materials, and plan the work. Ensure the area has good ventilation and keep doors closed to limit debris spread. Prepare a trash bag and containment zone marker before you begin.
Tip: Double-check PPE fit and work in a well-ventilated area. - 2
Contain the Work Area
Drape plastic sheeting to isolate the shower or affected area. Seal seams with tape to prevent spore travel to adjacent spaces. This minimizes contamination risk for you and others in the home.
Tip: Avoid oversizing containment—keep it simple and effective. - 3
Identify Moisture Sources
Inspect for leaks behind walls, under sinks, or around fixtures. Repair leaks first, because moisture will drive mold recurrence even after cleaning.
Tip: A quick flashlight check helps locate hidden damp spots. - 4
Clean Non-Porous Surfaces
Clean tile, glass, and enamel with detergent, then apply a mold-killing cleaner per label directions. For non-porous surfaces, a diluted bleach solution can be used with ventilation.
Tip: Always apply cleaner from top to bottom to prevent drips onto cleaned areas. - 5
Address Porous Materials
Evaluate porous items like drywall or insulation. If mold penetrates deeply, remove and replace. If only surface-level, treat carefully and dry thoroughly.
Tip: When in doubt, document conditions and consult a professional. - 6
Dry and Decontaminate
Dry the area completely using fans or a dehumidifier. Wipe surfaces dry and check for any remaining damp spots. Keep alerts for reappearance for the first few weeks.
Tip: Drying promptly prevents regrowth and reduces exposure. - 7
Dispose of Contaminated Materials
Place contaminated items in sealed bags and dispose of them according to local guidelines. Do not reuse bags or containers that held moldy materials.
Tip: Label bags clearly to avoid cross-contamination during disposal. - 8
Document and Reassess
Take photos of cleaned areas and note moisture sources. Revisit the space after a few days to ensure no regrowth and verify dryness.
Tip: A simple photo log helps track progress over time. - 9
Decide on Professional Help
If mold returns, grows behind walls, or you have health concerns, contact a certified mold remediation professional. They can perform advanced testing and remediation.
Tip: When in doubt, err on the side of professional assessment.
FAQ
What causes bathroom mold?
Bathroom mold grows where moisture persists, such as after showers, leaks, or poor ventilation. Addressing moisture sources is the most effective remediation strategy.
Mold in bathrooms grows when moisture sticks around. Fix leaks and improve ventilation to prevent it.
Is bathroom mold dangerous?
Exposure can trigger allergies or asthma for some people. More severe health effects are rare but possible with prolonged exposure or high indoor mold concentrations.
Mold exposure can affect people with allergies or asthma; keep spaces dry and clean to reduce risk.
Can I remove mold myself?
You can clean many non-porous surfaces yourself with proper PPE and cleaners. Porous materials or hidden mold behind walls may require professional remediation.
You can handle non-porous mold cleaning yourself, but call a professional for porous materials or hidden mold.
How do I clean grout mold?
Grout can be tricky; use a stiff brush, detergent, and mold cleaner. For stubborn grout, a calcium-based cleaner or professional-grade grout cleaner may help. Dry thoroughly after cleaning.
For mold in grout, scrub with a brush and cleaner, then dry completely to prevent regrowth.
How can I prevent mold after cleaning?
Keep humidity low with ventilation, fix leaks promptly, seal grout, and regularly dry surfaces after use. Routine maintenance reduces recurrence.
Prevent mold by controlling moisture and drying surfaces after each use.
When should I call a professional?
If mold recurs after cleaning, covers large areas, or is hidden behind walls, seek professional remediation. They can test and safely remove mold and address underlying moisture.
If mold keeps coming back or is hidden, a professional should assess and remediate.
Watch Video
The Essentials
- Identify and fix moisture sources before cleaning
- Contain the work area to prevent spore spread
- Use PPE and clean non-porous surfaces safely
- Decide when to replace porous materials and seek pro help if needed