Concrete Stone Mold Removal: A Complete Home Guide
Learn practical, proven methods to remove concrete stone mold safely from homes. This guide covers mold health risks, DIY steps, moisture control, and when to call pros.

By the end of this guide, you will know how to identify concrete stone mold, safely remove it, and prevent future growth. You’ll learn practical DIY cleaning methods, moisture-control strategies, and clear guidance on when professional remediation is necessary. Keep this guide handy for seasonal checks in damp basements and laundry areas.
What is Concrete Stone Mold and Why It Grows
According to Mold Removal Lab, concrete stone mold is a common, moisture-fueled fungus that can colonize porous stone surfaces in homes. When water intrusion or high humidity persists, mold spores settle on the stone and feed on organic residues in grout, cement, and binder materials. The result is dark spots, musty odors, and potential indoor air quality concerns. Understanding the basics helps homeowners target moisture sources first and choose effective cleaning strategies. This section outlines how mold develops on concrete stone and why some homes see recurring issues after a single incident of water damage. For most households, control starts with moisture reduction, surface cleaning, and drying thoroughly after any spill or leak.
Signs of Mold on Concrete Stone
Visible indicators of concrete stone mold include dark or greenish patches on the stone, grout lines, or adjacent caulk. You may notice a musty odor, especially in basements, laundry rooms, and garages where moisture lingers. Mold can appear fuzzy or slimy depending on the species and the area’s humidity. In severe cases, mold may look like powdery residue or dark staining that penetrates the stone surface. Since terrazzo, limestone, and concrete can hold moisture differently, it’s important to inspect countertops, mantels, and decorative stone features for hidden growth behind caulking or sealing. Early detection improves remediation outcomes.
Factors That Accelerate Growth in Stone Surfaces
High humidity, poor ventilation, and ongoing water intrusion accelerate concrete stone mold growth. Leaks from roofs, plumbing, or groundwater seepage raise surface moisture levels, while seasonal temperature cycles can drive condensation inside wall cavities. Porous stone and mortar tend to trap moisture more than sealed ceramic tiles, so bathrooms, basements, and exterior steps deserve special attention. Understanding these factors helps prioritize remediation efforts—focus first on sealing leaks, improving airflow, and drying wet areas promptly to prevent regrowth of concrete stone mold.
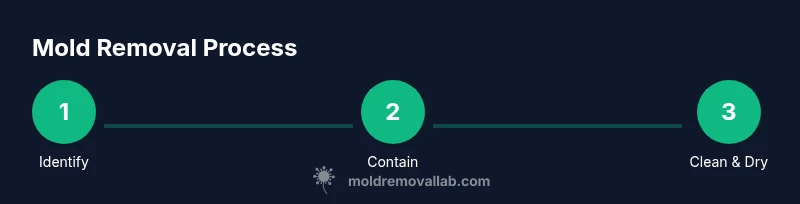
DIY Removal Methods for Concrete Stone Mold
Many homeowners can safely remove lightweight concrete stone mold with a combination of containment, cleaning, and drying steps. Start by ventilating the space, then isolate the area with plastic sheeting to limit spore spread. Use a cleaner that is appropriate for stone surfaces and follow label instructions. Scrub gently with a non-abrasive brush, rinse with clean water, and dry thoroughly. For stubborn patches, repeat cleaning and consider applying a stone-safe antimicrobial spray after the surface is dry. Always wear PPE and avoid mixing cleaners or creating strong fumes.
Preparation and Safety Steps
Preparation reduces exposure and prevents cross-contamination during cleanup. Put on an NIOSH-approved respirator, chemical-resistant gloves, and eye protection. Keep pets and children away from the work area and seal doors with plastic sheeting. Work from top to bottom and avoid spreading spores to clean areas. If mold covers a large area or you’re unsure about the surface integrity, pause and plan professional help. Proper ventilation and containment minimize health risks.
Cleaning Agents: What Works and What to Avoid
Conventional bleach can be effective on non-porous stone surfaces in small patches when used carefully, but it can damage some natural stones and should never be mixed with ammonia. Soap-and-water or stone-safe cleaners can remove surface mold without harming the stone’s finish. For porous stone, gentler cleaners that promote surface drying are preferred, and you may need to repeat treatments. Always test an inconspicuous spot first and follow label directions. Avoid acidic acids like vinegar on certain stones—test first to prevent etching.
Moisture Control and Prevention Strategies
The key to preventing future growth is moisture management. Repair leaks promptly, invest in a dehumidifier for damp rooms, and monitor humidity levels with a reliable gauge. Ensure proper ventilation in bathrooms and basements, and consider sealing stone surfaces with a breathable sealant that allows moisture to escape while reducing water absorption. Regularly inspect grout lines and caulking for cracks that can trap moisture. Consistent maintenance reduces the likelihood of new growth on concrete stone.
Test and Monitor: Simple Mold Checks
DIY moisture tests can help you catch recurrent dampness before mold becomes noticeable. Look for visible staining, track any new odors, and monitor moisture levels after rain or plumbing work. A cheap moisture meter can help you identify high-humidity zones around stone features. If you see new growth after remediation or if moisture remains elevated for extended periods, recheck ventilation and consider re-sealing or re-grouting as needed.
When to Call a Professional
If mold covers a large area, penetrates deep into stone or grout, or if you have health concerns, call a licensed mold remediation professional. Professionals can use containment measures, HEPA-equipped vacuums, and specialized cleaners that are not readily available to homeowners. Don’t wait for the problem to worsen—professional remediation can prevent structural damage and more serious health risks.
Maintenance Plan: Long-Term Mold Management
Create a simple upkeep plan that includes monthly checks for damp spots, quarterly sealing or re-sealing of stone, and annual humidity reviews. Document any water events and the actions you took to resolve them. A proactive approach saves time and reduces future mold growth on concrete stone surfaces. Keeping humidity under control and addressing issues promptly makes it far easier to maintain a safe home environment.
Tools & Materials
- PPE: NIOSH-approved respirator (N95 or higher)(P100 preferred for fine spores)
- Chemical-resistant gloves(Long cuff; avoid latex)
- Safety goggles(Wraparound style for splash protection)
- Plastic sheeting and painter’s tape(To seal off area and contain spores)
- Non-abrasive scrub brushes(Soft nylon bristles; avoid scratching stone)
- Buckets and clean water(For rinsing and dilution)
- Stone-safe cleaner or mild soap(Test on inconspicuous area first)
- HEPA vacuum with negative air (optional)(Helps capture spores during cleanup)
- Disposal bags(Seal contaminated materials before disposal)
- Moisture meter or hygrometer(Used to track humidity levels)
- Breathable stone sealant (optional)(Apply after drying to reduce absorption)
Steps
Estimated time: 2-6 hours
- 1
Identify and protect the area
Locate the mold-affected zone and guard adjacent spaces with plastic barriers. This prevents spores from spreading and keeps the cleanup contained. Proper identification helps tailor cleaning methods to the stone type.
Tip: Mark the boundary with tape to keep participants clear and to guide containment. - 2
Ventilate and prepare
Open windows or run a vent fan to pull air out of the workspace. Ensure fresh airflow while you work to reduce inhalation risk and speed drying after cleaning.
Tip: Do not run fans toward other rooms to avoid cross-contamination. - 3
Contain and isolate
Seal off the work area with plastic sheeting and tape, creating a containment zone. This minimizes mold spore dispersion during cleaning.
Tip: Keep doors closed and avoid removing containment until cleanup is complete. - 4
Apply cleaner and scrub gently
Apply a stone-safe cleaner or mild soap solution and scrub the surface with a soft brush. Work in small sections and avoid aggressive scrubbing that could scratch or embed spores.
Tip: Test cleaner on a hidden spot first to ensure no surface damage. - 5
Rinse and dry thoroughly
Rinse with clean water and dry promptly with towels or a dehumidifier. Moisture must be minimized to prevent regrowth.
Tip: Use a fan or dehumidifier to speed up drying in damp spaces. - 6
Treat persistent patches
If patches persist after cleaning, repeat the cleaning cycle or apply a stone-safe antimicrobial spray after drying. Do not mix cleaners.
Tip: Limit repeated chemical exposure on sensitive stone types. - 7
Check moisture levels
Confirm that moisture levels have returned to a safe range before removing containment. Ongoing dampness is a red flag for future mold growth.
Tip: Keep humidity below 60% where possible. - 8
Re-seal or protect the surface
If appropriate for the stone type, apply a breathable sealant to reduce water absorption. Ensure the surface is fully cured before use.
Tip: Choose a sealant labeled safe for your stone type. - 9
Dispose of waste properly
Bag and seal contaminated materials and cleaners before disposal. Clean tools and verify no residual spores in the workspace.
Tip: Do not re-use contaminated cloths on clean areas. - 10
Document and monitor
Record cleaning dates, humidity readings, and any leaks for future reference. Schedule follow-up checks after heavy rains.
Tip: Set a reminder to re-check moisture within 30 days.
FAQ
Is concrete stone mold dangerous to health?
Mold growth on stone can trigger allergic reactions and respiratory symptoms in sensitive individuals. Proper cleaning and moisture control reduce health risks, but persistent exposure should be evaluated by a professional.
Mold on stone surfaces can affect health, especially for people with allergies or asthma. Clean thoroughly, control moisture, and consult a pro if symptoms persist.
What is the best cleaner for concrete stone mold?
A stone-safe cleaner or mild soap solution is usually effective for non-porous or sealed stone. For porous or natural stone, avoid harsh chemicals that can damage the surface; always test first.
Use a stone-safe cleaner or mild soap solution and test on a small area before full use.
Can I use bleach on concrete stone mold?
Bleach can kill surface mold on non-porous surfaces but may damage some natural stones and should never be mixed with ammonia. Porous stone often requires gentler cleaners and thorough drying.
Bleach can be used cautiously on non-porous stone, but never mix with ammonia. Be careful with porous stone.
When should I seal concrete after mold removal?
Sealing can reduce water absorption on some stone types, but choose a breathable sealant compatible with your stone. Allow the surface to dry completely before sealing.
Seal only after the surface is fully dry and the product is appropriate for your stone.
What if mold returns after cleaning?
If mold reappears, re-check moisture sources, improve ventilation, and consider professional remediation if growth recurs despite cleaning.
If it comes back, stop and reassess moisture, ventilation, and seek pro help if needed.
How long does it take to see results after cleaning?
Visible improvements can appear within hours after cleaning, but full drying and stabilization may take days depending on humidity and stone type.
You should see faster drying after cleaning, with full stabilization over a few days in most homes.
Watch Video
The Essentials
- Identify moisture sources before cleaning
- Use stone-safe cleaners and avoid vinegar on certain stones
- Contain the area to prevent spore spread
- Dry thoroughly and monitor humidity
- Know when to call a professional