How to remove mold from leather with vinegar: A practical guide
Learn a safe, practical method to remove mold from leather using vinegar. Patch test, dilute properly, dry thoroughly, and condition to restore suppleness while preventing recurrence. Includes step-by-step instructions, safety tips, and professional thresholds from Mold Removal Lab.

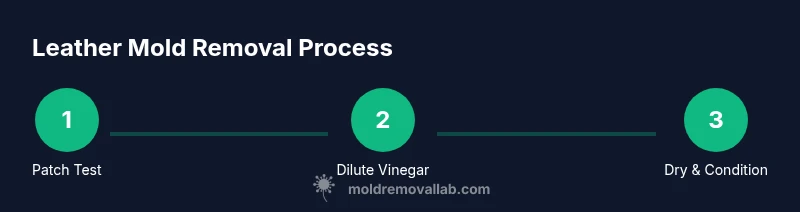
To remove mold from leather with vinegar, mix equal parts white distilled vinegar and water. Test on a hidden area first, then gently wipe the moldy surface with a clean cloth. Avoid soaking; repeat as needed until mold lifts. Let the leather air-dry completely away from heat or direct sun, then apply a leather conditioner.
Why vinegar is a practical option for leather mold remediation
Leather mold is a common problem for items exposed to humidity, from jackets to bags. White vinegar offers a simple, inexpensive way to address surface mold without harsh chemicals. According to Mold Removal Lab, vinegar's mild acidic properties help disrupt mold growth on non-porous or semi-porous surfaces and is widely available in most homes. However, leather is a porous material, so vinegar will mainly tackle surface mold and should be part of a careful, multi-step process. This approach minimizes risk to the leather finish while reducing odor and visible spots. Before you begin, understand that vinegar is not a magic cure for deeply penetrated mold or for leather items with significant structural damage. The goal is to stop surface growth, dry thoroughly, and condition the leather to restore suppleness. Always work in a well-ventilated area and wear gloves to protect your skin. By combining patch testing, gentle application, and thorough drying, you reduce the odds of mold returning in 24-72 hours.
Assessing leather type and mold severity
Not all leather responds the same way to cleaning. Full-grain and nubuck leather may show different reactions to moisture, while patent or coated surfaces resist moisture better but can lift with friction. Start by checking the finish: is there peeling, discoloration, or a musty odor that suggests deeper contamination? Gently rub a small, inconspicuous area with a damp cloth to test colorfastness; if color transfers, treat with extra care or skip water exposure. For severity, distinguish between surface mold (light specks on the surface) and deeper penetration (mold that has penetrated the grain or seams). If the item is valuable or vintage, consider consulting a professional to avoid irreversible damage. With leather, you should prioritize surface removal and drying; deep mold may require specialty cleaners or professional remediation.
Patch test and preparation steps
Always patch-test the vinegar solution before full application. Mix equal parts white vinegar and water; transfer to a spray bottle. In an inconspicuous corner, spray lightly and wait 5-10 minutes to observe any color change or texture shift. If no adverse reaction occurs, proceed to treat the mold in a controlled, circular motion with a clean cloth. Avoid saturating the leather; moisture can warp or stretch the material. After treating, wipe with a clean damp cloth to remove any sour scent from the vinegar and blot dry with a towel. This preparation step reduces the risk of water staining or ring marks later.
Handling finishes and colors: tips for different leather types
Leather finishes vary, so adjust technique to your item. Matte, distressed, or antique finishes may show scuffs after cleaning, while smooth, dyed leather might resist water better. For fragile finishes, use micro-fiber cloths and a lighter touch; for thicker hides, you can be a bit more deliberate with gentle agitation. If your leather has a color that runs or fades, stop immediately and dry the area. In all cases, avoid bleach or hydrogen peroxide, which can damage color and texture. After mold removal, apply a dedicated leather conditioner to restore suppleness. For heavily scented items, you can also place them in a ventilated area with a small bowl of baking soda nearby to absorb odor during drying.
Drying, conditioning, and odor control once mold is removed
Drying is critical. After wiping away mold, place the item in a well-ventilated area away from direct heat or sunlight. Use a fan or natural air flow to expedite drying; never attempt to speed-dry in a hot car or near radiators. Once completely dry, apply a high-quality leather conditioner or cream suited to your leather type. Conditioning helps restore suppleness and may reduce future cracking. If a musty odor persists, lightly mist with a leather-safe odor neutralizer or use activated charcoal in a ventilation-friendly space. Do not seal leather while damp, as trapped moisture can reignite mold growth.
Preventing future mold growth on leather
Prevention is easier than removing mold after it appears. Store leather items in cool, dry spaces with good air circulation and away from basements or bathrooms with high humidity. Use breathable garment bags rather than airtight containers; consider a dehumidifier for storage areas. Regularly inspect seams, linings, and pockets for dampness or condensation. If you use leather outdoors, dry items promptly after exposure to rain or dew. A moisture meter can help you monitor humidity in storage spaces; maintain levels below around 50-60% if possible. Finally, clean and condition leather periodically to maintain its protective oils and prevent surface mold from taking hold.
When to seek professional help
If mold returns after cleaning, or if you notice deep staining, cracking, or a persistent musty odor, professional remediation is advisable. Leather can be damaged by aggressive moisture or incorrect cleaners, so a specialist can assess structural damage, advise on finishing options, and provide safe restoration. Do not attempt aggressive cleaning with bleach, ammonia, or hydrogen peroxide on leather, as these chemicals can permanently alter color and texture. For antique or valuable pieces, obtaining documentation and care instructions from the manufacturer or a conservator is wise.
Tools & Materials
- White distilled vinegar (5-6% acidity)(Use a plain, clear vinegar for least risk of dye transfer.)
- Water(Prefer distilled or filtered water for consistency.)
- Spray bottle(A fine mist sprayer works best.)
- Soft microfiber cloth(Lint-free and gentle on finishes.)
- Leather conditioner(Choose a conditioner suited to your leather type.)
- Old towel or absorbent cloth(For blotting and drying without lint.)
- Optional: Soft-bristled brush(Gentle agitation if needed on stubborn spots.)
- Gloves(Protect skin from vinegar and grime.)
Steps
Estimated time: 60-90 minutes
- 1
Prepare workspace and patch test
Set up in a well-ventilated area. Put on gloves if available. Patch-test the vinegar solution on a hidden area of the leather for 5-10 minutes to check for color or finish reaction.
Tip: Patch testing saves expensive finishes from damage. - 2
Mix the cleaning solution
Combine equal parts white vinegar and water in the spray bottle. This dilution reduces acidity and minimizes potential color loss while remaining effective against surface mold.
Tip: Label the bottle so you don’t confuse it with cleaners. - 3
Apply to mold with restraint
Lightly spray or dampen a cloth and gently blot or rub the moldy area in small circles. Do not soak the leather; moisture can cause warping or water stains.
Tip: Work in small sections to prevent spread to clean areas. - 4
Wipe away residue and blot dry
Wipe away lifted mold with a clean damp cloth. Blot with an dry towel to remove surface moisture. Repeat if necessary until the area looks clean.
Tip: Avoid rubbing aggressively to prevent finish damage. - 5
Air-dry thoroughly
Place the item in a shaded, ventilated area away from heat or direct sunlight. Allow complete dryness before proceeding to conditioning.
Tip: Proper drying reduces mold regrowth risk. - 6
Condition the leather
Once dry, apply a conditioner formulated for your leather type per product directions. This restores oils and helps prevent cracking after cleaning.
Tip: Conditioning supports the leather’s natural barrier. - 7
Store and monitor
Store in a cool, dry, well-ventilated space. Periodically inspect for any new signs of moisture or odor and re-condition as needed.
Tip: Prevention beats repeated cleaning.
FAQ
What is the best vinegar to use for leather mold removal?
Use white distilled vinegar for a neutral cleaning action. Avoid flavored or colored vinegars to minimize dye transfer or staining.
White distilled vinegar is best for this task; avoid flavored vinegars to prevent staining.
Is vinegar safe on all leather types?
Vinegar works best on surface mold and on common leather finishes. Always patch-test, especially on delicate or antique pieces, because some finishes may react to moisture.
Patch-test first; some finishes may react to moisture.
Can vinegar remove deep mold from leather?
Vinegar is typically not sufficient for deeply penetrated mold. If mold penetrates seams or the leather feels tacky or stained, consider professional remediation to avoid permanent damage.
For deep mold, professional help is wise.
Should I condition after cleaning?
Yes. Conditioning helps restore oils and flexibility after cleaning mold. Use a conditioner suited to your leather type and follow product directions.
Condition after cleaning to keep the leather supple.
What about leather with strong dyes or special finishes?
Some dyed or specialty finishes can be sensitive to moisture. Patch-test and apply conditioner sparingly; if color transfer or finish change occurs, stop and seek expert advice.
Be cautious with dyed or specialty finishes; patch-test first.
Watch Video
The Essentials
- Patch-test first before cleaning
- Dilute vinegar to avoid damage
- Dry thoroughly after treatment
- Condition leather to restore suppleness
- Control humidity to prevent recurrence