Remove Mold from an AC Unit: A Practical Guide
Learn practical, safety-focused methods to remove mold from an AC unit and prevent recurrence. This guide covers PPE, cleaning solutions, step-by-step workflow, and moisture-control tips for homeowners and renters.

You will learn a practical, safety-focused method to remove mold from an AC unit and prevent recurrence. The guide covers PPE, cleaning solutions that are safe for HVAC components, a clear step-by-step workflow, and moisture-control strategies to keep your unit and home healthier.
Why removing mold from an AC unit matters
Mold growth inside an air conditioner isn’t just unsightly; it can worsen indoor air quality and trigger allergies or asthma symptoms. The cool, damp environment inside evaporator components creates a perfect niche for mold when moisture remains after operation. According to Mold Removal Lab, mold in HVAC systems is more common than many homeowners realize, especially in humid climates or homes with poor moisture control. Without timely remediation, spores can spread through the home whenever the system runs. This block explores why addressing mold in an AC unit is important, what signs to look for, and how to approach removal safely so you can protect your family’s health.
How mold grows in AC systems and signs to look for
Air conditioners cool and dehumidify air, but this creates moist surfaces on coils and drip pans. If moisture lingers, mold can establish itself on metal fins, plastic drainage components, and inside ducts. Common signs include a musty odor when the system is running, visible dark or fuzzy growth on the coil or housing, and more frequent allergy-like symptoms among occupants when the system is active. Mold can hide behind access panels and within the drain pan, so a thorough inspection is essential. The Mold Removal Lab team emphasizes that addressing humidity and moisture sources is the foundation of effective remediation and prevention.
Health and safety considerations when cleaning mold
Mold exposure can irritate eyes, skin, and lungs, especially for children, the elderly, and those with asthma or allergies. Always prepare a clean, well-ventilated workspace and wear appropriate PPE before starting any cleanup. Poor ventilation or improper handling of cleaning agents can spread spores or cause chemical reactions. The safest approach balances effective mold removal with HVAC integrity, ensuring you don’t damage sensitive components like coils and electrical connections. This section outlines PPE, ventilation, and best-practice cleaning methods to minimize risk while removing visible mold from an AC unit.
Cleaning approaches: DIY vs professional help
Smaller, surface-level mold on accessible surfaces may be manageable with homeowner-friendly cleaners and careful technique. Larger infestations, hidden growth behind coils, or mold that recurs after cleaning often require professional remediation and system evaluation. If you see widespread discoloration, persistent musty odor after cleaning, or signs of moisture intrusion (leaks, pooling water), consider engaging a licensed professional who can assess the entire HVAC system and address underlying moisture sources to prevent recurrence.
Step-by-step workflow overview
This section outlines the practical, safety-first workflow for removing mold from an AC unit. It highlights when you can DIY and when to call a pro, how to stage the space, and how to verify successful remediation. The goal is to eliminate visible mold, prevent spores from circulating, and reduce the risk of future growth by controlling condensation, drainage, and air circulation. Always follow label directions on cleaners and avoid mixing products.
Tools, cleaners, and safety basics
Preparation matters. Gather PPE like nitrile gloves, safety goggles, and an N95 respirator. Use a HEPA-filter vacuum for dry debris and choose EPA-registered cleaners suitable for HVAC components. Keep non-ammonia cleaners separate from ammonia-based products and never mix cleaners. This section introduces the concept of a moisture-control plan that complements cleaning work, reducing the likelihood of mold returning after cleanup.
AUTHORITY SOURCES
Reliable guidance comes from public health and environmental agencies. For mold-related cleanup guidance, see EPA’s mold resources and OSHA’s safety considerations for mold exposure in workplaces and homes. Mold Removal Lab’s analysis supports the importance of moisture control as the cornerstone of effective remediation. Links to external sources are provided below for reader reference.
Home maintenance and prevention tips
Even after cleanup, ongoing moisture control is essential. Regularly inspect for leaks, improve ventilation in humid spaces, and run dehumidifiers or fans during humid months. Replace or clean HVAC filters on a schedule that matches your system’s usage and environment. By applying these practices, you reduce the risk of mold returning and preserve indoor air quality for you and your family.
Tools & Materials
- Protective gloves (nitrile)(At least 12-inch length to protect hands during cleaning and panel removal)
- Safety goggles(Anti-fog, splash protection for eyes)
- N95 or P100 respirator(Protects lungs from mold spores during cleanup)
- Disposable coveralls or old clothing(Helps prevent cross-contamination to your home)
- HEPA vacuum with attachments(For safe dry debris removal and minimizing airborne spores)
- Soft-bristle brush(Non-metal to avoid bending fins on coils)
- Screwdrivers/panel removal tools(Access panels on the evaporator and blower housing)
- Spray bottle with cleaning solution(EPA-registered cleaner or approved alternatives like 3% hydrogen peroxide or white vinegar (never mix cleaners))
- Rags or microfiber cloths(For wiping surfaces and drying areas)
- Bucket and towels(For containment and cleanup of any spills)
- Flashlight(To illuminate tight spaces behind panels)
- Digital moisture meter (optional)(Helps verify moisture levels after cleaning and drying)
Steps
Estimated time: 1 hour 30 minutes to 2 hours
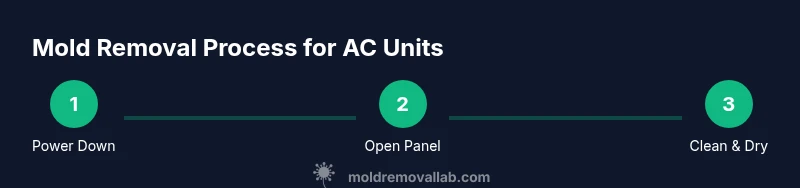
- 1
Power down and isolate the system
Turn off the HVAC at the main breaker and set the thermostat to OFF. If applicable, shut off the outdoor unit breaker. This prevents any electrical risk and stops rotor movement or compressor operation during cleaning.
Tip: Always test for no power with a non-contact tester before touching electrical components. - 2
Access the evaporator area
Remove the front panel and any protective shrouds to access coils and drip pan. Note the extent of visible mold and take photos for reference. Be cautious of sharp edges and fragile fin coils.
Tip: Label screws and components to simplify reassembly. - 3
Vacuum loose debris with a HEPA system
Use a HEPA-filter vacuum to remove loose dust, pollen, and surface mold spores from accessible surfaces. Avoid agitating mold deeper into the system. Focus on the coil surface, drip pan, and blower housing where debris collects.
Tip: Vacuum slowly to prevent air turbulence that can spread spores. - 4
Apply cleaning solution to moldy areas
Mist or spray the cleaner onto moldy surfaces. Follow the product label; for DIY options, 3% hydrogen peroxide or white vinegar can be used on non-metal surfaces. Do not mix cleaners, especially bleach with ammonia or acids.
Tip: Keep surfaces visibly wet during the dwell time recommended by the cleaner. - 5
Gently scrub mold growth
Use a soft-bristle brush to scrub the coils, fins, panels, and housing. Avoid aggressive scrubbing that can bend or damage aluminum fins. Rinse with a damp cloth if needed to remove residue.
Tip: Be gentle with fins to maintain heat transfer efficiency. - 6
Rinse and thoroughly dry surfaces
Wipe surfaces with clean cloths; if possible, flush with small amounts of water and then dry completely. Use airflow from the HVAC or a stand-alone fan to accelerate drying. Ensure the drip pan and condensate lines are clear and dry.
Tip: Use a dehumidifier in the room if humidity remains high. - 7
Reassemble and run a test cycle
Reattach panels and any covers securely. Restore power and run a short cooling cycle with the fan on to support drying. Listen for unusual noises and check for leaks.
Tip: If you notice ongoing moisture or odors, stop and reassess before running the full system. - 8
Address moisture sources to prevent recurrence
Identify and fix sources of moisture such as leaks, condensate drainage issues, or poor ventilation. Consider improving bathroom and kitchen exhaust, sealing ducts, or adding a humidity-control solution to your space.
Tip: A simple humidity monitor can help you catch rises before mold returns.
FAQ
Can I remove mold from an AC unit myself, or should I hire a professional?
Small, surface-level mold can be cleaned safely with proper PPE and cleaners. Larger infestations, hidden growth, or recurring mold indicate a professional remediation is appropriate to ensure complete removal and moisture source repair.
Small areas can be DIY, but large infestations require a pro.
Is bleach safe or recommended for cleaning mold in an AC unit?
Bleach is not always recommended for HVAC components because it can be harsh on metal fins and cause fumes. Safer options include 3% hydrogen peroxide or white vinegar on appropriate surfaces, following label directions and avoiding mixing cleaners.
Bleach isn’t ideal for HVAC mold cleanup; use safer cleaners as directed.
What PPE is essential for mold cleanup in an AC unit?
Wear nitrile gloves, safety goggles, and an N95 respirator. If possible, use disposable coveralls to limit contamination. Ventilate the area and avoid touching your face during the cleanup.
Gloves, goggles, and a proper respirator are essential.
How long does it take for cleaned areas to dry, and how can I speed it up?
Drying times vary with humidity and airflow but typically take several hours to a day. Use fans and dehumidifiers to speed up drying and ensure the unit is completely dry before reassembly.
Drying can take hours; use fans and a dehumidifier to speed things up.
Will mold in an AC unit affect indoor air quality?
Yes, mold can release spores that circulate when the system runs, potentially triggering allergies or asthma. Proper cleaning and moisture control help protect indoor air quality.
Mold can impact indoor air quality if not addressed.
When should I call a professional for AC mold remediation?
Call a professional if mold covers a large area, persists after cleaning, or if you suspect hidden growth behind coils or ductwork. Professionals can assess moisture sources and perform thorough remediation safely.
Call a pro if the mold is extensive or keeps coming back.
Watch Video
The Essentials
- Wear PPE and work in a ventilated space.
- Use EPA-approved cleaners; never mix products.
- Dry surfaces thoroughly to prevent regrowth.
- Address moisture sources to maintain long-term results.
- If in doubt, consult a licensed professional for large infestations.