Removing Black Mold from Your AC: A Practical Guide
A homeowner-friendly, step-by-step guide to identify, clean safely, and prevent black mold in air conditioners, with practical tips and when to call a pro.

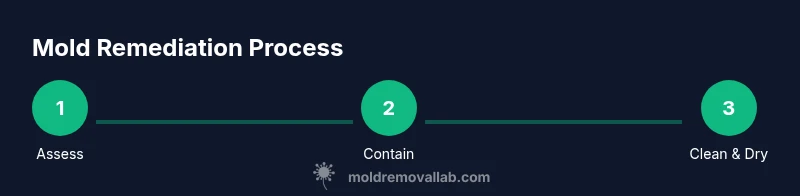
In this guide you will learn how to identify, safely clean, and prevent black mold in air conditioners. The steps cover shutting down power, donning PPE, inspecting the unit, cleaning moldy surfaces, drying thoroughly, and testing humidity levels. If you suspect extensive contamination or your system uses shared ducts, contact a licensed professional.
Understanding black mold in air conditioner
Black mold in air conditioner is a common problem in humid homes and buildings with limited airflow. Visible patches on evaporator coils, condensate troughs, or inside the blower cabinet are signs you may have a mold issue. According to Mold Removal Lab, damp HVAC systems can foster mold growth, especially when moisture sits in damp areas for days to weeks. The health implications vary by person, but mold exposure is a reason to take action sooner rather than later. In this section, you’ll learn what black mold is, why air conditioning systems can harbor it, and how moisture dynamics in your home influence growth. Understanding the biology and the risk helps you decide whether a DIY clean is appropriate or if a professional remediation is warranted.
Why air conditioners are prone to mold growth
Air conditioners create cool, moist environments. When the system pulls in humid outdoor air and the condensate drain becomes clogged or poorly maintained, moisture lingers inside the coil housing and ducts. Regular use, leaky seals, or dirty filters can add nutrients for mold spores to take root. Complex components—evaporator coils, drain pans, and blower housings—provide many nooks where mold can hide behind panels. The result can be a musty odor, allergic reactions, or respiratory irritation for sensitive individuals. Small growths may be visible, while hidden colonies can accumulate spores that circulate with every cooling cycle. Keeping parts dry, clean, and well-sealed reduces the chance of a resurgence.
Health risks and when to seek professional help
Exposure to mold spores can cause symptoms such as nasal congestion, coughing, throat irritation, and eye irritation in some people. Mold exposure can be more problematic for children, older adults, and anyone with asthma or a mold allergy. Mold Removal Lab analysis shows that addressing moisture and sanitation in HVAC systems reduces risk by limiting spore release and growth. If you notice persistent coughing, wheezing, or headaches when the AC runs, or if you see extensive mold growth, seek a professional assessment and remediation. In cases of widespread contamination or if your ductwork is involved, a licensed contractor is the safest option.
DIY remediation: what you can safely do
There are safe, homeowner-friendly steps to mitigate minor mold growth without full system replacement. Start with turning off power to the unit and putting on PPE before you begin. Use non-ammonia cleaners or products labeled for mold remediation, and avoid mixing cleaners. Clean accessible surfaces gently with a soft brush and microfiber cloths, rinse with clean water, and dry thoroughly. Do not attempt to sanitize moldy insulation or porous materials that have absorbed moisture; those parts may require replacement. Finally, monitor humidity levels in the home to discourage regrowth. If mold returns after a DIY cleanup, or if you see mold behind panels you cannot safely access, contact a professional.
Step-by-step remediation plan (overview)
This section previews the practical steps covered in detail below. The plan focuses on safety, containment, surface cleaning, drying, and verification. It’s important to avoid spreading spores during cleanup, use the right protective gear, and follow local regulations for waste disposal. When followed correctly, a thorough DIY cleanup can restore comfort and air quality while reducing health risks. For more extensive contamination, a professional remediation service is recommended to address hidden mold and potential duct involvement.
Tools and materials you’ll need (overview)
Before you start, gather PPE, sealable bags, cleaning agents appropriate for mold, a spray bottle, microfiber cloths, soft brushes, a vacuum with HEPA (if available), a dehumidifier or fans, and disposable gloves. Keeping materials organized in advance minimizes cross-contamination. Check product labels for safety instructions and avoid mixing cleaners. This overview aligns with the tools/materials list in the dedicated section to ensure you have everything needed for a safe cleanup.
Step-by-step remediation plan: overview and safe practices
The steps below break down the remediation into actionable actions. Each step is designed to be performed independently, but success hinges on thorough cleaning, proper drying, and post-cleanup monitoring. After completing the steps, you should reassess moisture sources, replace filters if needed, and maintain a drier HVAC environment to deter future growth. Remember, if you encounter widespread growth or structural mold, professional remediation is strongly advised.
Preventing mold recurrence and HVAC maintenance
Prevention is easier than remediation. Maintain indoor humidity below 60% (ideally 30-50%), fix leaks promptly, replace or cleanable filters regularly, and keep the condensate drain clear. Schedule routine inspections of the ductwork and coils, especially in damp climates. Use bathroom exhaust fans and dehumidifiers in high-humidity rooms to reduce ambient moisture. Regular cleaning of the AC intake area helps limit dust and organic matter that mold feeds on. A proactive maintenance plan reduces the chance of returning black mold in air conditioner.
Authority sources and references
- Environmental Protection Agency (EPA): Mold and moisture control in buildings — https://www.epa.gov/mold
- Centers for Disease Control and Prevention (CDC): Mold and dampness in homes — https://www.cdc.gov/mold/dampness_facts.htm
- Occupational Safety and Health Administration (OSHA): Mold hazards and safe work practices — https://www.osha.gov/molds
For more details and guidelines, consult these authoritative sources. See the Mold Removal Lab recommendations throughout this article for practical steps and homeowner-safe practices.
Tools & Materials
- N95 respirator or respirator mask(Protects from inhaling spores during cleaning)
- Safety goggles(Eye protection against splashes and particles)
- Disposable gloves (nitrile or rubber)(Keeps skin protected from cleaners and mold)
- Plastic sheeting and painter’s tape(Containment to prevent spread of spores during cleanup)
- Spray bottle(For applying cleaners and water lightly to surfaces)
- Microfiber cloths(For wiping and picking up mold and dust without leaving lint)
- Soft-bristled brush or sponge(Gentle scrubbing to lift mold from nonporous surfaces)
- Vacuum with HEPA filter (optional)(Helps capture spores during work; ensure the vacuum is clean before use)
- Trash bags (heavy-duty)(Seal contaminated waste securely for disposal)
- Dehumidifier or fans(Accelerates drying and reduces moisture in the air)
Steps
Estimated time: 2-3 hours
- 1
Power down and prepare PPE
Turn off the HVAC unit at the breaker panel and inside the thermostat if applicable. Put on your PPE—mask, goggles, and gloves. This protects you from dust, spores, and chemical cleaners. Ventilate the area using open windows if possible. If the area is damp or moldy, limit disturbance to prevent dispersal of spores.
Tip: Never operate electrical components while cleaning mold growth; risk of shock and electrical short. - 2
Inspect accessible surfaces for mold
Carefully remove accessible panels to inspect coils, drip pan, and the blower housing. Look for visible colonies, staining, or a musty odor. Document areas that require cleaning, and decide whether contaminants are localized or likely spread through ducts.
Tip: If you see mold on porous materials (insulation, cardboard) consider replacement rather than cleaning. - 3
Contain and remove removable components
Isolate and bag removable parts (filters, panels) before cleaning. Seal bags to prevent spores from escaping. Clean the removable components separately using non-ammonia cleaners. Avoid shaking or agitating items to minimize spore release.
Tip: Containment reduces cross-contamination to other rooms. - 4
Clean moldy surfaces with approved cleaners
Apply cleaner to nonporous surfaces (metal, plastic) and wipe with microfiber cloths. Use a soft brush on textured areas to lift mold. Rinse with clean water if recommended by the product label, then dry surfaces thoroughly.
Tip: Do not mix cleaners; avoid bleach with ammonia-based products. - 5
Dry thoroughly and inspect for dampness
Use a dehumidifier or fans to reduce ambient humidity and help surfaces dry within a few hours. Check for persistent dampness in the drip pan and coil housing. Reassemble components only after all parts are completely dry.
Tip: Adequate drying is essential to prevent mold regrowth. - 6
Test and monitor for mold return
After cleaning, run the unit in a dry, controlled environment and recheck for musty smells or new stains over the next few days. Replace or clean filters as needed and maintain humidity controls to keep conditions unfavorable for mold.
Tip: Set up a simple monthly check to catch early signs of regrowth.
FAQ
What signs indicate black mold in an air conditioner?
Visible mold, musty odors, water leaks, or excessive dust buildup near the unit can indicate mold growth. Persistent allergy symptoms when the AC runs may also point to mold in the system.
Look for visible growth, odors, and allergy-like symptoms that worsen with the AC on.
Is DIY remediation safe for all AC units?
DIY remediation can be safe for minor growth on nonporous surfaces and with proper PPE. Avoid porous materials, large infestations, or ductwork contamination; these require professional remediation.
DIY is possible for small, contained issues if you follow safety steps.
Can black mold in a AC affect my health long-term?
Prolonged exposure to mold spores may irritate airways and trigger allergies or asthma in susceptible individuals. If you have ongoing symptoms, seek medical advice and address the mold in your home.
Mold exposure can irritate the airways and cause symptoms in sensitive people.
How can I prevent mold from returning after cleaning?
Control humidity, fix leaks, clean or replace filters regularly, and keep the condensate drain clear. Regular maintenance reduces the likelihood of mold returning.
Keep humidity in check and maintain the unit to prevent regrowth.
When should I call a professional?
If mold covers a large area, the mold is behind panels or ductwork, or you notice recurring growth after cleaning, hire a licensed remediation specialist.
If the problem seems extensive or persistent, professional help is best.
Watch Video
The Essentials
- Assess moisture and diagnose mold presence before cleaning
- Use proper PPE and containment to prevent spore spread
- Clean nonporous surfaces safely; replace porous materials as needed
- Dry thoroughly to prevent recurrence; monitor humidity long-term
- Consider professional remediation for extensive contamination or duct involvement