Mold in the Air Conditioner: A Practical Guide for Homeowners
Learn how to spot mold in your air conditioner, assess health risks, and safely remove mold with practical steps and prevention tips for a healthier home.

By the end of this guide, you will know how to identify mold in the air conditioner, assess health risks, and safely remediate mold growth in accessible parts of your HVAC system. You’ll need basic PPE, cleaning supplies, and a plan to prevent recurrence. This quick answer sets you up for a thorough, step-by-step remediation process.
What is mold in the air conditioner?
Mold in the air conditioner refers to mold growth inside the HVAC system, often on damp surfaces such as condensate pans, coils, drip trays, insulation, duct liners, and filters. The phrase 'mold in the air conditioner' describes mold colonies that thrive where moisture accumulates due to condensation or leaks. In many homes, the AC unit becomes a microenvironment that supports mold when humidity is high, air leaks bring spores, and surfaces remain wet after cooling cycles. Mold species commonly found in air conditioning systems include Aspergillus, Cladosporium, and Penicillium, among others. While some of these molds are relatively harmless in small, contained areas, undisturbed growth can release spores and volatile organic compounds (VOCs) into the home’s living space, impacting indoor air quality. According to Mold Removal Lab, addressing mold in the air conditioner promptly reduces exposure and protects indoor air quality. The contagion risk is not just from spores in the unit itself—the HVAC blower can circulate contaminated air through living spaces, especially in tightly sealed homes. Mold growth on porous materials like insulation or cardboard-backed duct lining entails replacement rather than cleaning; non-porous materials like metal or plastic can usually be cleaned. A critical starting point is identifying ongoing moisture problems, since moisture is the root cause of most HVAC mold issues. Beyond cosmetic staining, mold growth can degrade equipment efficiency and cause musty odors that persist even after cleaning. This section lays the groundwork for practical detection and remediation steps.
How mold enters and spreads in AC systems
Mold enters HVAC systems primarily through moisture and ambient mold spores in the indoor air. Condensation on coils or in drip pans creates a damp habitat where fungi can establish colonies. Leaky or poorly sealed ducts allow moist air from living spaces to circulate back into the unit, distributing spores throughout the home. Dirty filters and stagnant condensate lines provide additional growth substrates and nutrients. Over time, mold can spread from the evaporator coil to insulation, duct liners, and even the blower cabinet. The result is not only a musty odor but also reduced efficiency and potential health concerns for sensitive individuals. Regular humidity control, proper filtration, and timely repairs are crucial to preventing spread. The Mold Removal Lab team emphasizes that early detection and prompt action prevent more extensive contamination and costly repairs.
Health risks and signs of exposure
Mold inside an air conditioner can impact indoor air quality and trigger reactions in susceptible people, including allergies, asthma symptoms, coughing, sneezing, sinus irritation, and headaches. Pets may experience similar reactions, and prolonged exposure can exacerbate respiratory conditions. Common signs of HVAC mold exposure include a persistent musty odor, visible mold, foggy or damp surfaces on or near the unit, and increased condensation despite normal use. Some individuals may experience skin irritation or eye redness when in the affected space. If you notice these signs, especially in damp or humid environments, prioritize remediation and consult a professional if symptoms persist. Mold Removal Lab notes that health risks are higher for individuals with asthma, allergies, or compromised immune systems, underscoring the importance of rapid, controlled remediation and air-quality monitoring.
How to detect mold in the AC system
Detection starts with a careful visual inspection of the indoor unit and accessible ductwork. Look for discoloration, fuzzy growth, or moisture on the coils, drip pans, insulation, and seals. A musty odor near the air handler is a key indicator, particularly when the system is off or run for short periods. If you can access moisture readings, use a moisture meter to assess dampness in insulation and duct lining. For definitive results, consider professional mold testing or air quality assessments, especially in homes with pets, children, or health concerns. In many cases, the combination of smell, visible growth, and moisture confirms the presence of mold. Remember that unsealed ducts and leaking condensate lines contribute to ongoing exposure, making remediation urgent. Based on Mold Removal Lab analysis, humidity control and proper filtration are critical to preventing recurrence and protecting occupants.
Safe remediation plan for homeowners
A safe remediation plan begins with turning off the HVAC system and isolating the affected area. Equip yourself with an N95 respirator, eye protection, and gloves, and prepare a clean, ventilated workspace. Remove or replace porous materials such as insulation that show mold damage, as cleaning porous substrates often fails to remove deeply embedded mold. Clean non-porous surfaces with a detergent solution or EPA-registered cleaner, and use a HEPA vacuum to capture loose spores from surrounding areas. After cleaning, dry the area thoroughly with fans or a dehumidifier to prevent regrowth. Reinstall or replace filters and ensure all seams and ducts are properly sealed. If mold contamination is extensive, or if occupants have health concerns, do not hesitate to call a licensed mold remediation professional. This plan minimizes exposure and reduces the chance of recontamination during cleanup.
Step-by-step overview for HVAC mold remediation
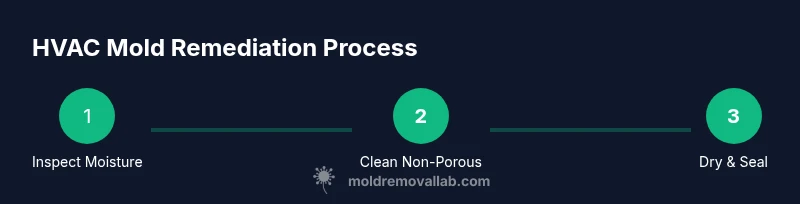
This overview outlines the core phases of HVAC mold remediation: (1) isolate the work area and put on PPE, (2) identify moisture sources and fix leaks, (3) remove and replace mold-damaged porous materials, (4) clean and disinfect non-porous surfaces, (5) thoroughly dry the system, and (6) reassemble with renewed filtration and humidity control. The goal is to stop moisture, remove colonies, and prevent recurrence through ongoing maintenance. For most homes, a comprehensive remediation completes within a few hours to a day, depending on contamination extent and accessibility.
Cleaning and sanitizing the condensate tray and ducts
Cleaning the condensate tray requires removing standing water, then scrubbing with detergent or an EPA-registered mold cleaner. Rinse and dry completely before reassembling. For ducts and non-porous surfaces, wipe with cleaner, then sanitize with a disinfectant appropriate for HVAC use. Avoid mixing cleaners that can release harmful fumes and never spray bleach on porous materials. Keep the work area well-ventilated and avoid dispersing spores through the system by sealing off the intake and outlet during cleaning. After cleaning, perform a final dry-out cycle with dehumidification to prevent regrowth.
Prevention and maintenance to stop mold from returning
Prevention hinges on moisture control and regular upkeep. Maintain indoor humidity between 30% and 50% as a key defense against mold growth in HVAC systems. Change air filters regularly on a schedule recommended by the manufacturer, and upgrade to higher-efficiency filters if needed. Repair leaks promptly and inspect condensate lines for clogs. Schedule seasonal HVAC inspections to ensure coils stay clean and seals remain intact. Consider installing a condensate drain pan overflow alarm or a humidity sensor to catch moisture buildup early. Through consistent maintenance, you reduce mold recurrence and improve overall indoor air quality.
Tools & Materials
- N95 respirator(Fit-tested preferred; use with eye protection)
- Goggles or eye protection(Chemical splash resistance or safety glasses)
- Chemical-resistant gloves(Long sleeves advised)
- HEPA vacuum cleaner(Vacuum before and after cleaning)
- Disposable plastic sheeting(Tents off work area to contain spores)
- Soft-bristle brush(For scrubbing non-porous surfaces)
- Detergent solution or EPA-registered cleaner(Follow label directions)
- EPA-registered mold cleaner or disinfectant(Optional but helpful for sanitizing)
- Hydrogen peroxide (3%)(Alternative sanitizer for non-porous surfaces)
- White vinegar(Can be used as a mild antimicrobial rinse)
- Baking soda(Deodorizes and can aid drying)
- Replacement insulation or duct liner(Porous materials that are heavily contaminated)
- Replacement air filters(New filters prevent reinfestation)
- Sealant/duct tape for minor repairs(Use only where appropriate)
Steps
Estimated time: 2-4 hours
- 1
Power down and prepare
Turn off the HVAC system at the breaker, unplug if accessible, and remove any nearby obstructions. Don PPE before touching the unit. Lay down plastic sheeting to contain debris and spores, and ensure the area is well-ventilated to minimize exposure.
Tip: Label the area and take photos of visible mold before cleaning to document the condition. - 2
Identify visible mold and moisture sources
Inspect the unit’s accessible components (drip pan, evaporator coil housing, and duct near the air handler). Look for discoloration, dampness, or standing water. Note leaks or condensation paths that need repair.
Tip: Take moisture readings if possible; moisture is the root cause of most HVAC mold issues. - 3
Fix moisture problems
Repair leaks, clear clogged condensate lines, and improve drainage. If humidity remains high, use a dehumidifier in the area to reduce ambient moisture.
Tip: Even after repairs, continue to monitor humidity levels weekly for the first month. - 4
Clean non-porous surfaces
Scrub metal or plastic components with a detergent solution or EPA-registered cleaner. Rinse with clean water and dry thoroughly to prevent residual moisture that can invite regrowth.
Tip: Use a back-and-forth scrubbing motion to lift mold without dispersing spores. - 5
Address porous materials
Porous substrates like insulation or duct liners with mold should be removed and replaced when feasible. Cleaning porous materials is often ineffective and risks lingering spores.
Tip: Dispose of heavily contaminated materials in sealed bags to prevent spread. - 6
Sanitize and dry the area
Apply a sanitizing solution to the cleaned areas if using a non-porous surface. Dry the space completely with fans and dehumidifiers to prevent regrowth.
Tip: Ensure no damp pockets remain behind panels or within ducts. - 7
Restore filtration and seals
Install new air filters and reseal joints as needed. Tighten duct fittings and ensure there are no gaps that could reintroduce moisture or spores.
Tip: Choose a higher-efficiency filter if your system supports it to improve air quality. - 8
Evaluate need for professional help
If mold covers large areas, if you have health concerns, or if you cannot access contaminated sections safely, contact a licensed mold remediation professional.
Tip: Professional remediation can prevent recurrence and protect occupants' health.
FAQ
Can mold in the air conditioner affect indoor air quality?
Yes. Mold in the HVAC system can release spores and VOCs into circulating air, affecting indoor air quality and potentially triggering symptoms for sensitive individuals. Immediate cleaning and moisture control help protect occupants.
Yes. Mold in the HVAC can affect indoor air quality and cause symptoms for sensitive people; address moisture and contamination quickly.
Should I replace the entire unit if mold is found?
Not always. If contamination is extensive or safety is a concern, replacement may be necessary. For minor, isolated mold on non-porous parts, cleaning and sealing can suffice, but porous materials often require replacement.
Replacement isn’t always required; it depends on how widespread the mold is and which materials are affected.
Is it safe to clean mold in an AC unit myself?
DIY cleanup can be safe for small, contained areas on non-porous surfaces with proper PPE and ventilation. Do not attempt to clean deeply embedded mold in porous materials or areas you cannot access safely.
You can clean small, non-porous areas yourself with PPE, but avoid porous materials or hard-to-reach spots.
When should I call a professional?
Call a professional if mold covers large areas, if you have health concerns, or if you cannot safely access the contaminated components. A licensed remediator can assess, contain, and remediate effectively.
Call a pro if contamination is extensive or if you’re unsure about safe cleanup.
Can mold in the AC cause health problems for pets?
Pets can experience allergic reactions and respiratory irritation from mold exposure, similar to humans. Protect pets by reducing moisture and improving airflow during remediation.
Pets can be affected; keep them away from the area during cleanup and ensure good ventilation.
How can I prevent mold growth in the future?
Limit moisture, maintain humidity control, replace filters regularly, and perform periodic HVAC inspections. Address leaks promptly and keep condensate lines clear to minimize mold risk.
Prevent mold by controlling moisture, cleaning regularly, and staying on top of HVAC maintenance.
Watch Video
The Essentials
- Identify moisture sources to stop mold growth.
- Wear proper PPE and contain the work area.
- Replace contaminated porous materials when needed.
- Dry thoroughly to prevent recurrence.
- Schedule regular HVAC maintenance to protect indoor air quality.