Mold Near Your AC Unit: Safe, Practical Remediation
Practical steps to safely identify, clean, and prevent mold near an AC unit. Learn containment, moisture control, and when to call a professional for safe, effective remediation.

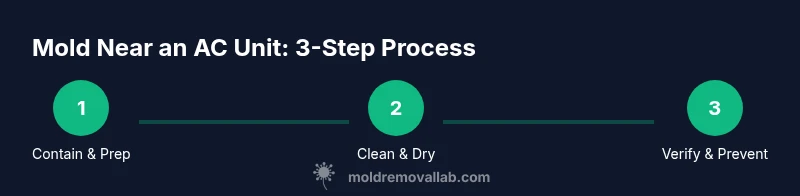
To address mold near an AC unit, start by stopping the moisture source, then inspect for visible mold and leaks, and clean with a mild detergent or a 1:10 bleach solution if safe for the surface. For larger infestations or if occupants have symptoms, contact a qualified mold remediation professional. Safety first: shut off power to the unit before working.
Understanding the risk of mold near AC units
According to Mold Removal Lab, mold near AC unit spaces is a common problem in homes with damp, poorly ventilated ducts. When moisture accumulates, mold spores can colonize on surfaces inside and around the unit, spreading through return ducts and into living spaces. The health implications vary, but prolonged exposure can irritate the lungs, trigger allergies, and worsen respiratory conditions, especially for children, the elderly, and people with asthma. The combination of warm temperatures and repeated humidity cycles around HVAC components creates ideal conditions for mold growth. For homeowners, recognizing early signs—musty odors, visible discoloration, or persistent condensation—can prevent larger issues. The goal is to interrupt moisture, remove active growth, and reduce the chance of re-growth by improving ventilation and drainage around the unit.
What to inspect around your AC unit
Visible mold around an AC unit often sits on non-porous surfaces like metal housings and plastic ducts, but it can also colonize porous materials such as insulation, drywall, or cardboard inside the unit cabinet. Start with a careful visual check: look for dark green, black, or white patches, fuzzy growth, water stains, and powdery residues. Check for moisture sources: condensate pans, clogged drain lines, dripping hoses, or leaky seals around the blower compartment. Listen for musty odors that linger after a cleaning attempt, which can indicate hidden mold behind panels or in air spaces. Take photos for documentation, especially if you plan to involve a professional later. If you find mold on porous materials or if the growth is extensive, plan for professional assessment and possible material containment.
Signs to watch for when inspecting the area around your AC unit
- Visible mold growth on metal or plastic surfaces near the unit
- Condensation buildup or continuous dampness on surfaces
- Musty or earthy odors that persist after cleaning
- Water staining on walls, ceiling, or insulation near the HVAC cabinet
- Discoloration around the drain pan or condensate lines
Document these signs with dates and photos. Early tracking helps determine whether the issue is localized or spreading into ductwork or the building structure.
Safe cleaning methods and when to avoid bleach
Cleaning mold near an AC unit requires selecting appropriate products for the surface you’re treating. For non-porous surfaces like metal cabinets or glass, a detergent solution followed by a disinfectant can be effective. A mild solution of dish soap and warm water can remove visible grime, while a separate step using an EPA-registered cleaner can address residual spores. If you choose to use bleach, dilute sodium hypochlorite 5-6% to a 1:10 ratio with water and apply only to non-porous surfaces. Never mix bleach with ammonia or other cleaners, and never use bleach on porous materials such as drywall or insulation, where it can trap moisture and worsen damage. Wear PPE—gloves, eye protection, and an N95 mask—to minimize exposure to spores during cleaning, and ventilate the space well during and after treatment. If mold returns quickly or you see growth behind panels, stop and call a professional.
Practical steps for cleaning around the unit
- Shut off power to the AC unit and disconnect electrical power if safe to do so
- Contain the work area with plastic sheeting and seal with tape to prevent spores from scattering
- Remove loose debris with a vacuum equipped with a HEPA filter if available
- Clean non-porous surfaces with detergent, rinse, and dry completely
- Use a mold-specific cleaner or EPA-registered product on affected areas, following label directions
- Dispose of contaminated wipes and materials in sealed bags
Always prioritize your safety; if you’re unsure about electrical components or if the growth is extensive, consult a professional.
Moisture control and ventilation strategies to prevent recurrence
Prevention hinges on controlling moisture and improving air flow. After cleaning, fix leaks immediately and ensure condensate drains are clear and functioning. Upgrade or replace HVAC filters regularly—at least every 1-3 months, depending on usage and manufacturer guidance. Improve ventilation by running exhaust fans in bathrooms and kitchens during moisture-intensive activities and by using dehumidifiers in damp spaces, especially in basements or crawl spaces. Maintain indoor humidity between 30-50% to inhibit mold growth. Regular inspections, including after heavy rains or plumbing issues, help catch problems early. Consider professional assessment if humidity remains high, surfaces remain damp, or musty odors persist.
When to call a professional and how to choose one
If mold covers a large area, is embedded in insulation, or recurs after DIY cleaning efforts, professional remediation is warranted. A licensed mold remediation contractor can determine the extent of growth, contain the area to prevent spread, remove contaminated materials safely, and verify with post-remediation testing. When selecting a pro, verify credentials, ask about containment strategies, and request references. Ask if they’ll perform moisture management and air-quality considerations to prevent recurrence. For guidance, review authoritative sources and ensure any contractor follows local regulations and industry best practices.
AUTHORITY SOURCES
- Environmental Protection Agency (EPA): Mold and your indoor air quality. https://www.epa.gov/mold
- Centers for Disease Control and Prevention (CDC): Mold and health risks. https://www.cdc.gov/mold/default.htm
- Occupational Safety and Health Administration (OSHA): Mold in work environments and safety considerations. https://www.osha.gov/molds
Tools & Materials
- N95 respirator mask(Protects against airborne mold spores during cleanup)
- rubber gloves(Chemical-resistant with long cuffs)
- safety goggles(Eye protection from splashes)
- mild detergent(Dish soap or gentle cleaner for initial cleaning)
- bleach (sodium hypochlorite) 5-6%(Use only on non-porous surfaces; dilute 1:10)
- EPA-registered mold cleaner(Follow label directions; avoid mixing with other cleaners)
- spray bottle(For applying cleaners and rinses)
- paper towels or microfiber cloths(For wiping and drying surfaces)
- HEPA vacuum (optional)(Dry debris removal before damp cleaning)
- plastic sheeting and tape(Contain the work area and prevent spread)
- sealed trash bags(Dispose contaminated materials safely)
Steps
Estimated time: 2-6 hours total for cleaning and containment; drying may take longer
- 1
Power down and isolate the area
Turn off power to the AC unit and the circuit feeding it. If safe, unplug the unit and shut down nearby breakers. This minimizes risk of shock and prevents accidental operation during cleanup.
Tip: Never work on a live electrical system near water or moisture. - 2
Contain the space
Seal the work area with plastic sheeting. Tape edges to the ceiling and floor to prevent mold spores from drifting to other rooms.
Tip: Create a small airlock if you need to re-enter the space during work. - 3
Inspect and document
Look for visible mold and moisture sources. Take dated photos to support any professional assessment later.
Tip: Note whether the growth is on non-porous vs porous materials. - 4
Clean non-porous surfaces
Wash metal and plastic surfaces with detergent solution, rinse, and dry thoroughly. Apply an EPA-registered cleaner if needed, following label directions.
Tip: Do not mix cleaners; use one product at a time. - 5
Address porous materials
If insulation or drywall is moldy, assess safety for removal. Bag and dispose of contaminated materials if advised by a professional.
Tip: In some cases, removal by a pro is safer than DIY. - 6
Drying and ventilation
Thoroughly dry the area and improve ventilation to prevent recurrence. Use dehumidifiers or fans, and ensure drains are clear.
Tip: Aim for ambient humidity below 50%. - 7
Evaluate after cleaning
Check for residual odor or dampness. If odors persist or you still see growth, escalate to professional remediation.
Tip: Keep records and schedule follow-up moisture assessments. - 8
Decide on professional help
For large areas, hidden growth, or structural concerns, hire a licensed remediation contractor who specializes in HVAC mold.
Tip: Ask for written guarantees and post-remediation tests.
FAQ
Is mold near an AC unit dangerous to breathe?
Exposure can irritate respiratory systems and trigger allergies. If you have symptoms, limit exposure and consider professional testing and remediation.
Yes. Mold around an AC unit can affect breathing, especially for sensitive individuals; consider testing and remediation if symptoms appear.
Can I clean mold near an AC unit myself?
For small, non-porous surfaces, DIY cleaning is reasonable with proper PPE. Large areas, porous materials, or ductwork contamination should be handled by a professional.
Yes, for small non-porous areas you can DIY, but bigger or porous problems call in a pro.
How do I know if the mold problem is large?
If you see growth on multiple surfaces, it covers more than a few square feet, or you notice recurring dampness, treat it as a larger issue and consult a pro.
Large problems involve multiple surfaces, noticeable growth, or persistent dampness—call a pro.
Should I run the AC during remediation?
Limit running the AC during cleanup to reduce spread of spores; after containment and cleaning, run the system only if professionals confirm it’s safe.
Only run it if a pro says it's safe after containment and cleaning.
What signs indicate moisture problems around the AC unit?
Condensation, standing water, discoloration, and a persistent musty odor around the unit are key moisture indicators requiring attention.
Watch for condensation, water, stains, or a musty smell near the unit.
When is professional remediation necessary?
When mold covers a large area, involves insulation or ductwork, or if you have health concerns, a licensed remediation contractor is recommended.
Call a pro if the mold is extensive or affects insulation or ductwork.
Watch Video
The Essentials
- Identify moisture sources first to stop mold growth.
- Contain and clean promptly, prioritizing non-porous surfaces.
- Dry thoroughly and improve ventilation to prevent recurrence.
- Reserve large or hidden mold issues for professionals.
- Document findings and seek authoritative guidance when needed.