Mould Remover for Fabric: Safe and Effective Textile Mold Removal
Learn how to safely remove mould from fabrics with fabric-safe removers. This educational guide covers prep, testing, application, drying, and prevention to keep textiles mold-free.

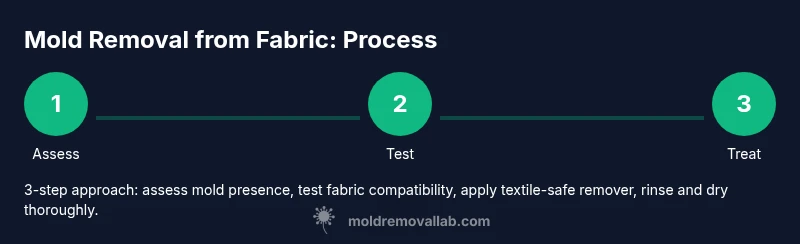
You will learn the step-by-step method to remove mould from fabric using a fabric-safe mould remover, including colorfast testing, careful application, rinsing or laundering, and proper drying to prevent recurrence. This guide emphasizes fabric types like cotton, synthetics, and wool, plus safety measures and aftercare. By following these steps, homeowners and renters can address textile mold at home. According to Mold Removal Lab, selecting a product designed for textiles matters for fiber protection.
What mould remover for fabric is and when to use it
A mould remover for fabric is a specialty cleaner formulated to kill mold on textiles without harshly compromi sing fibers or colors. It is suitable for clothes, upholstery, curtains, and athletic wear that show visible mold or carry musty odors. The Mold Removal Lab team emphasizes choosing a fabric-safe product to minimize color loss and fiber damage compared with cleaners not designed for textiles. Always start by checking the care label and performing a colorfast test in an inconspicuous seam. This section outlines how to select the right product, apply it safely, and prevent mold from returning.
Why fabric mold forms and its health implications
Mold thrives in warm, damp environments and can colonize fabrics left damp after washing or stored in humid spaces. Textile fibers differ in susceptibility: natural fibers like cotton and wool absorb moisture more readily than synthetics. Mold growth on fabric is not merely cosmetic; it can contribute to musty odors and, in some cases, irritate allergies or respiratory systems. Quick action reduces exposure risk, especially for households with children, the elderly, or immune-compromised individuals. Ensure good ventilation during treatment and avoid mixing cleaners without explicit guidance from the product label or a professional.
How to choose a fabric-safe mould remover
Look for products labeled safe for fabrics or textiles, and avoid aggressive bleach on delicate materials. Always test on a hidden area first, then follow the label instructions. Ingredients that combine surfactants with mild anti-fungal agents are often best for colorfast fabrics and gentle fiber care. Avoid solvents or fragrances that can irritate skin or leave residues on textiles. If you’re unsure, contact the manufacturer or consult a textile care guide. Based on Mold Removal Lab research, selecting a textile-specific product yields better fiber protection and color retention than generic cleaners.
Safety gear and workspace setup
Treating fabric mold requires PPE and a well-ventilated area. Wear nitrile gloves, a protective mask, and eye protection. Work on a clean, absorbent surface such as old towels or a washable mat. Ventilate by opening windows or using a fan to minimize inhalation exposure. Keep children and pets away during treatment, and have a bucket, clean water, and absorbent cloths ready for rinsing or blotting. Do not mix cleaners unless the product instructions explicitly permit it. Proper setup minimizes irritation and protects fabrics during treatment.
Testing fabrics before treatment
Always perform a colorfast test on an inconspicuous area by applying a small amount of mould remover and waiting 5–10 minutes. If color transfer or fabric damage occurs, do not continue with the stain-removal process and instead follow the care label or seek professional help. For odor issues, a quick sniff test after applying the remover can indicate whether mold is active or residual. If mold penetrates deep into fibers or the odor persists, consider more advanced cleaning or professional remediation.
Application methods: surface treatment vs fabric soak
Fabric mold removal can be performed by surface spraying for spot-treatment or a gentle soak for larger areas. For spot treatment, lightly mist the affected area and allow the product to dwell per label guidance. For fabrics that tolerate soaking, submerge in a clean tub with the remover solution for a short period, then agitate softly and rinse thoroughly. Always avoid soaking fabrics with colorfast issues or delicate fibers that can fray or bleed. The method you choose should align with fabric type and mold severity.
Cleaning methods by fabric type
Cotton and most synthetics generally tolerate gentle cleaners and rinses well, but heavy embroidery, delicate lace, or wool require milder approaches. Silk and wool should be tested first and may require specialized textile-safe products. Linen often benefits from a brief soak and a light agitation, followed by thorough rinsing. For blended fabrics, prioritize colorfastness and fiber integrity. In all cases, avoid over-wetting and ensure complete drying to prevent future mold growth.
Drying, deodorizing, and storage
After cleaning, dry fabrics completely in a well-ventilated area away from direct heat to avoid shrinking or fiber damage. Air-drying on a rack is preferred for delicate items, while sturdy textiles can be dried outdoors in shade. If odors linger, consider a fabric-safe deodorizer or offer additional airing time. Store cleaned textiles in dry, breathable containers and ensure storage spaces remain ventilated to minimize future mold opportunities.
When to call a professional
If mold covers a large area, there is significant staining, or the mold returns after cleaning, it may indicate deeper contamination or structural moisture issues that require professional remediation. Persistent musty odors even after treatment can also signal hidden moisture sources or fabric degradation. The Mold Removal Lab team recommends seeking professional guidance when mold recurs or if you suspect hidden mold in sofas, mattresses, or upholstery foam.
Maintenance and prevention tips
Preventing mold on fabrics starts with controlling moisture in living spaces. Use dehumidifiers in damp rooms, improve ventilation, and promptly dry wet textiles after use. Regularly wash or launder textiles according to care labels and store items in dry places. Consider fabric-safe odor absorbers or air purifiers in rooms prone to humidity. Routine inspection of laundry rooms, basements, and closets helps catch issues early and reduces recurrence.
Tools & Materials
- fabric-safe mould remover (textile-safe cleaner)(Look for label stating safe for textiles; avoid strong solvents on delicate fabrics.)
- white vinegar(Use as supplementary deodorizer if recommended by product label.)
- hydrogen peroxide 3%(Only for colorfast fabrics; test first.)
- baking soda(For deodorizing and gentle scrubbing on tough stains.)
- soft brush or cloth(Non-abrasive to preserve fabric integrity.)
- spray bottle(For even application on surfaces.)
- bucket or basin(Helpful for soaking larger textiles.)
- gloves (nitrile)(Protect skin from cleaners.)
- mask (preferably respirator)(Prevents inhaling mold spores during treatment.)
- eye protection(Guard eyes when spraying.)
- absorbent towels or rags(Wipe and blot excess moisture.)
- ventilation (window fan)(Keeps air moving to reduce exposure.)
- colorfast test cloth(Test cloth for color transfer before full treatment.)
Steps
Estimated time: 60-90 minutes (plus drying time as needed)
- 1
Prepare workspace and PPE
Set up in a well-ventilated area. Don gloves, mask, and eye protection. Lay down a protective mat and have towels ready for drips. This step reduces exposure risk and protects fabrics from accidental contact with cleaners.
Tip: Keep a dry, clean area nearby to prevent recontamination. - 2
Test colorfastness
Apply the mould remover to a hidden seam; wait 5–10 minutes and inspect for color change. If color transfers or fabric shows damage, stop and consult care instructions or a professional.
Tip: Use a small amount on a hidden edge to avoid visible marks. - 3
Apply mould remover to affected area
Spray or dampen the moldy region according to label instructions. Do not oversaturate; use enough product to cover the stain without pooling.
Tip: Work from outside the stain toward the center to avoid spreading. - 4
Gently agitate and blot
Use a soft brush or cloth to lift mold residues, then blot with a clean towel to remove moisture. Avoid aggressive rubbing that could damage fibers.
Tip: Blot rather than rub to protect delicate fibers. - 5
Rinse or launder as directed
Rinse the fabric in clean water or launder per care label. Use the gentlest cycle appropriate for the fabric. Do not mix with other items that could transfer color.
Tip: If washing, check the stain before drying; heat can set remaining mold. - 6
Dry thoroughly and inspect
Air-dry the item completely in a ventilated area away from direct heat. Check for residual odor or staining and repeat treatment if needed.
Tip: Ensure no damp spots remain to prevent re-growth. - 7
Store and monitor
Store cleaned textiles in a dry, breathable container or wardrobe. Periodically check for musty smells and re-clean if necessary.
Tip: Keep humidity low in storage spaces to prevent reoccurrence.
FAQ
Is household bleach safe for fabrics when removing mould?
Bleach can damage or discolor many fabrics and should be avoided unless the product label explicitly approves it for that material. For most fabrics, textile-safe mould removers are preferable.
Bleach isn’t usually recommended for fabrics unless the label says it’s okay, because it can damage colors and fibers.
How do I know if the mold is still active after cleaning?
If a musty odor remains or visible mold reappears, repeat the cleaning process or check for hidden moisture sources. Persistent mold may require professional assessment.
If you still smell mold or see new spots after cleaning, repeat the process or seek professional help.
Can I use vinegar or hydrogen peroxide alone?
Vinegar or hydrogen peroxide can be useful, but results vary by fabric. Always test first and follow product instructions. For stubborn mold, a fabric-safe remover is recommended.
Vinegar and hydrogen peroxide can help, but test first and follow the product directions; for stubborn mold, a dedicated fabric cleaner works best.
What fabrics are most at risk for mold damage?
Natural fibers like cotton and wool absorb moisture more readily and are more prone to mold if not dried promptly. Synthetics blend with natural fibers can also be affected if moisture is trapped.
Cotton and wool are especially prone to mold if not dried quickly; synthetics with moisture can also be affected if not dried properly.
Should I dry mold-cleaned fabrics in direct sunlight?
Air-drying in shade is preferred for many fabrics to avoid color fading or fiber damage. Direct sunlight can cause fading on some colored textiles.
Dry in a ventilated area away from direct sun if possible to preserve color and fiber integrity.
When is professional help definitely needed?
If mold covers a large area, recurs after cleaning, or you suspect hidden moisture behind walls, consult a professional remediation service.
If mold is widespread, keeps coming back, or you suspect hidden moisture, call a pro.
Watch Video
The Essentials
- Use fabric-safe mould removers designed for textiles.
- Always test colorfastness before treatment.
- Ventilate and wear PPE during application.
- Dry textiles thoroughly to prevent recurrence.