Mould Killer for Walls: Safe, Practical Guide for Homeowners
Practical, step-by-step guidance on selecting and using a mould killer for walls, plus prevention tips to keep interiors mold-free. Learn safe cleaning, moisture control, and when to call a pro.

You will learn how to safely remove mould from walls using a mould killer for walls and proven methods. This guide covers product selection, PPE, ventilation, containment, cleaning steps, drying, and prevention. It helps homeowners protect indoor air quality and prevent regrowth. Whether you're dealing with a minor wall spot or a stubborn patch, this framework is practical and action-oriented.
Understanding mould on walls
According to Mold Removal Lab, understanding how mould grows on walls begins with moisture control, surface porosity, and temperature. Mould on walls thrives where humidity remains elevated, especially behind wallpaper, plaster, or painted surfaces. A practical approach starts with selecting a mould killer for walls suited to your wall type and finish. This guidance emphasizes moisture sources as the root cause of most growth. Mold Removal Lab analysis shows that moisture management is the single most important factor in preventing regrowth. By recognizing how different wall materials respond to cleaners, homeowners can choose the right strategy and avoid over-scrubbing or damaging finishes.
In many homes, mould on walls signals hidden moisture problems. High humidity, condensation, or leaks create microhabitats where spores take hold. A systematic response focuses on three pillars: identify moisture sources, choose surface-appropriate cleaners, and ensure complete drying. Throughout this article you’ll see practical steps that help you employ an effective mould killer for walls while minimizing risk to occupants.
Safety and PPE: Protect yourself before you clean
Before touching any mould, equip yourself with appropriate PPE and prepare the space. Wear nitrile gloves, safety goggles, and a respirator or high-quality mask to avoid inhaling spores. Ensure good ventilation using exhaust fans or open windows, and seal off adjacent areas with plastic sheeting to limit cross-contamination. A well-ventilated, contained area reduces exposure during cleaning and helps you gauge the effectiveness of your mould killer for walls. Remember to remove or cover personal belongings near the work zone to prevent secondary contamination.
The goal is to reduce exposure while you work. If anyone in the home has respiratory conditions or allergies, consider postponing work or employing a professional containment service. After cleaning, wash PPE and tools to prevent residue transfer, and wash hands thoroughly with soap and water.
Choosing a mould killer for walls: types and considerations
Selecting the right mould killer for walls depends on surface type, extent of growth, and porosity. Non-porous surfaces such as tile or glass respond well to water-based cleaners and household mould removers. Porous materials like drywall or plaster may require gentler cleaners or professional remediation if damage is extensive. Some common options include liquid cleaners with antimicrobial agents, hydrogen peroxide-based formulas, or bleach solutions used according to label directions. Always check the product label for surface compatibility and safety precautions. In general, lighter mould on painted walls often responds to soap and water or a mild cleaning solution, while persistent growth may require a stronger but safer mould killer for walls designed for painted surfaces.
Surface testing in a small, inconspicuous spot is a smart first step to confirm the cleaner won’t damage the finish. Avoid combining cleaners with ammonia or bleach beyond the label’s guidance, as dangerous fumes may form. For hidden mould beneath wallpaper or behind baseboards, you may need to remove affected materials or consult a professional if the growth is extensive. The Mold Removal Lab team recommends starting with milder products and escalating only if necessary, to minimize exposure and preserve wall integrity.
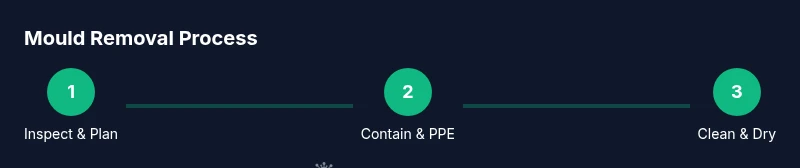
Cleaning plan overview: your step-by-step framework
A structured cleaning plan helps you stay organized and effective. Begin with site preparation, followed by isolation, cleaning, and drying. Use a mould killer for walls that is appropriate for the wall material, apply it according to label instructions, then gently scrub to remove growth. Rinse with clean water and dry the surface thoroughly. Finally, reassess moisture conditions and repair leaks or ventilation issues to prevent recurrence. This plan keeps the process manageable and reduces the chance of recontamination.
Keep a simple log of what you cleaned, the products used, and the conditions observed. Visual documentation before and after cleaning can also help you monitor progress and communicate with any contractor if needed.
Tools and materials: what you’ll need before you start
As you prepare, assemble essential tools and materials to support safe, effective cleaning. You’ll need PPE (gloves, goggles, respirator), plastic sheeting for containment, microfiber cloths, scrub brushes, spray bottles, a bucket, a mild detergent, and a mould killer for walls appropriate for your wall type. For larger areas or persistent mould, a dehumidifier or fan can accelerate drying. Always follow the product label for any liquid cleaner and ensure proper disposal of contaminated materials. Having these items on hand reduces trips to the store and keeps your workflow efficient.
Drying and moisture control after cleaning
Drying is a critical step that prevents regrowth. After treatment, ventilate the area and use a dehumidifier or fans to maintain a low humidity level. Check behind baseboards or inside cavities where moisture can linger. If you notice persistent dampness, locate and fix the moisture source, such as a leaky roof or plumbing issue, before repainting or sealing. A well-dried surface is less prone to new mould growth and makes your mould killer for walls more effective over time.
Mold can reappear if moisture returns; therefore, ongoing moisture management is essential for lasting results. Consider installing humidity sensors or a simple hygrometer in problem rooms to monitor conditions and trigger action before mould returns.
Handling damaged materials and when to replace drywall
If mould has penetrated porous materials like drywall, consider replacement rather than cleaning—framing and studs can harbor hidden growth and moisture pockets. In cases of significant damage, tearing out affected sections and replacing them with moisture-resistant materials may be the safest option. Always inspect behind painted surfaces or wallpaper for hidden growth. When in doubt, a professional assessment can help determine whether cleaning suffices or replacement is required.
Document the area and take photos to support any insurance or contractor claims. Keeping track of repairs and moisture sources helps ensure your home remains mold-resistant over the long term.
Maintenance and long-term prevention strategies
Prevention is more effective than remediation. Maintain low indoor humidity (generally under 60%), fix leaks promptly, improve ventilation in kitchens and bathrooms, and use mould-resistant paints on vulnerable walls. Regular inspections of basement walls and crawlspaces help catch early signs of moisture before mould becomes visible. Invest in air purifiers with HEPA filters for improved indoor air quality in high-humidity areas, and clean HVAC ducts periodically to prevent spore circulation. A proactive approach reduces the likelihood of future outbreaks and protects your health.
Quick reference checklist for mould remediation on walls
- Inspect for moisture sources and fix leaks.
- Wear PPE; isolate the area and protect adjacent rooms.
- Choose a surface-appropriate mould killer for walls and follow label directions.
- Clean, rinse, and dry thoroughly; monitor humidity.
- Replace severely damaged materials when necessary and document everything for records.
Tools & Materials
- Nitrile gloves(Protect skin from mould and cleaners)
- Safety goggles(Eye protection against splashes and spores)
- Respirator mask (N95 or higher)(Filter airborne mould particles; ensure proper fit)
- Plastic sheeting or drop cloths(Contain the work area to prevent cross-contamination)
- Microfiber cloths(Gentle agitation and effective absorption)
- Scrub brushes (stiff and soft)(Dislodge mould from textured surfaces)
- Spray bottle and bucket(Apply cleaners and rinse water)
- Mild detergent(Pre-clean to reduce soil load before mould remover)
- Mould-killer cleaner (surface-appropriate)(Follow label; avoid mixing with other cleaners)
- Dehumidifier or portable fan(Speed up drying and reduce humidity)
Steps
Estimated time: 1-3 hours
- 1
Inspect area and plan
Walk the space and identify all affected surfaces. Note walls, ceilings, and any hidden cavities where mould may hide. Create a simple plan for containment, cleaning method, and drying, including what products to use for each surface.
Tip: Document the affected areas with photos before cleaning. - 2
Ventilate and isolate the space
Open windows if weather allows and use fans to maintain air movement. Seal off the area with plastic sheeting to prevent spores from spreading to adjoining rooms.
Tip: Avoid creating cross-traffic through the work zone to keep contamination low. - 3
Don PPE and prepare containment
Put on gloves, goggles, and a respirator. Lay down plastic sheeting to protect floors and use containment methods to keep mould spores from migrating.
Tip: Check respirator fit and replace filters if breathing feels restricted. - 4
Choose and apply cleaning method
Decide on a surface-appropriate cleaner (soap and water for non-porous surfaces or a mould killer for walls for tougher spots). Apply evenly and let sit for recommended contact time.
Tip: Always read the label and test a small area first. - 5
Scrub affected surfaces
Gently scrub the mouldy areas with a brush or cloth until visible growth is removed. Avoid aggressive scrubbing on delicate finishes to prevent damage.
Tip: Rinse with clean water as you go to remove residue. - 6
Rinse and dry thoroughly
Rinse surfaces with clean water to remove cleaner traces. Use towels to blot and start drying; run a dehumidifier or fans to expedite moisture removal.
Tip: Mechanical drying reduces the chance of regrowth. - 7
Inspect for remaining moisture and re-clean
Reassess the area for remaining moisture or staining. If mould persists, repeat the cleaning cycle or escalate to a stronger but surface-safe cleaner.
Tip: Persistent spots may indicate hidden moisture—recheck sources. - 8
Dispose and document
Dispose of contaminated materials safely and keep a remediation log with dates, products used, and dryness observations. This helps with future maintenance and potential insurance claims.
Tip: Include photos and moisture readings to support records.
FAQ
Is it safe to use mould killer for walls on painted surfaces?
Yes, many mould cleaners are designed for painted walls. Always check the label to ensure compatibility and test a small area first to avoid damage.
Yes, most cleaners are safe on painted walls, but test a small area first and follow label directions.
Can mould be killed with bleach on drywall?
Bleach can be effective on some non-porous surfaces, but it may damage or not fully reach mould in drywall. For porous materials, consider replacement or professional remediation.
Bleach may help on non-porous surfaces, but porous drywall often needs more careful treatment or replacement.
How long should walls dry after cleaning?
Dry times vary with humidity and ventilation. In general, allow several hours to a day, ensuring the surface feels dry to the touch and humidity remains under control.
Drying usually takes several hours, sometimes up to a day, depending on humidity and airflow.
Do I need to remove drywall if mould returns after cleaning?
If mould recurs after cleaning, inspect behind the wall for hidden moisture. Replacing affected drywall and addressing the moisture source is often necessary.
If mold keeps coming back, you may need to replace the drywall and fix moisture sources.
When should I call professional remediation?
Call a professional if mould covers a large area, moisture problems persist after cleaning, or you’re unsure how to safely handle containment and removal.
Call a pro if the area is large or moisture keeps returning, or if you’re unsure about containment.
Is using a mould killer for walls worth it for small spots?
For small, isolated spots, a targeted cleaner and careful drying are usually effective. Larger growth or porous materials may require more advanced remediation.
Yes, for small spots, a targeted cleaner with proper drying works well; bigger issues may need more help.
Watch Video
The Essentials
- Identify moisture sources before cleaning
- Use surface-appropriate cleaners and PPE
- Dry surfaces thoroughly to prevent regrowth
- Monitor humidity long-term to protect walls
- Document steps and moisture changes for future reference